Router Fence Recommendation

MikeGE said:
I considered adding a router table to my saw like Derek did, but I got sidetracked and went a different path.  Here is a recent thread about my router table build.  I am very happy with the Incra system and am glad I went with a mobile table.  I have to shuffle tools in and out of the shop as I need them, so the bandsaw and router table are mobile, and soon the jointer/planer will be as well.

https://www.festoolownersgroup.com/member-projects/router-table-63522/msg613775/#msg613775

The disadvantage to the Incra, and possibly the others, is the backlog in manufacturing.  However, in my opinion, the system is worth the wait.

Mike, that is one hellava build!  8)  Superb work!

I have no doubt that the Incra is the one to go for in a stand alone router table. As you know, I am predominantly a hand tool guy, and my occasional router table needs are best met with an in-tablesaw set up. The Jessem (or the one I am building) is then the one to go for.

Regards from Perth

Derek
 
Thanks, Derek!  I was getting close to paralysis by analysis with all of the options available.  If I had seen this video by Dennis before I trudged merrily down my path, I would likely have done something like he did:

 
edwarmr said:
I can second the Incra LS Positioner. It’s amazing! However the Jessem TA fence is far and away the better fence system. It has tool free adjustment, a simple jointing feature, and is solid as can be. I plan on posting more on this in the future but I made an adaptor out of 8020 aluminum extrusions to attach my Jessem TA fence to my LS Positioner. I am using it with two CMS-VL units attached to each other so I can use the same fence for routing and sawing.

[attachimg=1]

Interesting set up you have there, would you care to enlighten us with the router insert? [smile]
It seems that you have converted an empty insert plate for the CMS tables to accept a Jessem router insert.
I’m not going with an Incra fence, but rather a LA-CS70 fence that can be extended beyond the CMS VL table and onto the MFT/3 for wider cuts, dados etc.
 
I have an older woodpecker fence and lift that I added to the end of miter station.  Its worked well for me the last few years plus saved some shop space. 


Attachments

  • IMG_1256.jpg
    IMG_1256.jpg
    100.7 KB · Views: 458
  • IMG_1257.jpg
    IMG_1257.jpg
    51.7 KB · Views: 340
FestitaMakool said:
edwarmr said:
I can second the Incra LS Positioner. It’s amazing! However the Jessem TA fence is far and away the better fence system. It has tool free adjustment, a simple jointing feature, and is solid as can be. I plan on posting more on this in the future but I made an adaptor out of 8020 aluminum extrusions to attach my Jessem TA fence to my LS Positioner. I am using it with two CMS-VL units attached to each other so I can use the same fence for routing and sawing.

[attachimg=1]

Interesting set up you have there, would you care to enlighten us with the router insert? [smile]
It seems that you have converted an empty insert plate for the CMS tables to accept a Jessem router insert.
I’m not going with an Incra fence, but rather a LA-CS70 fence that can be extended beyond the CMS VL table and onto the MFT/3 for wider cuts, dados etc.

So I got the idea for the Jessem lift with the CMS plate from another thread on here:https://www.festoolownersgroup.com/...ft3-vl-custom-insert-for-incra-masterlift-ii/

I routed a CMS-PS plate to take the Jessem Prestige router lift. It is supported by 8020 aluminum extrusions which are directly attached to the inside of the CMS-VL profiles. It is super solidly locked in place. The four corner bolts on the Jessem lift are directly connected to the CMS-VL and the 8020 extrusions by means of t-nuts in the 8020 extrusions. I will have to take more pictures to explain more. I plan on doing a write up explaining everything. I wanted the Incra Cleansweep rings but Jessem doesn’t make their Prestige router lift to accept Incra rings so I routed the opening of the plate and added Incra’s magnets to take the Cleansweep rings.

I love this setup! I’m still working on a few more details of my modification but it’s been working great.

[attachimg=1][attachimg=2][attachimg=4][attachimg=3]
 

Attachments

  • BD9FD77C-880C-47CC-807D-29AF386FE712.jpeg
    BD9FD77C-880C-47CC-807D-29AF386FE712.jpeg
    299.7 KB · Views: 4,415
  • A257670A-37C8-45E0-92A8-2C177A150A53.jpeg
    A257670A-37C8-45E0-92A8-2C177A150A53.jpeg
    308 KB · Views: 4,409
  • EAF842B3-90B4-4B04-B6ED-24E96D426DDE.jpeg
    EAF842B3-90B4-4B04-B6ED-24E96D426DDE.jpeg
    263 KB · Views: 4,394
  • 2D7BA252-6722-442B-B3FD-4CBBC492E8E9.jpeg
    2D7BA252-6722-442B-B3FD-4CBBC492E8E9.jpeg
    284.7 KB · Views: 4,437
[member=70011]edwarmr[/member] That is a nice solution and very well done!

I have a Kreg router table top (and lift) that uses the standard Kreg inserts. 

I have thought about trying to adapt the inserts by drilling/routing extra holes in them, but found that by using an insert with extra space around the bit (one or two steps up) it does a great job with dust collection.    Perhaps not as nice as the Incra Cleansweep rings, but I fine it works well and I get very little dust when using the router table.  It's a low tech solution that works well.

I do get a lot of suction from my dust collection system, I suspect that helps a lot too.

Bob
 
derekcohen said:
MikeGE said:
I considered adding a router table to my saw like Derek did, but I got sidetracked and went a different path.  Here is a recent thread about my router table build.  I am very happy with the Incra system and am glad I went with a mobile table.  I have to shuffle tools in and out of the shop as I need them, so the bandsaw and router table are mobile, and soon the jointer/planer will be as well.

https://www.festoolownersgroup.com/member-projects/router-table-63522/msg613775/#msg613775

The disadvantage to the Incra, and possibly the others, is the backlog in manufacturing.  However, in my opinion, the system is worth the wait.

Mike, that is one hellava build!  8)  Superb work!

I have no doubt that the Incra is the one to go for in a stand alone router table. As you know, I am predominantly a hand tool guy, and my occasional router table needs are best met with an in-tablesaw set up. The Jessem (or the one I am building) is then the one to go for.

Regards from Perth

Derek

I liked Derek's setup, but I don't (yet) have the space to accommodate the table. 

To quote Derek and echo my impression, is simply WOW.  That's a project to be really proud of.

This nails what I need, as I have a small shop.  Everything is on wheels except my lathe.  That's a heck of a design and a nice aspiration.  Thanks for the pointer to the other video as well.  That's super helpful.  I can't tell you how many videos I've already watched.  So again, thanks.

FWIW, my fav is a guy who made a table out of a couple of sheets of plywood and used a massive guitar amp as a weight when he glued the sheets together.  He also experimented with an epoxy finish to the top, which I wonder if it'd present too much surface friction when sliding a piece.  The starburst he put into the design was cool nonetheless.
 
I am on at least my fourth router table (over 50 years of making sawdust).  None have used a commercial fence or even a router plate.  My current one has a home made lift and the top tilts up for bit changes.  Both are great improvements.  The fence is also home made, made of plywood with melamine sliding pieces to vary the opening for different bits.  It clamps to the top with very short pipe clamps.  They hold it in place extremely securely.  Fine adjustments are done by tilting the fence a little, loosening one end and pivoting the fence.  It's OK with me if you want these commercial fences, I am just posting to suggest you don't really need them.  A router table is one tool that is better made than bought IMHO. 
 
A router table is one tool that is better made than bought IMHO.

Jim, you are a man after my own heart.

As much as I love seeing the commercial versions and, frankly, they need to sell in order to sustain the industry, there are at least several fixtures that should be made by woodworkers as a form of “entry” to woodworking: one is a work bench, and another is a router table.

Regards from Perth

Derek
 
derekcohen said:
A router table is one tool that is better made than bought IMHO.

Jim, you are a man after my own heart.

As much as I love seeing the commercial versions and, frankly, they need to sell in order to sustain the industry, there are at least several fixtures that should be made by woodworkers as a form if “entry” to woodworking: one is a work bench, and another is a router table.

Regards from Perth

Derek

If I was a young man starting out on a career or hobby of woodworking, I would agree.  I'd be out there with a sharp stick scraping at the dirt to mine the iron ore so I could smelt it and forge my own axe that I would sharpen on a flat rock and use to fell the trees that would become my workbench.  I'd be scouring the garage sales and flea markets looking for the cast off planes and chisels that could be coaxed back to good order with a fair amount of work.  I'd be doing all of those things that seem to be the mandatory rites of passage.  [big grin]

Unfortunately, I'm not a young man and recently started down my own path of woodworking as a hobby following my retirement.  Time is the one resource I cannot buy, but a I can plop down my credit card at the Hornbach and drive away with a Sjöbergs Elite 2000 workbench in the back of my truck and set it up the same day.  A few clicks of the mouse, and my new planes and chisels are on the way.  I do applaud you guys for your experience and the years it took to acquire it, but I do not have access to Mr. Peabody's WABAC machine to explore that path not taken.  I realize I can't buy game, but for everything else there is Visa and a desire to learn and experiment.
 
I've been using a self made router table for 20+ years/ mine is large as I often am routing large pieces (I fab plastics regularly). my table is 30 X 49 1 1/8" melamine and a welded steel frame.  I have an original Benchdogs lift which was rare when I bought,  as it was targeted for smaller commercial shops that needed multiple stations.  I have an Incra 17" adjuster with an Incra Wonder fence attached, that coupled with a Dust Router under table dust collector and a Festool router table split hose lets me collect 90% of all duts and chips generated.  The only thing I would ever change is a cast iron table so I could use the Magswitch magnets to attach my guides.
 
derekcohen said:
I am in the process of building a new router table and fence (it's going onto a Hammer K3 slider). Having done a ton of research (along with 25 years using these things), the fence I consider to be the best is the Jessem.
https://www.fine-tools.com/routerfence.html

I will build my own version of this fence. It is pretty straight forward, and I can do it for a fraction of the cost. The Jessem is a great fence to model one on. It's a good fence to buy if you can afford it.

This is where it will go ...

IMG_6227.jpg


Regards from Perth

Derek
Derek,
I too have the k3.  How did you fit a router table to the k3?
Bob
 
Bob, I only have pics of the previous table, but the method was the same.

Here is the old table ...

2a.jpg


My K3 came with a half-panel ...

router-space1.jpg


router-space2.jpg


The top ...

1a.jpg


... is secured at one side by bolts into inserts (there are convenient holes in the saw case) ...

2a.jpg


Facing the saw, add bolts as legs ...

4a.jpg


And the far side I used existing bolt holes to support an aluminium section ...

6a.jpg


7a.jpg


8a.jpg


9-1a.jpg


Current:

IMG_6225.jpg


More later, if you or others are interested.

Regards from Perth

Derek

 
I built my first router table when I was in my 20s but I am now retired.  God has blessed and I can afford some nicer tools now but I still like my last home made router table.  I made it probably about 10 years ago when I was in my 50s. 

One of the reasons I think making your router table is something most woodworkers should do is this sort of shop furniture is a good way to start making things.  You can use whatever type joints you want and it should still work.  I think I dovetailed the drawer on mine but a lot of the joints are just plugged butt joints glued and screwed together.  I have enough drawers to store all my router bits.  The top tilts up for bit changes, a feature I have not seen on any commercial router table.  Height adjustments are by screw, one turn is 1/16th of an inch.  Dust collection from both the cabinet and the fence.  Total locking casters so I can move it and then lock it down.  Height same as table saw and outfeed/accessory table and miter saw table. 
 
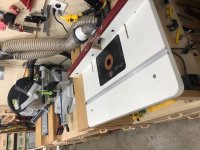
Here's the router table and router table fence I have been building. There is a little more work to do on the micro-adjuster, which is coming from AliExpress, as well as the dust extractor for the (2 1/4 hp) Elu 177e router I use. But for now, the rest is done.

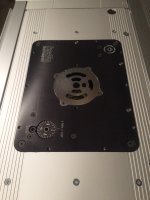
This is a very full-on set up. What is relevant is that it did not cost much (don't include the cost of the JessEm guides, which are excellent but a little luxury). It is difficult to total, as some parts, such as the aluminium insert plate, was purchased about 3 years ago, as was the Router Raizer lift, and the MuscleChuck router bit change.

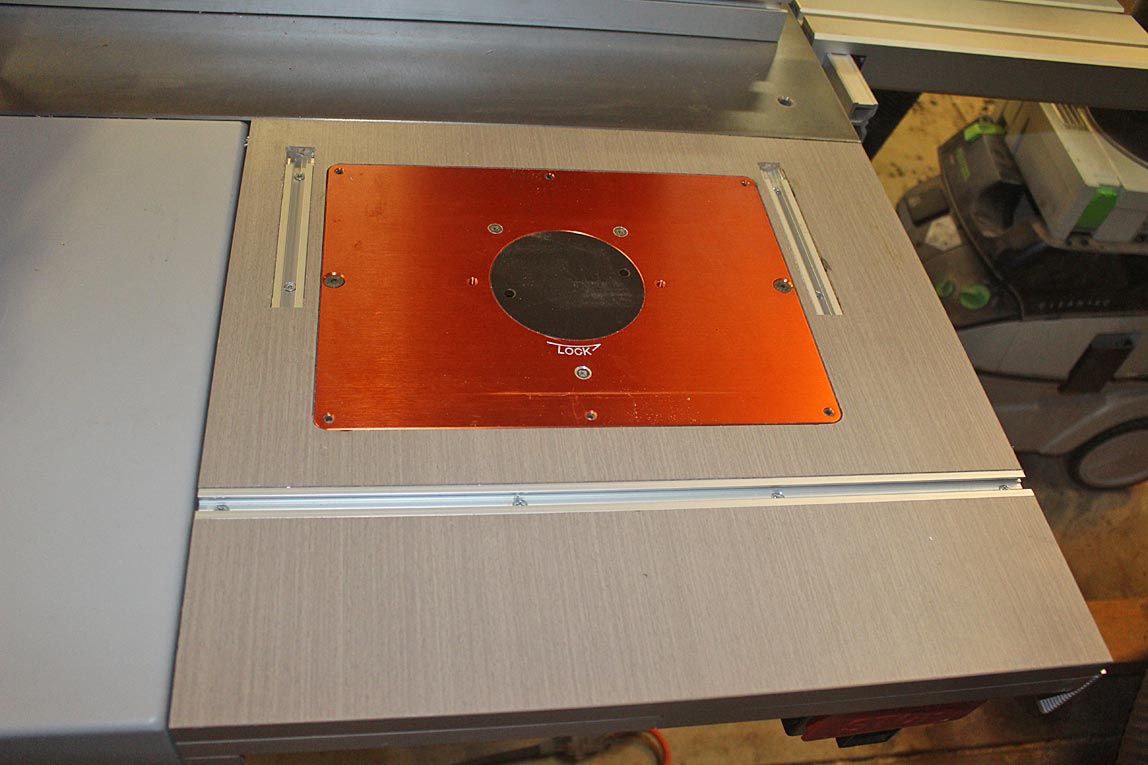
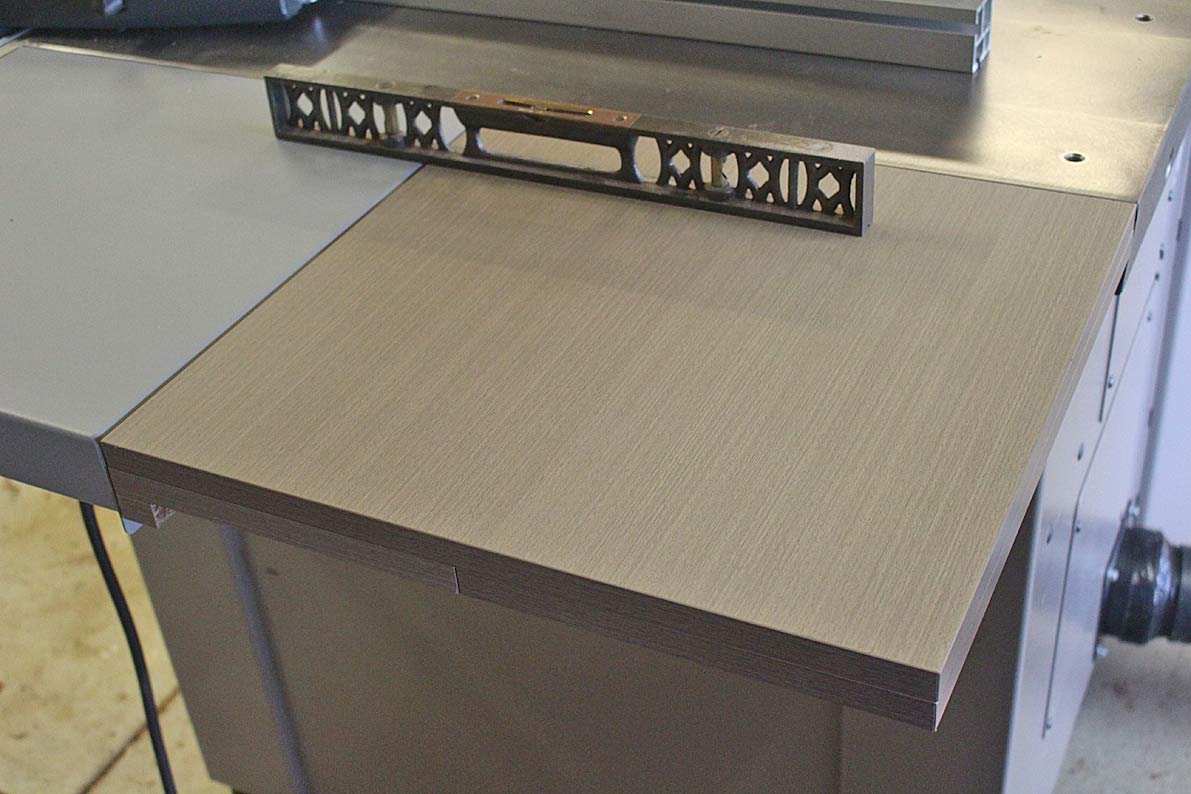
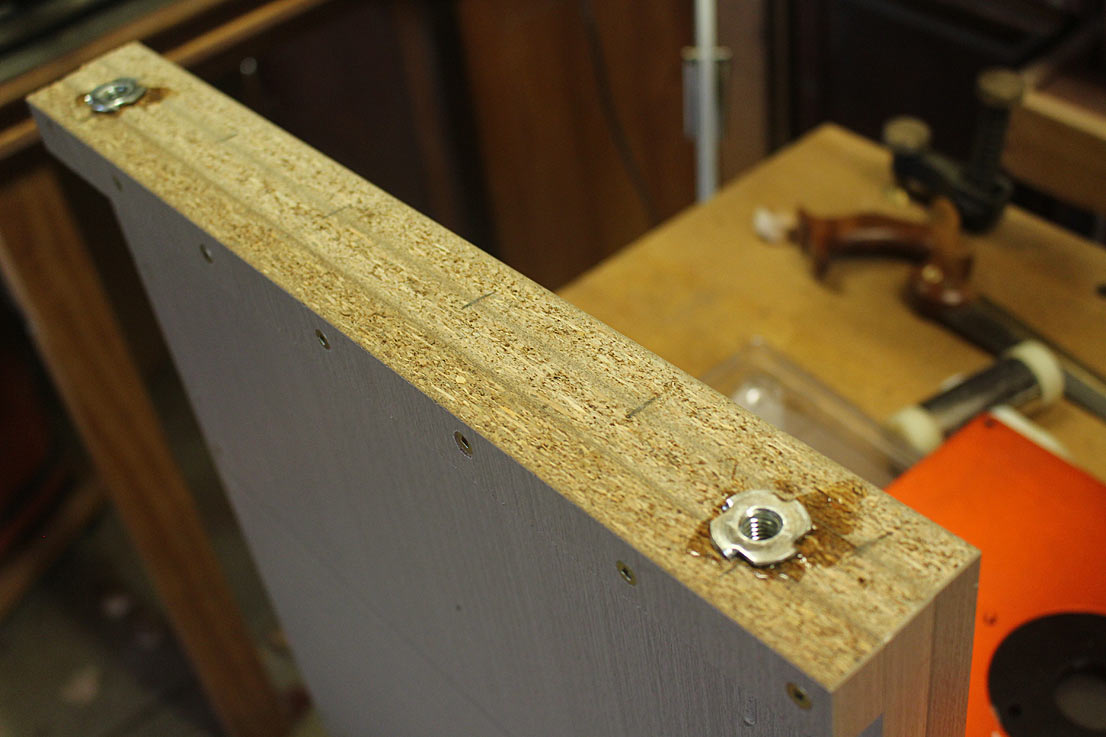
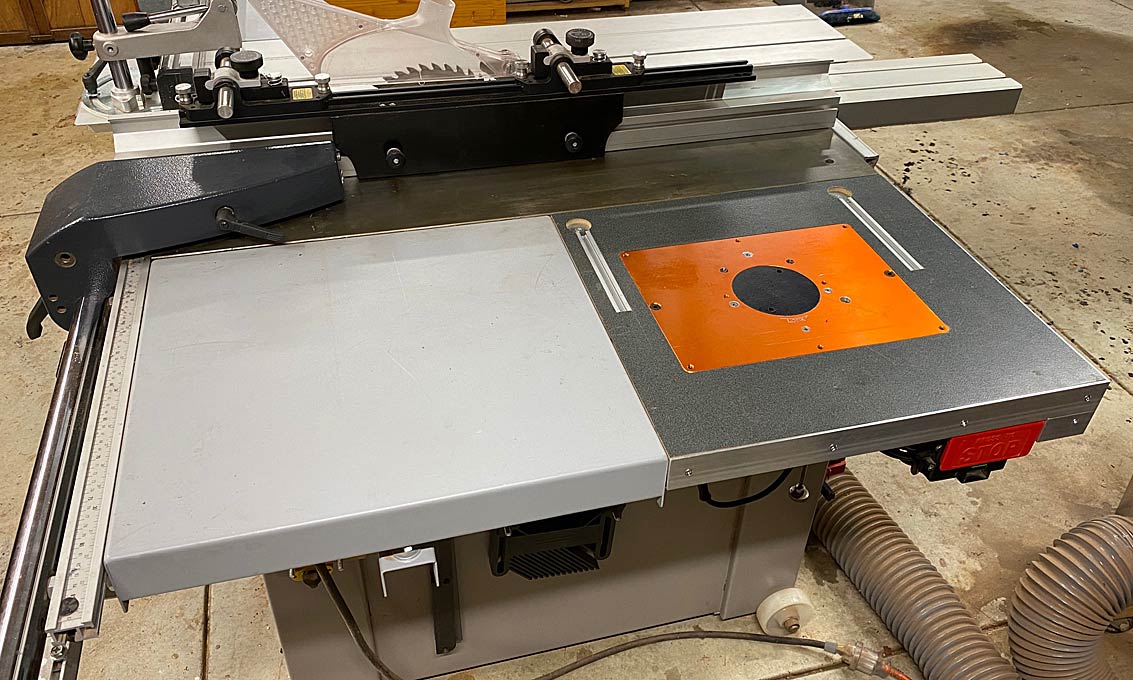
The base for the router table was a laminated high pressure MDF kitchen bench off cut from a kitchen maker ...

F9.jpg


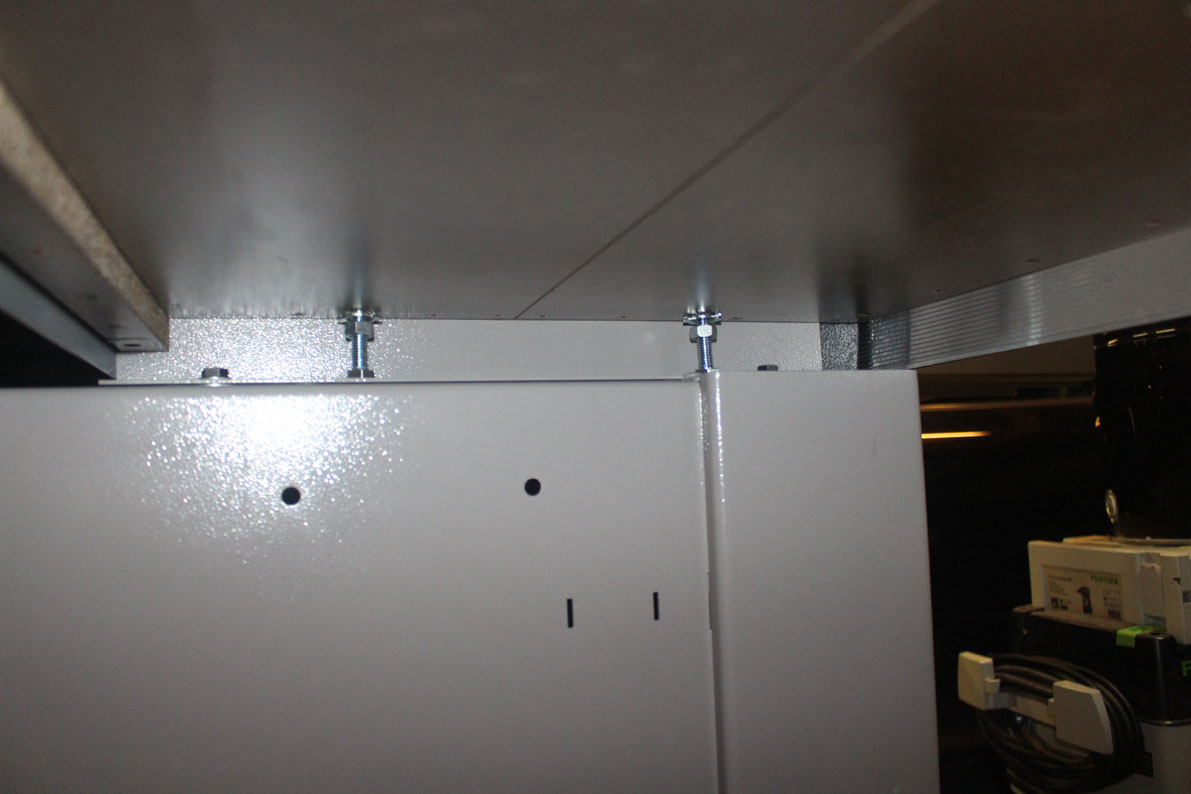
This was build into the outfeed of my Hammer K3 sliding table saw ...

RTF1a.jpg


RTF2a.jpg


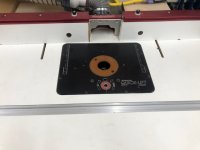
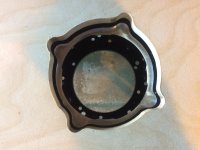
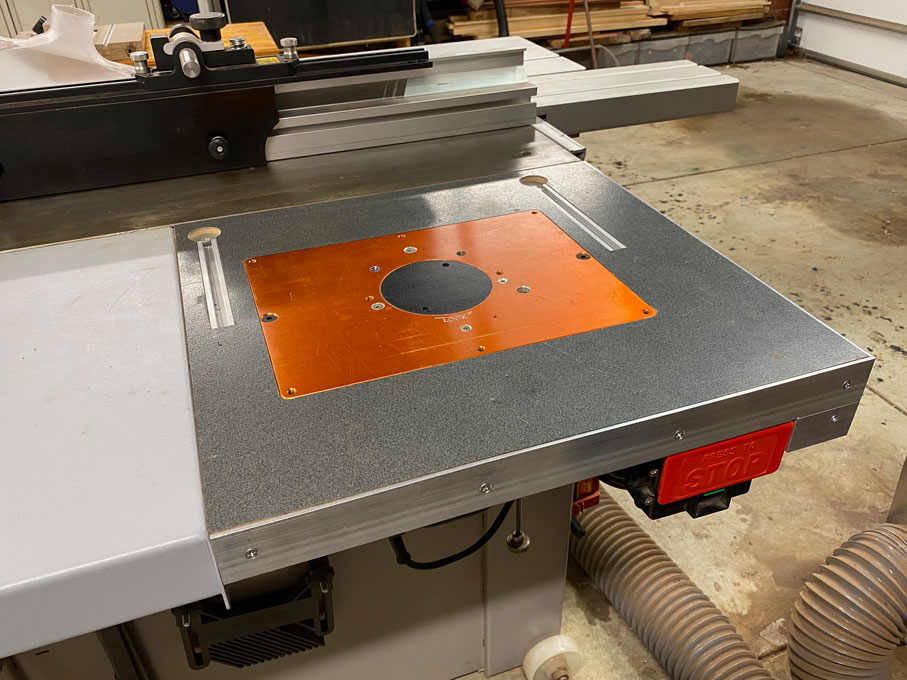
These aluminium plates are excellent. After 3 years of hanging the heavy Elu, there is no signs of any dips. The surface remains flat, flat.

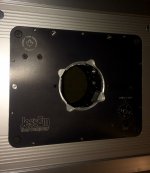
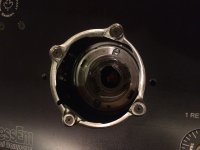
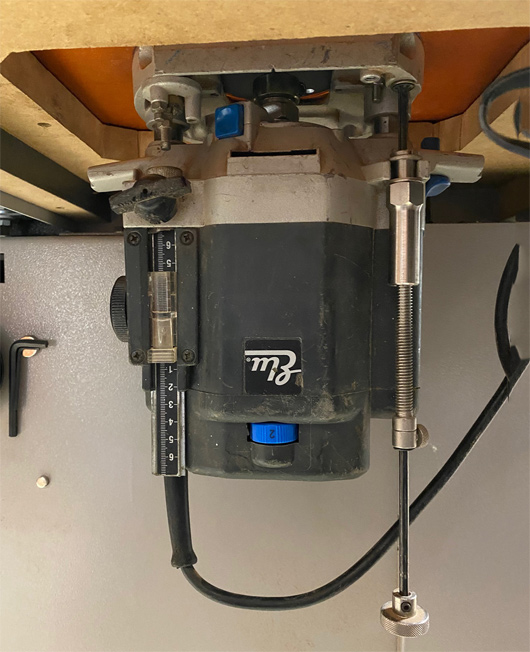
The Elu below, minus handles, with Router Raizer attached ...

RTF4a.jpg


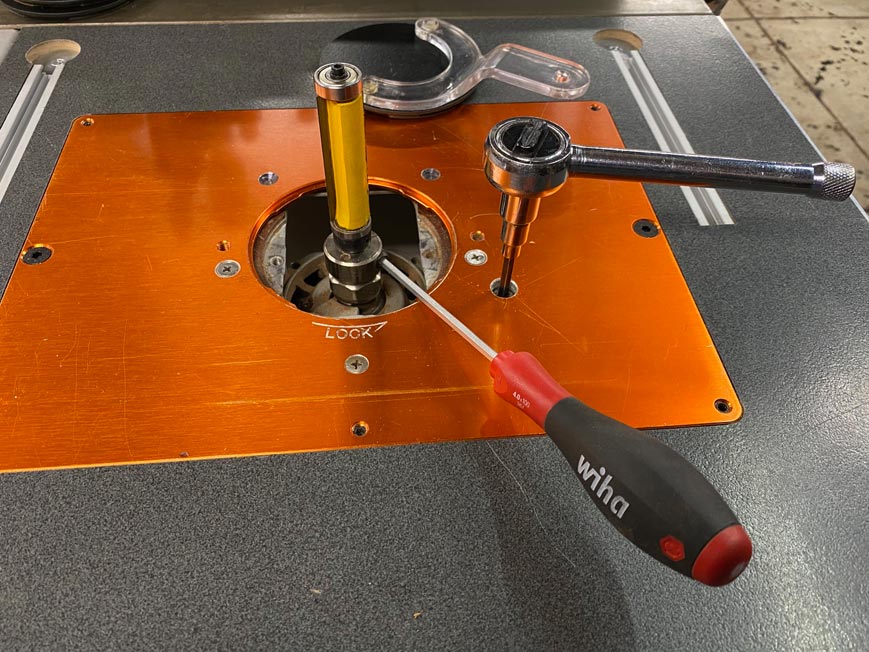
Above the plate, the MuscleChuck allows for changing bits and easy bit-holding. I built a handle for the Router Raizer from a cut-down socket wrench. This enable fast spinning as well as fine adjustments with the fence close by.

RTF5a.jpg


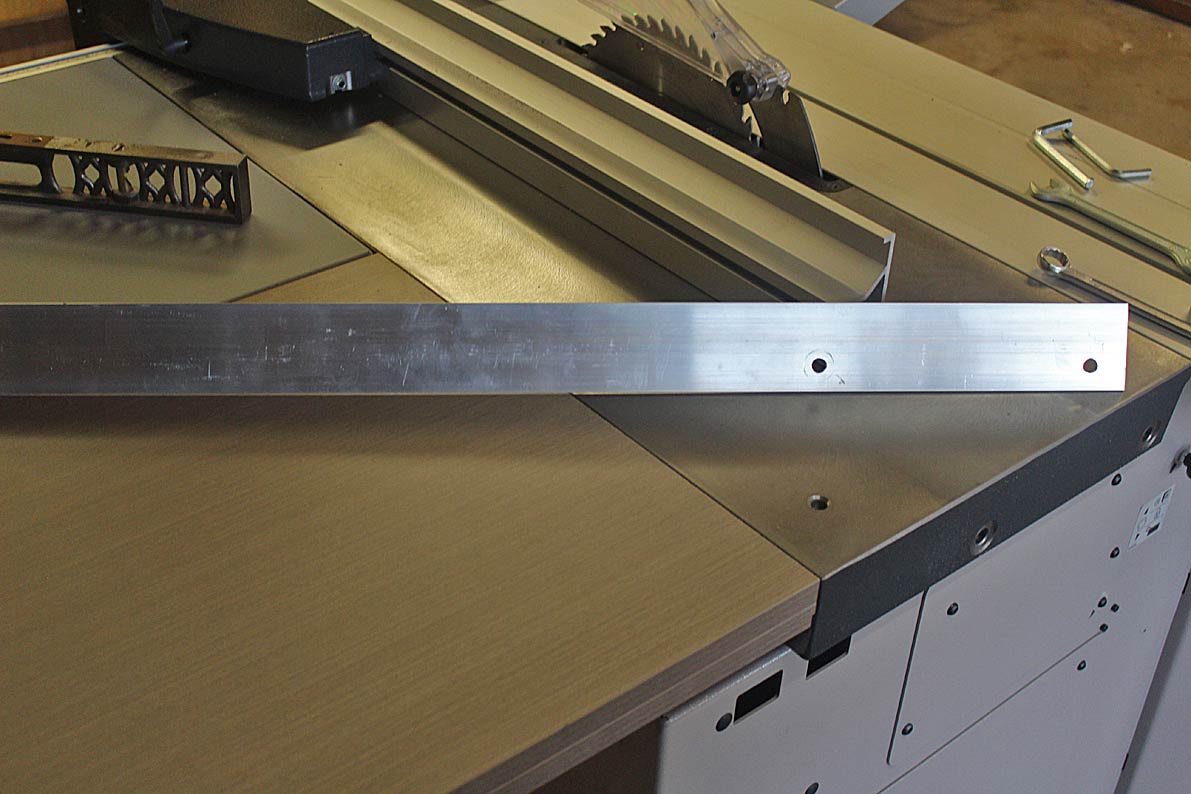
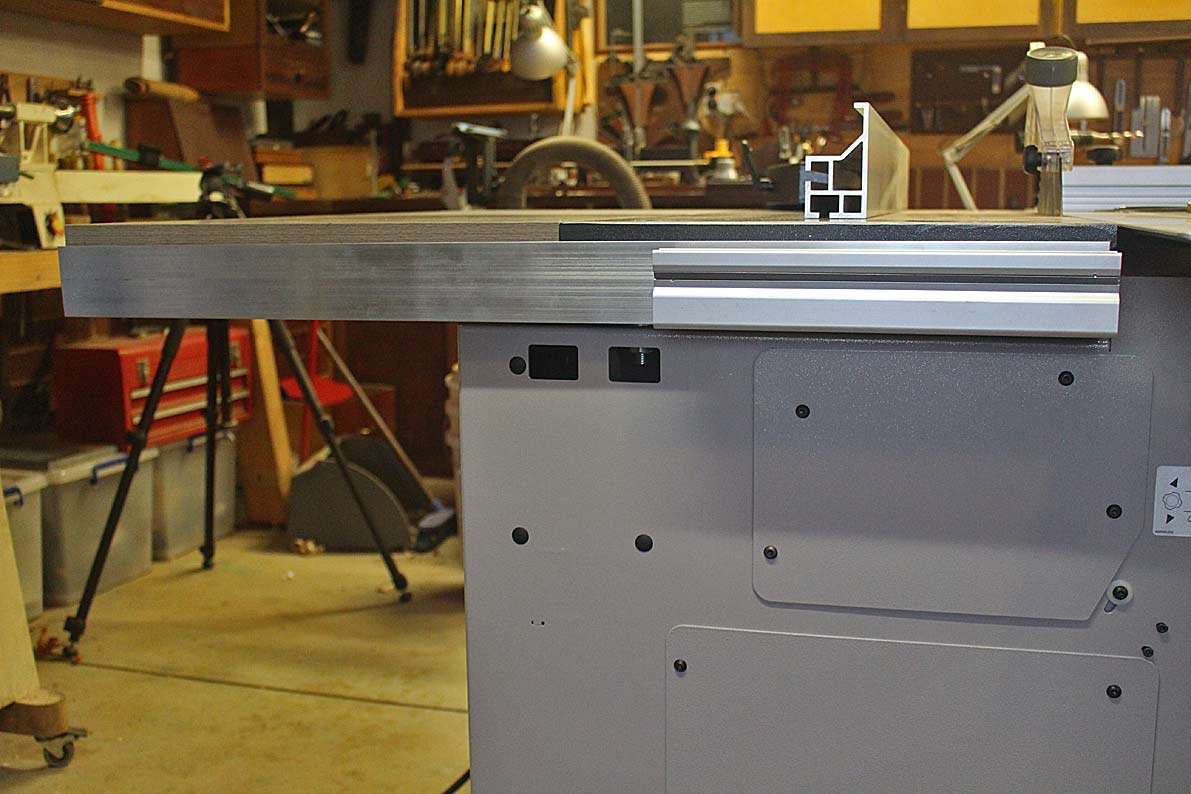
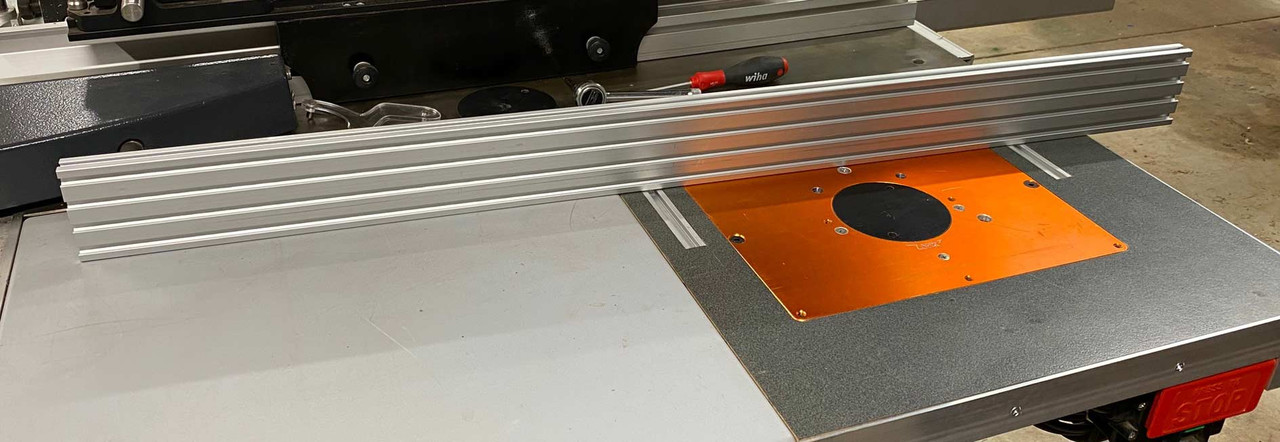
The heart of the fence is made for 8020 extruded aluminium (80mm high and 20mm wide). I comes in 1m lengths, and this fence is 600mm long.

RTF6a.jpg


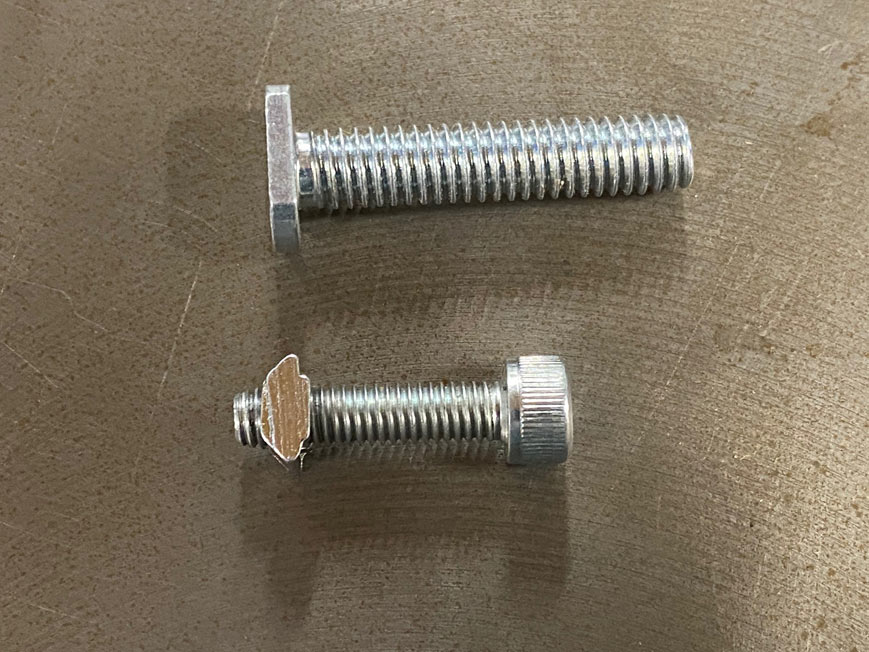
Note that the slots of this extrusion use different T-bits ...

RTF13-2a.jpg


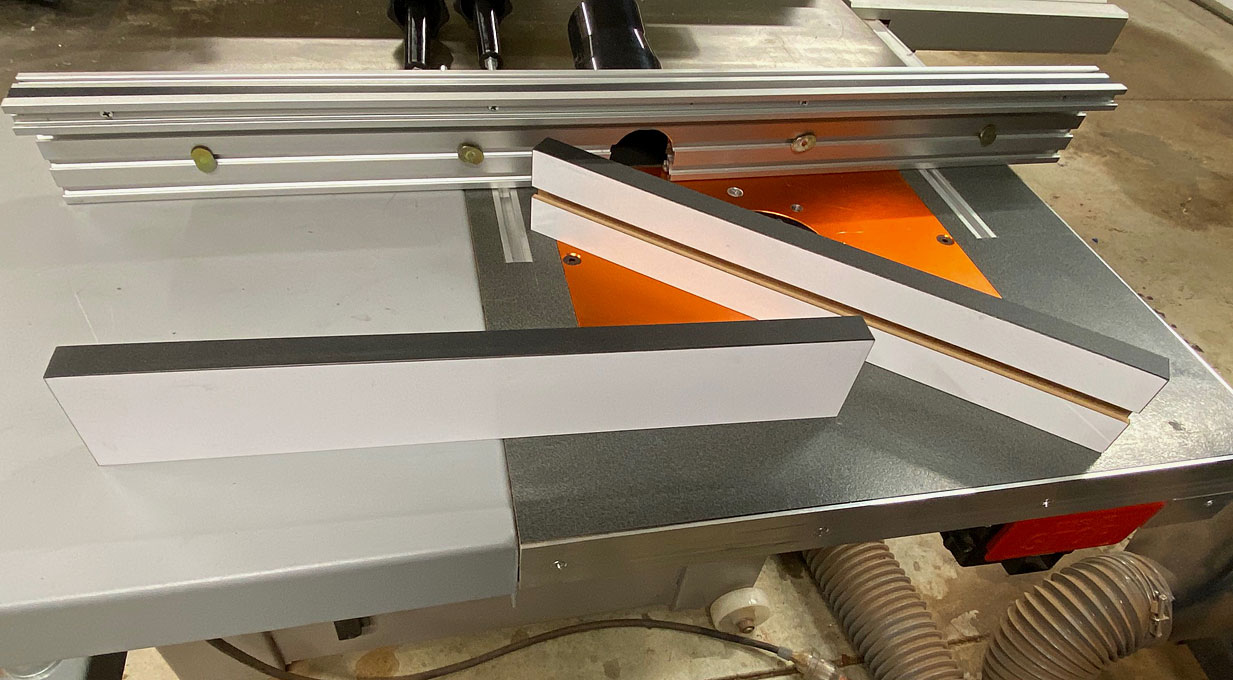
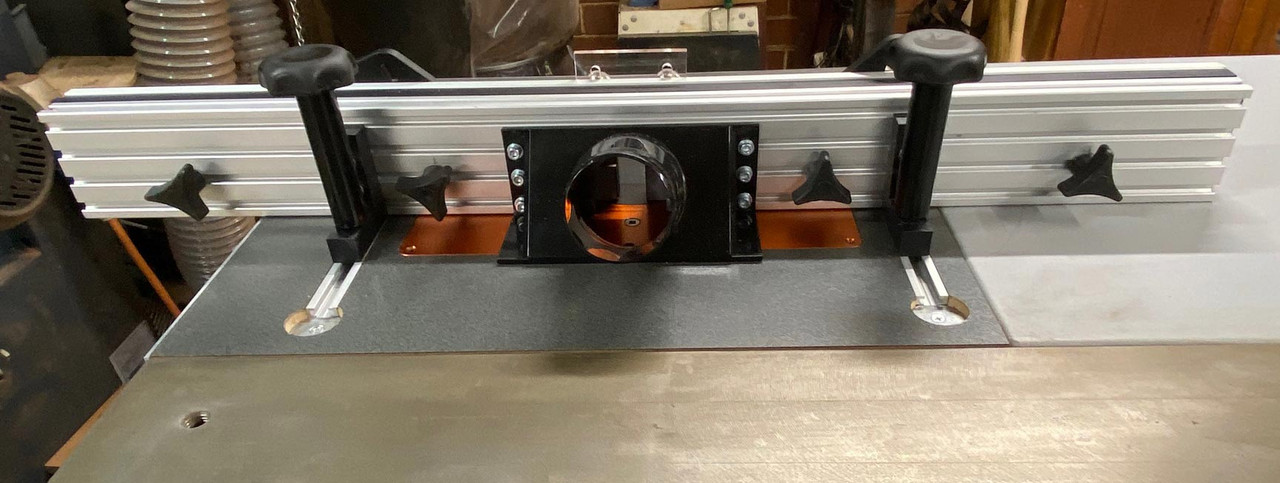
The only other part I bought in were the sub-fences, since these are phenolic-coated, and the dust port.

RTF7a.jpg


The subfences. Also note that the dust collection port in the mainfence was made with a 2 1/4" hole saw ...

RTF12a.jpg


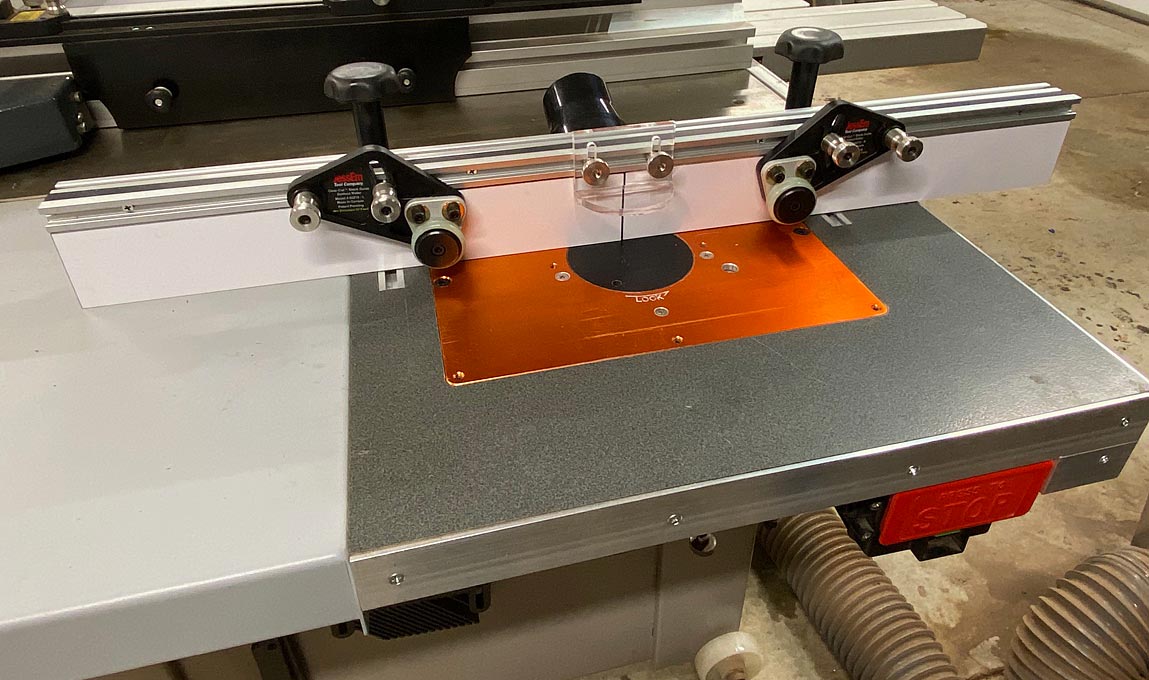
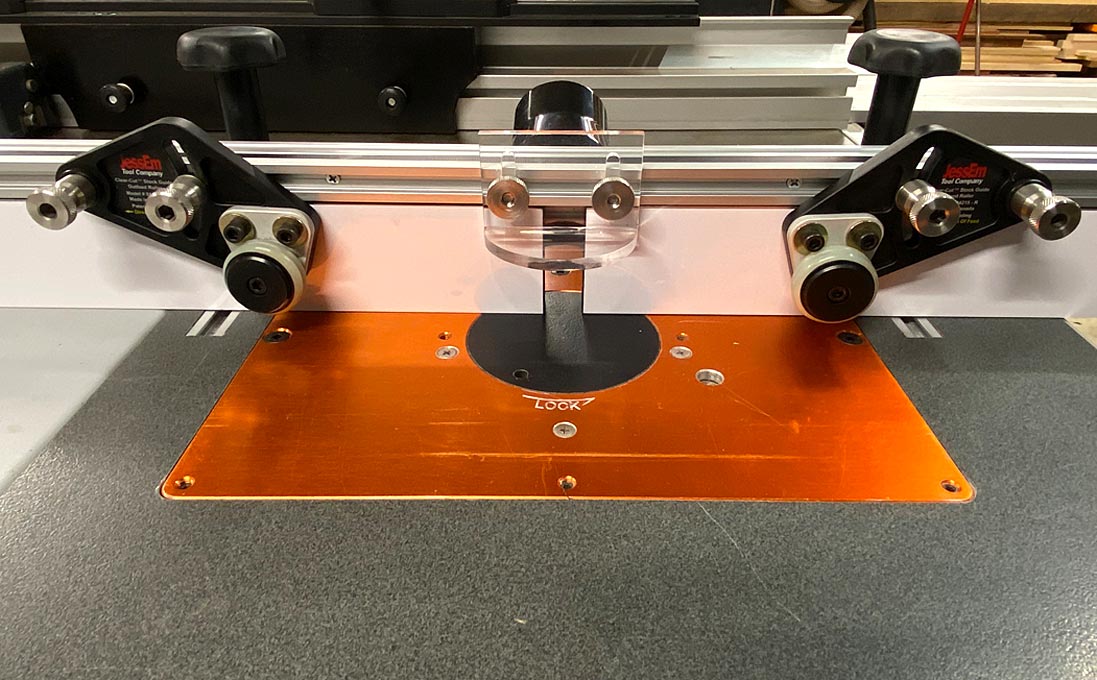
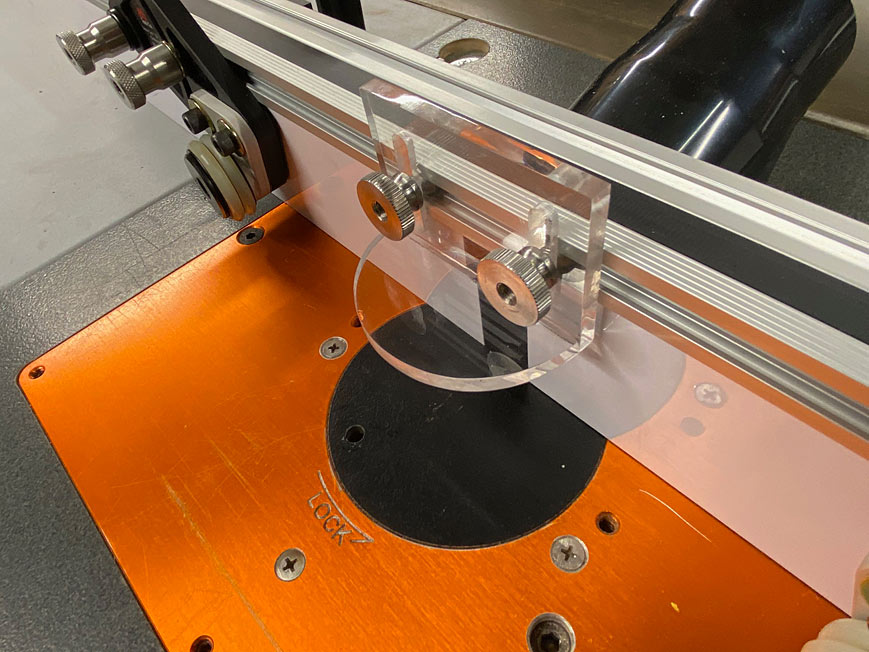
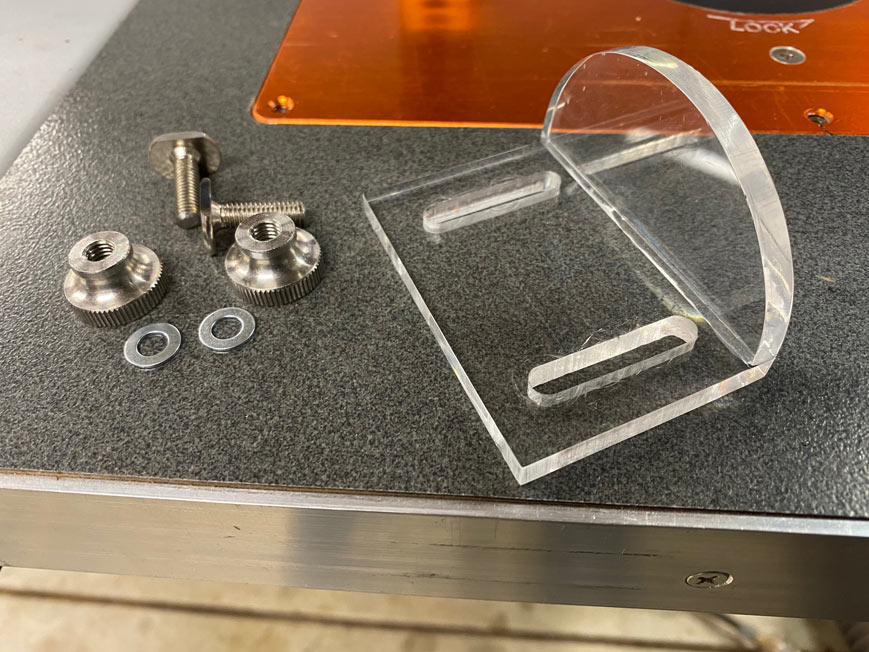
The Jessem guides, and the bit guard I made ...

RTF8a.jpg


RTF9a.jpg


Made in two sections and superglued together ...

RTF10a.jpg


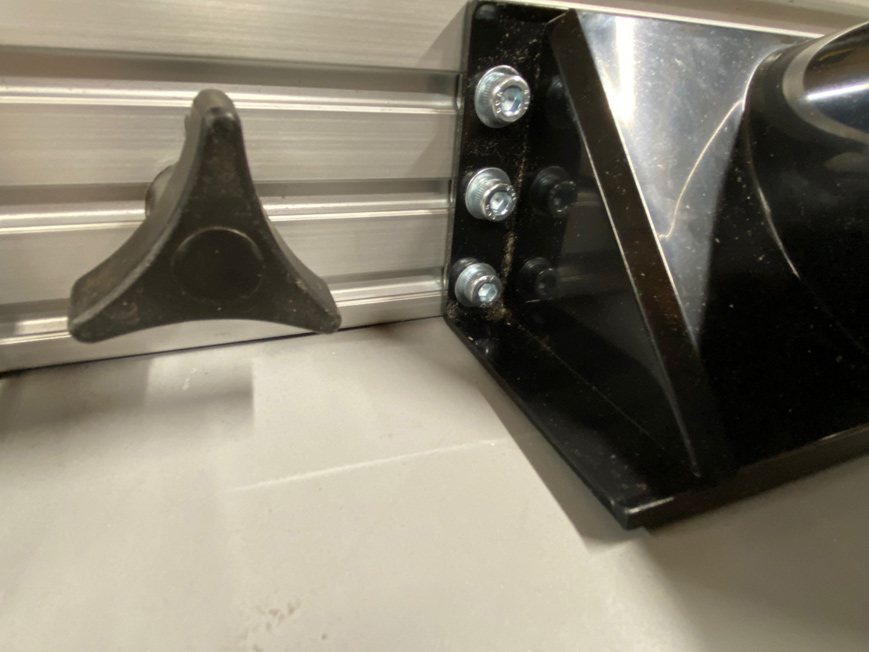
The rear of the fence, with the dust port, and sub-fence adjusters ...

RTF11a.jpg


The reason for bolting on the dust port was not simply to make it possible to remove, but this enabled the T-track to be plugged ...

RTF13-1a.jpg


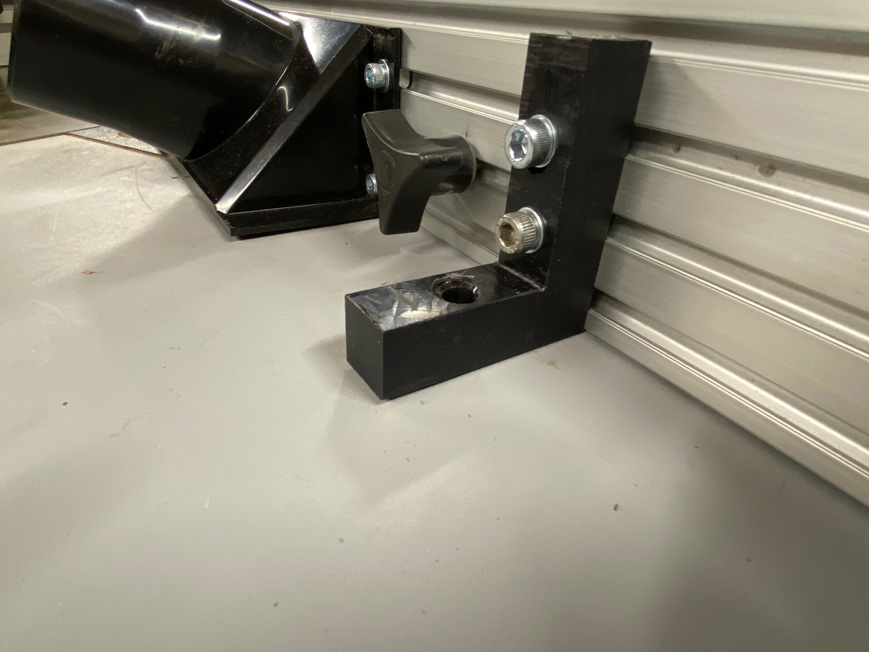
The (very stiff) UHMW fence bracket is temporary ...

RTF13a.jpg


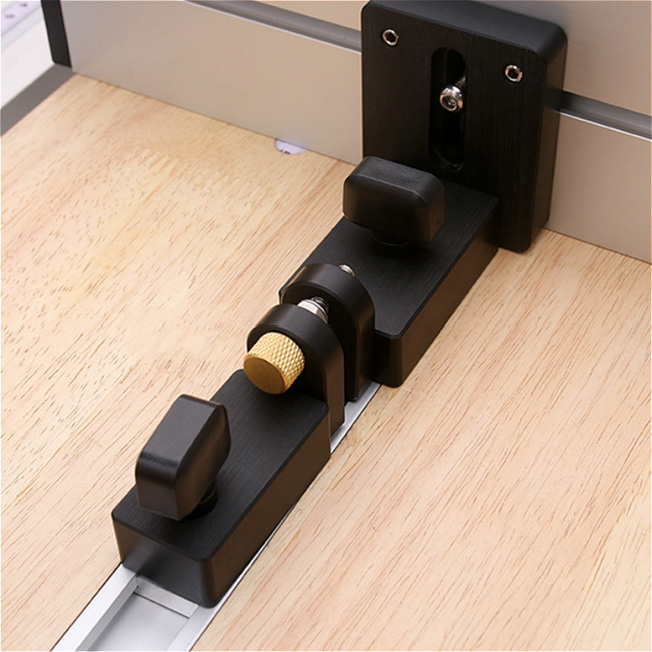
and will be replaced by these brackets with fine-adjuster (only needed on one side) ...

RTF13b.jpg


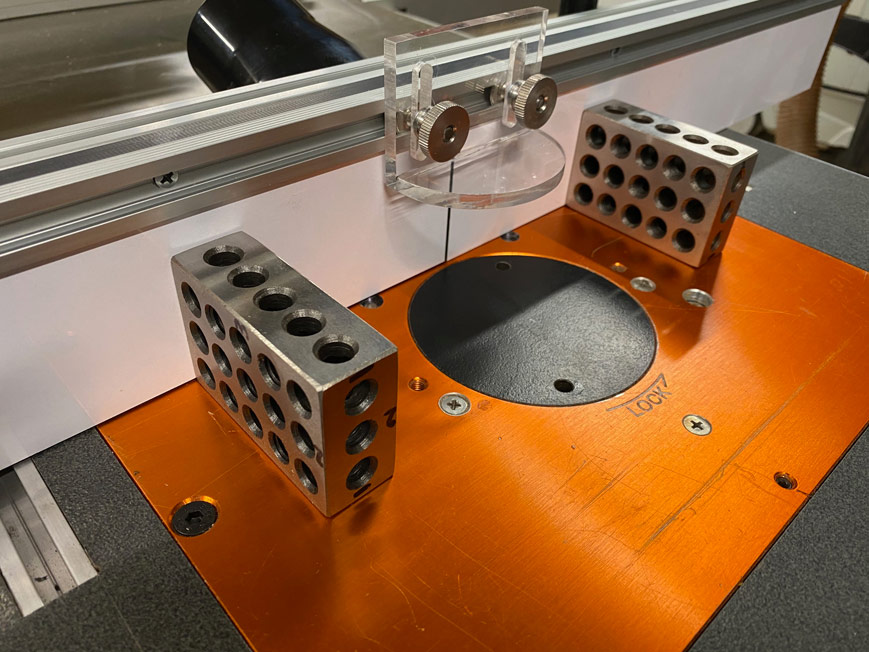
There is adjustment built into the brackets to ensure that the working side of the fence is square to the table ...

RTF14a.jpg


I hope that this provides some ideas for your build.

Regards from Perth

Derek
 
Back
Top