- Joined
- Oct 16, 2015
- Messages
- 5,827
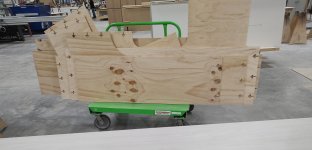
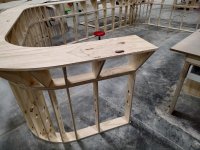
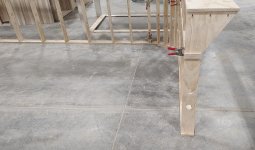
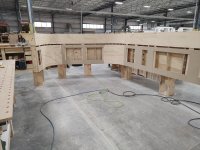
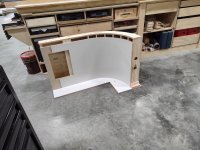
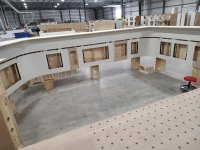
Ultimately, there will be 8 of these things. This second version has one major change that will make it far easier to build. Outwardly it will look exactly the same, this is just an assembly modification. My idea for the change was initially just about making that transition to the bevel easier to trim around. As it turns out there are 2 other benefits, from the same change. It will make assembling and sanding the solid surface lower countertop, during the installation process, far easier too. The 3rd benefit is that the parts nest together much better for the CNC too. So, even though there are added pieces, it took less plywood.
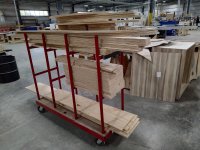
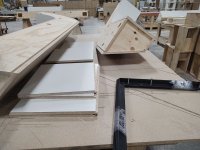
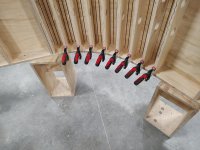
Just the top/bottom plates and the vertical "studs" require 6 1/2 sheets of 3/4" ply and the sub-tops needed another 6 sheets.
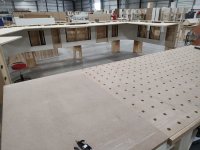
The main CNC guy was off yesterday, so I ran the parts myself, (on the secondary machine) while the other CNC guy was running cabinet parts on the "big" machine. It took about 2 1/2 hours to cut out all of these parts.
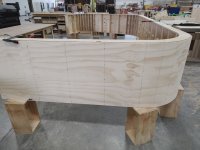
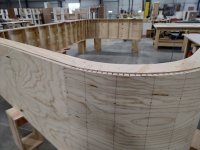
I got shifted onto something else for the rest of the day and part of this morning, but I got the frame completely assembled by the end of the day. Now, beveled section is separate from the vertical wall section. This will make laminating and trimming a lot easier, probably easier to ship also.
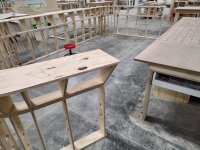
It's kind of a time study, to see how much faster the second unit can be built, but the results can never be perfect. I did all of the kerfing and bevel routing of the cone parts for the first 4 sets of these while building the first one, plus the jig building time went there too. I didn't have any CNC time on the first one though, so that's different too. I expect 30-40%?
Just the top/bottom plates and the vertical "studs" require 6 1/2 sheets of 3/4" ply and the sub-tops needed another 6 sheets.
The main CNC guy was off yesterday, so I ran the parts myself, (on the secondary machine) while the other CNC guy was running cabinet parts on the "big" machine. It took about 2 1/2 hours to cut out all of these parts.
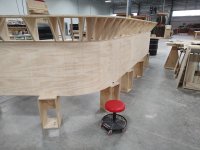
I got shifted onto something else for the rest of the day and part of this morning, but I got the frame completely assembled by the end of the day. Now, beveled section is separate from the vertical wall section. This will make laminating and trimming a lot easier, probably easier to ship also.
It's kind of a time study, to see how much faster the second unit can be built, but the results can never be perfect. I did all of the kerfing and bevel routing of the cone parts for the first 4 sets of these while building the first one, plus the jig building time went there too. I didn't have any CNC time on the first one though, so that's different too. I expect 30-40%?