Bugsysiegals
Member
- Joined
- Mar 19, 2016
- Messages
- 908
I'm building cabinets for my basement wood shop, am on the first cabinet, used Domino's throughout, was considering to put the cabinet together as outlined below, but cannot glue, align, and clamp the cabinet in less than 3-5 minutes open time for Titebond II and have serious doubts if I could even do it in 8-10 minutes open time for Titebond III.
Instead of having the deck on the ground would it be better to put the back on the ground, assemble the partition/stretchers, lay them onto the back, add the sides, and finally deck/top? Should I glue half of each Domino into one piece of wood before final assembly to reduce the amount needing glue and to speed things up? Should I avoid the Domino's for the stretchers and instead install them after the cabinet is glued up using Kreg screws?
FWIW - I made many mistakes with the Domino. Some mistakes I've learned from while others will have to be avoided with experience. That said, this is my first cabinet ever, but am wondering whether Dado's, Rabbits, Kreg screws, are the quicker and easier method for cabinet building and assembly rather than Domino's ... perhaps they are better suited for other projects?
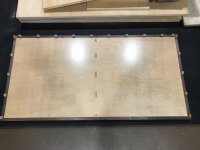
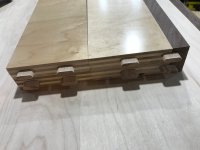
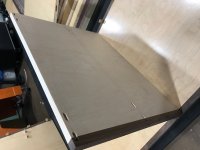
Bottom of the cabinet with Domino's installed
View attachment 1
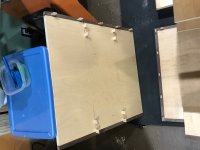
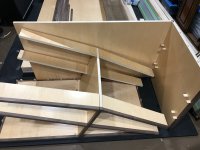
Partition with pre-finished side
View attachment 2
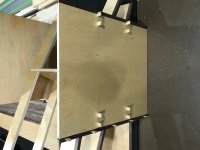
Partition unfinished side ... should I spray this after the cabinet is glued and I'm spraying the exterior? What happens if I spray over existing clear coat on other interior parts?
View attachment 3
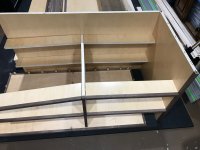
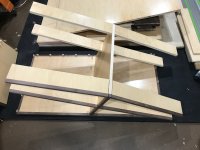
Stretchers with Domino's ... could be enough "meat" to switch to Kreg screws if needed?
View attachment 4
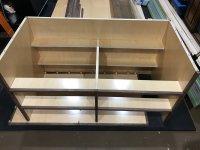
Stretchers attached to the partition
View attachment 5
Right side ready to attach to the back
View attachment 6
Right side attached to the back
View attachment 7
Right side attached to stretchers
View attachment 8
Left side ready to be attached
View attachment 9
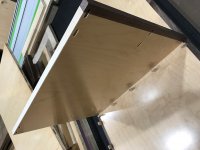
Cabinet assembled ... needs to be set on top of the bottom and then have the top applied
View attachment 10
Instead of having the deck on the ground would it be better to put the back on the ground, assemble the partition/stretchers, lay them onto the back, add the sides, and finally deck/top? Should I glue half of each Domino into one piece of wood before final assembly to reduce the amount needing glue and to speed things up? Should I avoid the Domino's for the stretchers and instead install them after the cabinet is glued up using Kreg screws?
FWIW - I made many mistakes with the Domino. Some mistakes I've learned from while others will have to be avoided with experience. That said, this is my first cabinet ever, but am wondering whether Dado's, Rabbits, Kreg screws, are the quicker and easier method for cabinet building and assembly rather than Domino's ... perhaps they are better suited for other projects?
Bottom of the cabinet with Domino's installed
View attachment 1
Partition with pre-finished side
View attachment 2
Partition unfinished side ... should I spray this after the cabinet is glued and I'm spraying the exterior? What happens if I spray over existing clear coat on other interior parts?
View attachment 3
Stretchers with Domino's ... could be enough "meat" to switch to Kreg screws if needed?
View attachment 4
Stretchers attached to the partition
View attachment 5
Right side ready to attach to the back
View attachment 6
Right side attached to the back
View attachment 7
Right side attached to stretchers
View attachment 8
Left side ready to be attached
View attachment 9
Cabinet assembled ... needs to be set on top of the bottom and then have the top applied
View attachment 10
Attachments
-
 IMG_3564.JPG598.7 KB · Views: 406
 -
 IMG_3579.JPG553.8 KB · Views: 485
 -
 IMG_3578.JPG517.3 KB · Views: 171
 -
 IMG_3577.JPG581.1 KB · Views: 197
 -
 IMG_3576.JPG554.6 KB · Views: 195
 -
 IMG_3575.JPG555.2 KB · Views: 159
 -
 IMG_3574.JPG611.6 KB · Views: 209
 -
 IMG_3570.JPG568.3 KB · Views: 240
 -
 IMG_3569.JPG444.5 KB · Views: 245
 -
 IMG_3568.JPG517 KB · Views: 279
")