[member=77266]smorgasbord[/member]
1)I generally use the 6mm Dominos in 3/4" material, just out of habit (and supply) I have far more 6mm than any other size. In cases like this, I reference the part and the bottom of the machine against the workbench.
That's why they all have a black marker line on them. That may not show in the pics, but it is there.
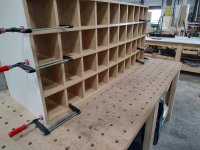
2)Yes, the clamps were just temporary. There is enough curve to the entire unit that clamping across would require tapered cauls. Since neither side of this unit will show, when installed, the sides got screwed on.
3) I did tight on the horizontal parts and medium-loose on the verticals. I used standard 40mm on the bottom, inserted them and then set the first row of verticals. They are only flush to the back, so all I did was tap them to fit. After that came the next layer. It was placed on top, glued through the mortice, then the longer (65mm) Dominos were driven in, like a nail. These then would stick out enough for the next layer. I drove in screws to pull it all together as the layers went on. After that pic was taken, I took the top and last row of verticals off and clamped it to dry over the weekend. Those parts were not glued yet. They were installed as a test-fit, to be sure the total height was correct. Sometimes nominal measurements don't all add up the way they should.
4)mostly answered with 3
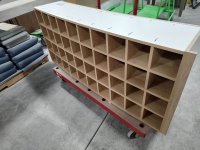
5)These are shoe racks, for children. Those openings are very small, which doesn't show so well in the pics. They are about 7" high and 6 1/4" wide.
We do occasionally still do physical mail type cubbies, though they are not generally for actual mail, but internal paperwork. Trucking companies do it for drivers.
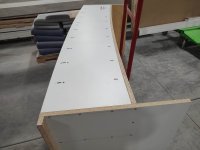
It was slightly out of square, but pulled right in when installing the back this morning. I forgot to take a final pic of it though....tomorrow.