You are using an out of date browser. It may not display this or other websites correctly.
You should upgrade or use an alternative browser.
You should upgrade or use an alternative browser.
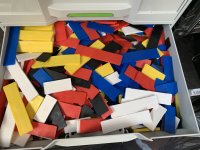
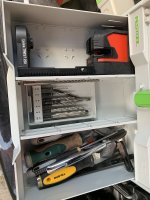
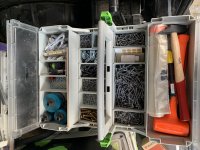
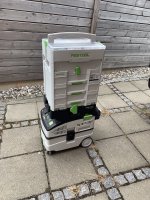
Show your systainer
- Thread starter Tooms
- Start date


blaszcsj
Member
- Joined
- Feb 21, 2015
- Messages
- 545
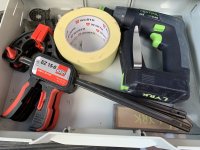
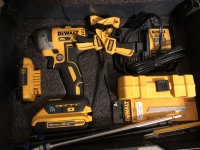
Did you cut the foam out of the dewalt box? and it fit? I have this kit in the tough case. [member=64217]DashZero[/member]
DashZero said:Laser in SYS-2
Yes i cut the Kaizen foam to fit it. I still have the bulky hard case that came with it that doesn’t stack or store well. I made the labels and printed them and laminated them.
blaszcsj said:Did you cut the foam out of the dewalt box? and it fit? I have this kit in the tough case. [member=64217]DashZero[/member]
DashZero said:Laser in SYS-2
dwillis
Member
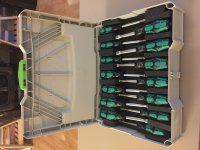
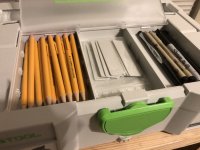
dwillis said:Two sets of Wera nut drivers (metric and Imperial) on FastCap Kaizen foam bed. Blocks of Kaizen foam glued to the bed make up the dividers that hold the nut drivers in place.
That look pretty cool. Good idea gluing the dividers.
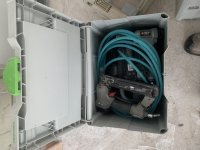
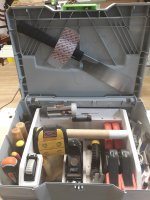
My version of a `quick and dirty` SYS-air.
The first pic is just the unit with the lid open showing guns & hose. Usually there is a bottle of glue in there as well.
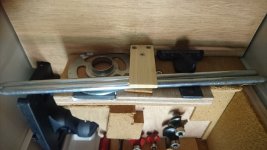
Second pic is a more unobstructed view. It also shows the `divit` where the hose and the power cord lead out with the ability to close the lid. That divit was due to a mishap on the jobsite which later proved to be fortunate.
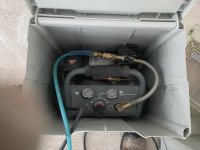
The third pic shows the modification to the compressor to allow it to sit on its 4 feet. The modification was to remove about 1 to 1 1/2 inches of tubing from the frame. I can't remember for sure, but I think I also turned the motor 180 laterally on it's mounts so the starter capacitor would clear the tank. Unmodified is still fit in the systainer, but rather sloppily and as a result made the unit made a ton of noise.
This is just a 1 gallon Senco compressor i picked up at the cheapo-depot as my prior systainer version had blown it's reeds with replacements no longer available.
For those wondering:
Yes, I can and generally do, run this with the lid closed. Helps keep the crud out of the box and makes it quieter. It has only popped the thermal one time. My guy was running speed base on a 90 degree day with the lid closed. Nothing but nailing, everything had been pre-cut and dry fitted already. in a systainer or out of one, this little compressor was never intended to run a 15 gauge gun at that production level as it only 30% duty cycle if I remember correctly. He thought he burned it up but it was just the thermal breaker. He admitted that the unit hd not been keeping up with him. And yes, I/we have more appropriate compressors for that.
The first pic is just the unit with the lid open showing guns & hose. Usually there is a bottle of glue in there as well.
Second pic is a more unobstructed view. It also shows the `divit` where the hose and the power cord lead out with the ability to close the lid. That divit was due to a mishap on the jobsite which later proved to be fortunate.
The third pic shows the modification to the compressor to allow it to sit on its 4 feet. The modification was to remove about 1 to 1 1/2 inches of tubing from the frame. I can't remember for sure, but I think I also turned the motor 180 laterally on it's mounts so the starter capacitor would clear the tank. Unmodified is still fit in the systainer, but rather sloppily and as a result made the unit made a ton of noise.
This is just a 1 gallon Senco compressor i picked up at the cheapo-depot as my prior systainer version had blown it's reeds with replacements no longer available.
For those wondering:
Yes, I can and generally do, run this with the lid closed. Helps keep the crud out of the box and makes it quieter. It has only popped the thermal one time. My guy was running speed base on a 90 degree day with the lid closed. Nothing but nailing, everything had been pre-cut and dry fitted already. in a systainer or out of one, this little compressor was never intended to run a 15 gauge gun at that production level as it only 30% duty cycle if I remember correctly. He thought he burned it up but it was just the thermal breaker. He admitted that the unit hd not been keeping up with him. And yes, I/we have more appropriate compressors for that.
Attachments
dltflt
Member
- Joined
- Jan 18, 2008
- Messages
- 2,047
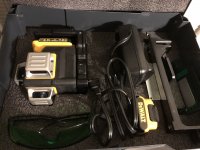
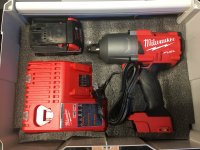
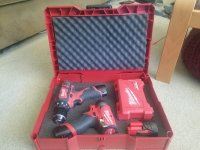
Here is my Milwaukee impact with battery, charger, torque sticks, and sockets for wheel removal. This is going with me when we travel in the Fifth wheel during the summer.
View attachment 1
View attachment 1
Attachments
UncleJoe
Member
- Joined
- Oct 3, 2011
- Messages
- 154
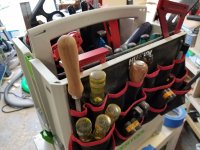
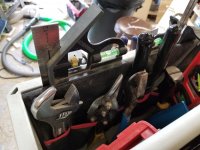
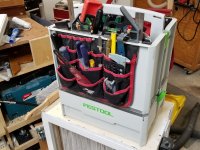
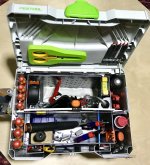
Here is my solution for my Sys Toolbox. This has worked pretty well for me. It may not be what you want but it may give someone some inspiration to help solve their tool storage issues. I use mine in the shop but have taken it to the job site a few times. I simply took an old bucket organizer I had from Home Depot, if I remember correctly, I think I paid about $7. I cut it apart and used pop rivets to attach it. I may have used a few small bolts (10-32) to reinforce it. I have inside loops for tools and a lot of pockets. It can be removed if I ever decide I don't like it or need it anymore but I have been using it for about 2 years and it is quite handy. I can move it to where I am working and have all my most used tools within easy reach.
Attachments

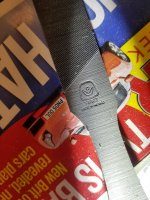
This is not a systainer post directly. I was modifying one of my systainers and I found this file underneath the plastic insert. Most likely from packing. Kind of neat for festool swag. The only thing I have gotten from Festool for free. [big grin]
Attachments
Joort
Member
- Joined
- Mar 20, 2019
- Messages
- 11
Nice thread guys, Fingerlicking and very OCD friendly.
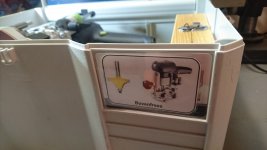
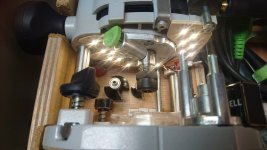
I made this insert for my beloved OF 1010.
Plywood and 4mm cork.
Fits snugly and secure.
The router is now laying correctly (rather than reversed).
Next time I will use thinner plywood.
For the rest I'm very happy.
Of course, this is 1% necessary and 99% fun.
I made this insert for my beloved OF 1010.
Plywood and 4mm cork.
Fits snugly and secure.
The router is now laying correctly (rather than reversed).
Next time I will use thinner plywood.
For the rest I'm very happy.
Of course, this is 1% necessary and 99% fun.
Attachments

Vondawg
Member
Aw come on Joort you just want to show me your LED lights
How about a little show and tell....looks like you have an great idea under there.
How about a little show and tell....looks like you have an great idea under there.
")

Joort
Member
- Joined
- Mar 20, 2019
- Messages
- 11
Vondawg said:Aw come on Joort you just want to show me your LED lights
How about a little show and tell....looks like you have an great idea under there.
Ok, here is the thread:http://festoolownersgroup.com/festool-jigs-tool-enhancements/best-value-for-money-jig-for-festool/
goko
Member
- Joined
- May 22, 2016
- Messages
- 47
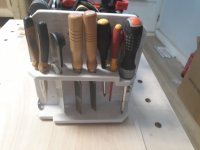
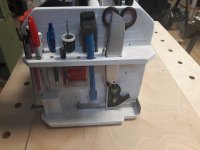
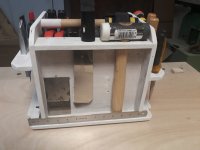
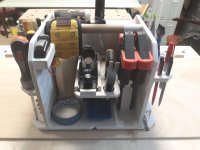
This is my setup for kitchenfitting. My apprentice calls it R2D2. Only thing I need to modify, is something to mount my 1200mm level, hearing protection, and my caulkgun. I also carry a Hilti sportback with my other powertools, such as impactdriver, powerdrill, jigsaw, sds drill. And ofcourse, my radio. I can pretty much do about 80-90% of the work with this setup.
[attachimg=1]
[attachimg=1]