Show your systainer

Lots of good stuff in there. I have a Sys Toolbox that has similar contents. Nice to have much of what is needed for the finishing touches in one place.
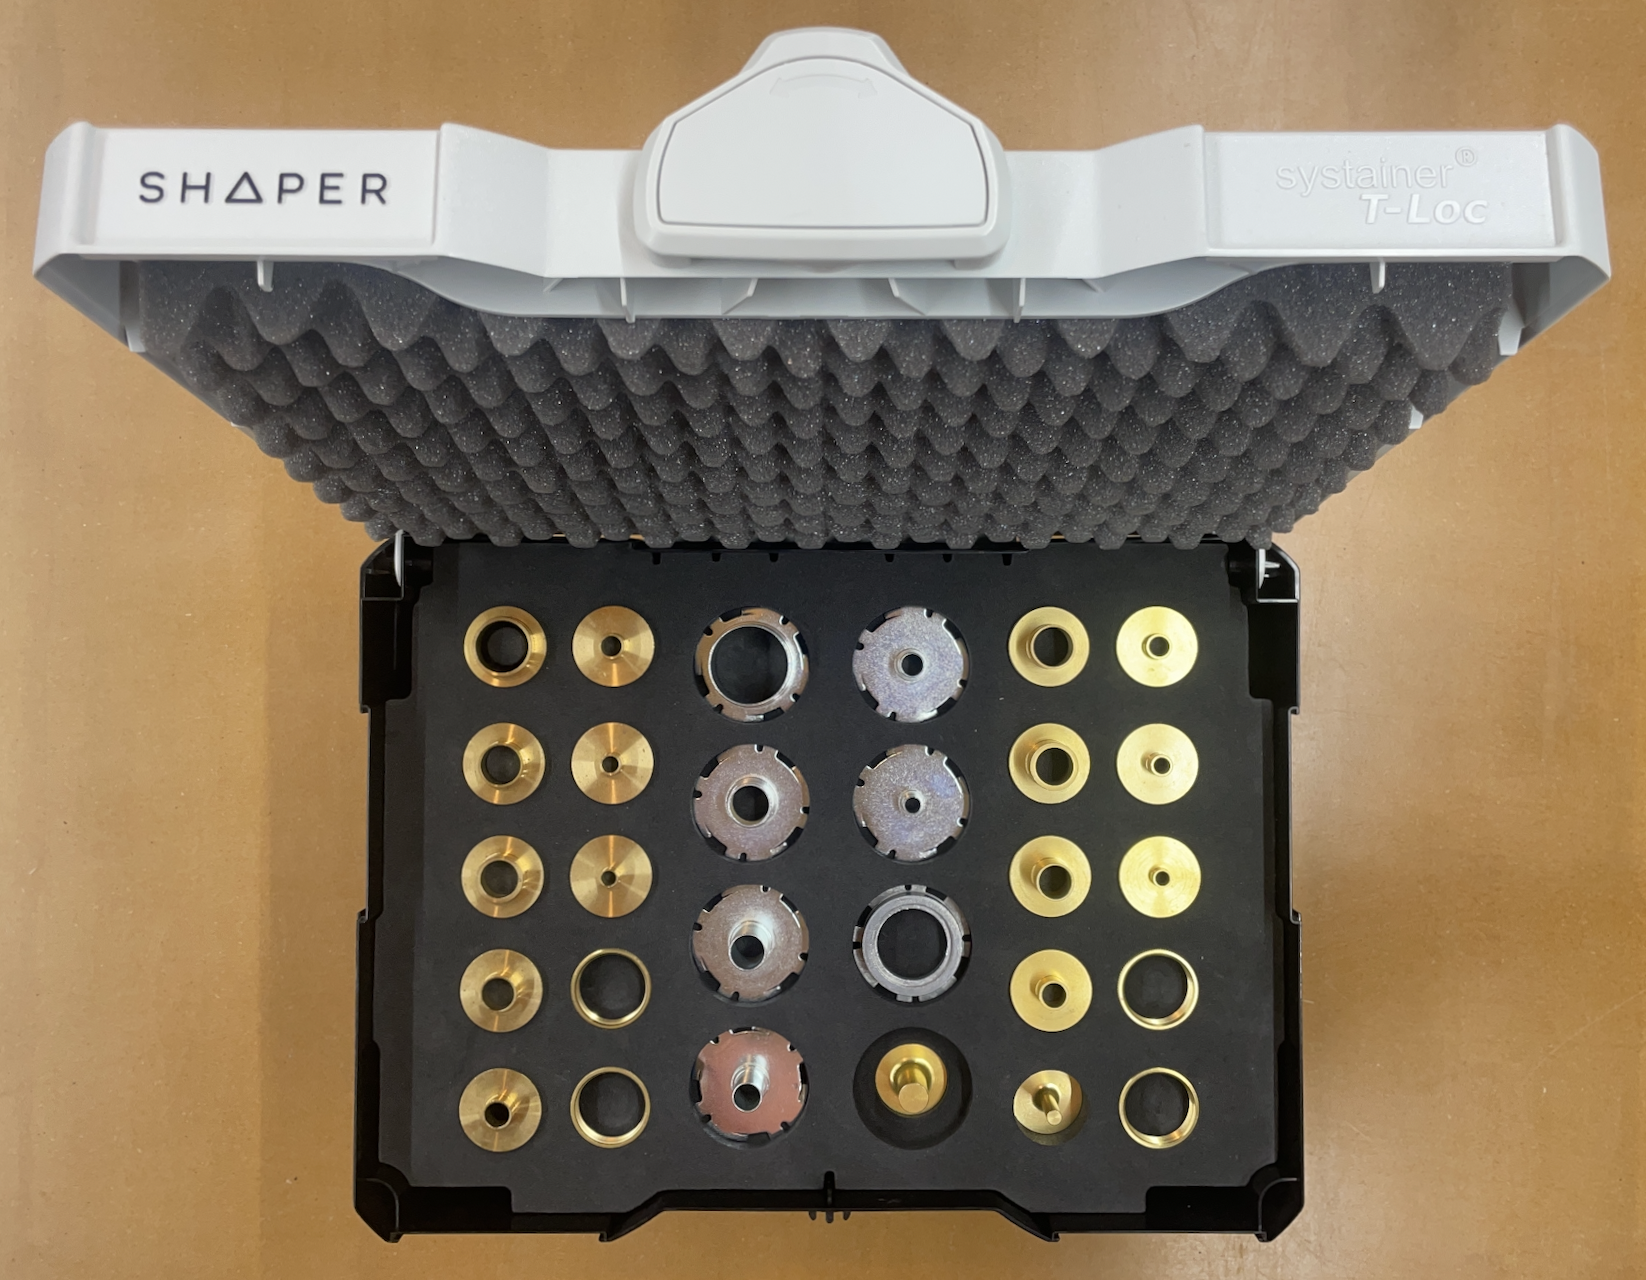
My Sys Toolbox is mostly taken up with small hand tools and bits, but I can see how it would make an excellent finisher. I may look into that...
 
I seem to be accumulating Sys Minis, so I made another case to contain them. They will eventually end up on a cleat wall in my garage shop.
The newest is from Bow Products. Their new item, called "Pack of Dogs" comes in a foam inert that fits the Mini Sys. It is a set of 6 expandable dogs, that act as mounting bolts for MFT holes. So far, I put a pair into the board I use for the pocket screw jig. Next is going to be the Shaper Workstation
 

Attachments

  • Sys minis.jpg
    Sys minis.jpg
    436.4 KB · Views: 125
  • Bow Dog Sys.jpg
    Bow Dog Sys.jpg
    374.2 KB · Views: 114
  • Bow Dogs.jpg
    Bow Dogs.jpg
    367.3 KB · Views: 111
Hello, FNG here,

Where are people obtaining the systainer foam inserts that are then cut out for non Festool items? Next question, how do you cut them out so precisely for each tool/accessory. Thank you in advance and I apologize if this was already covered.
 
Hello, FNG here,

Where are people obtaining the systainer foam inserts that are then cut out for non Festool items?
1'' or/and 2'' XLPE (cross-linked polyethylene). I buy it here.
Next question, how do you cut them out so precisely for each tool/accessory. Thank you in advance and I apologize if this was already covered.
CNC. I use Fusion 360 and Shaper Origin: see the some projects [1][2][3] on shaperhub. I try to source tool outlines online, from grabcab.com for instance or measure tools with a caliper.
 
1'' or/and 2'' XLPE (cross-linked polyethylene). I buy it here.

CNC. I use Fusion 360 and Shaper Origin: see the some projects [1][2][3] on shaperhub. I try to source tool outlines online, from grabcab.com for instance or measure tools with a caliper.
OOF, I was hoping I didn't need to spend $3,500 to create the foam inserts. Nevertheless, I appreciate the response.
 
OOF, I was hoping I didn't need to spend $3,500 to create the foam inserts. Nevertheless, I appreciate the response.

You can get long narrow blade snap knives that will easily cut the foam around a tool. Then you need to cut, rip, pull out the middle.

Seth
 
Where are people obtaining the systainer foam inserts that are then cut out for non Festool items? Next question, how do you cut them out so precisely for each tool/accessory. Thank you in advance and I apologize if this was already covered.
I have bought 30 and 50 mm sheets from Shadow Foam in UK in size 40x60 cm. One sheet is enough for two Systainers. A box with 3 of the thick ones or 5 of the thin ones is rather cheap. The foam is layered (or should I say layered'ish?) so you can peel off layers to create holes of desired depth.

I use a bread knife to cut the outer countour of my inserts to fit in the Systainers. Then I arrange my tools on top of the insert and use a scalpel to cut a contour in the foam around each tool. Then I just need to peel off layers inside each contour, until the depth fits the tool.

Their website has videos demonstrating how to do this efficiently (minus the bread knife, which is my own invention).
 
I've used Fastcap kaizen foam and a snap knife. It isn't as pretty or clean as a CNC; but it works well enough to know what goes where and to prevent things from bouncing around.
 
Don't they sell foam that fits the Sys mini? They used to sell said foam for normal Systainers.
 
Don't they sell foam that fits the Sys mini? They used to sell said foam for normal Systainers.
I have never seen the one for the mini sold separately, though I sure would like to. The ones I have came inside Shaper branded minis, and the one from Bow Products. My others have the divider partitions or the blow-molded inserts.
I did get a few of the full-sized foam pieces, the one time I saw them available. So far, I have only cut into one of them. Strangely enough, I just added to that one today. While I had it empty for the procedure, an idea occurred to me.
The space under the Trace frame could be used too. It's a very shallow pocket, so router bits, an Exacto knife, short ruler, etc could fit under it. As far as that goes, it really wouldn't even have to fit completely under it? As long as the pocket was deeper, it could be partially visible.

Recently I saw the same foam sold as 24" x 48" sheets, but I would have to figure out how many I could cut from a piece, of that size.Shaper Sysb.jpg
 
Last edited:
I've used Fastcap kaizen foam and a snap knife. It isn't as pretty or clean as a CNC; but it works well enough to know what goes where and to prevent things from bouncing around.
I also used kaizen foam and knife for all my inserts. Worked great for me. I have had a CNC for 2-3 years and have never bothered to redo the hand cut kaizen foam.
 
I recently consolidated some Woodpecker kits (setup blocks and cross-dowel jig) into one of my spare Shaper Systainers. I had a few screw-ups with the cut and some of my depths, but otherwise, happy with the outcome.

Monosnap_2025-08-04_13-39-00.png
 
One more and the jig I'm using for cutting. Not that I needed to put my guide bushings into a Systainer but why not? Also stoked that Systainer.Store sells replacement foam and lid foam as I've got several T-Loc's and Sys3's with stuff just tossed in there that I can now spend hours OCD-organizing myself into a frenzy. 😎

Monosnap_2025-08-05_14-31-01.png


Monosnap_2025-08-05_14-37-25.png
 
Me too @4nthony. Now that I'm retired, I have plenty of time for OCD. I have been cutting smaller pieces of 3/4" MDF for inserts in tool box drawers. Most of those will get re-done soon too. I have a lot of rearranging to do. The templates that I made, for both of the Systainer inserts, are some of the ones I kept.
 
If anyone was curious about the Shaper T-Loc foam vs. the Sys3 foam, here's the Sys3 foam in my Shaper template.

It's mostly stable. Mowing foam with the Origin can be kinda grippy, so I'll probably shim, and/or tape the foam to the bench, and clamp the jig just to be safe and prevent any movement.

Monosnap_2025-08-07_14-27-20.png
 
1'' or/and 2'' XLPE (cross-linked polyethylene). I buy it here.

CNC. I use Fusion 360 and Shaper Origin: see the some projects [1][2][3] on shaperhub. I try to source tool outlines online, from grabcab.com for instance or measure tools with a caliper.

Thanks for posting this info. Have been wanting to do this on my regular CNC (Avid pro) for years but haven't got around to it yet. Good info to have though.
 
A little rabbit hole I went down this week while waiting for the stain to dry/vent.....

I have a Sortainer 12 that holds (most of) my specialty Luthier tools. One of the drawers is dedicated to a set of dedicated router bits for cutting the binding ledges for purfling and binding on the guitar body. Years ago I made a crude MDF tray to hold the different diameter bearing bits, but this week I happened to open it up and said "Hey, now that I have a 3D printer....."

Before and after pictures. Yes, there were errors. My approach is to slice up the model into smaller sections for geometry I'm not sure of to make sure things will fit. That eliminates the waste (and time) of making an entire print that might not work.

There are sets from two sources here, one from StewMac and the other from LMI (now defunct and purchased by StewMac).
At the time I put this together 20+ years ago, there were some sizes not covered by each set, but now they seem to have expanded the offering.

the numbers indicate "BEARING DIAMETER in THOUSANDTHS / LEDGE WIDTH IN THOUSANDTHS", with the leading zero and decimal point omitted for space.

Of course, I also made a 3D printed label for the drawer.

IMG_2885.jpgIMG_2909.jpgIMG_2910.jpgIMG_2912.jpg
 
This project, as simple as it is, took well over a year to complete. It as almost done in February 2024 when my wife had the bright idea of getting a divorce. As I result, I spent about 14 months out of the house with no access to the workshop. After I got back in the house, which I took in the settlement, it was still a few months before I could head back to the workshop in earnest.

I had a bunch of Woodpeckers Clamping squares, both the regular size and the Minis, and also several of the associated clamps. The "rack-it" which came with some of the clamps was pretty useless to me as i really have no wall space left. So I decided to customize a systainer for the whole setup.

I started with a Tanos Systainer³ M 187 in Carmine Red which is a pretty good match for the Woodpeckers red. The plywood base insert has 3/8" holes for the clamps to sit in and the aluminum rods for the clamps are 9mm from McMaster-Carr. 9mm is a decent sliding fit for the 3/8" holes in the clamps.

Not the best handiwork but it does the job. There's vertical space for mor clamping squares, but no space for more clamps (unless I just toss them in).IMG_0014.jpegIMG_0015.jpeg
 
Back
Top