ear3
Member
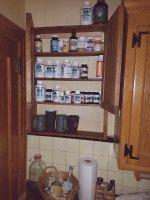
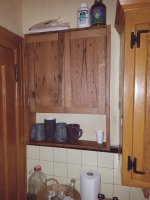
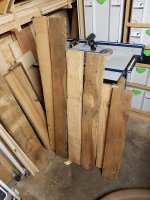
After a bunch of reclaimed oak projects over the summer, I had built up a decent off-cut pile of 2x6 and 2x8 offcuts, so I decided to consecrate those pieces for a cabinet my wife requested for her (growing) collection of supplements and tea mugs, which were starting to take over the kitchen counter.
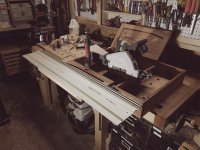
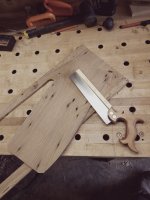
To hit the projected linear feet, and to especially to make the planned bookmatched panels for the doors, I resawed a few of the beams using the Roubo Frame saw I got from Bad Axe tool works last month. Kerfed each piece on the table saw to assist in blade tracking:
View attachment 1
Then clamped them up one by one in the leg vise and sawed them in half:
View attachment 2
View attachment 3
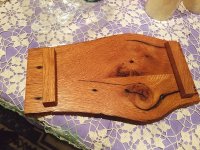
The sawing went relatively quickly, and after planing them all to an equal size, I ended up with boards a bit thicker than 5/8. The frame saw has been a great addition to my arsenal, since my shop will not accommodate a serious resaw capable bandsaw.
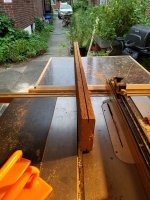
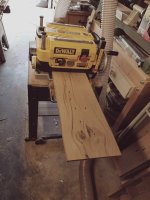
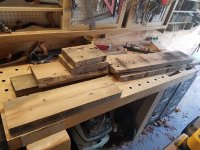
For the verticals and door frame members, I simply planed down the remaining boards on the thicknesser to 1"+. You can see I was really scraping the bottom of the barrel at this point, and had to use planks as short as 12" to make sure I had enough wood. Even so, I ended up having to mix red and white oak to get all the wood I needed.
View attachment 4
I selected the boards for the bookmatched panels first, choosing those that had a good combination of grain patterns and nails holes. I straightened one edge with the tracksaw, and then joined them with 4mm dominoes. I jointed one side flat with a no. 8, but left them thick until I had an exact size for the door panel slot in the frame members:
View attachment 5
View attachment 6
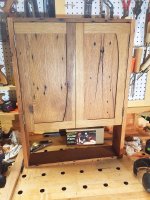
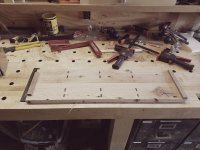
The boards for the case were then ripped to width, and I dominoed the verticals as a pair to ensure level alignment (those boards on either end are just scrap pinned with a 23 gauge nailer to keep the boards aligned):
View attachment 7
View attachment 8
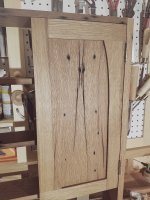
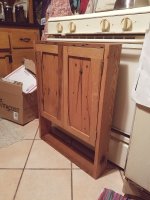
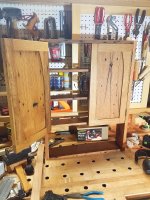
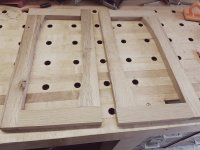
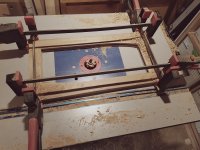
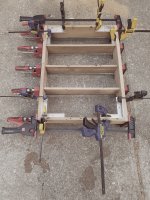
Clamped up the case, and then moved on to the doors:
View attachment 9
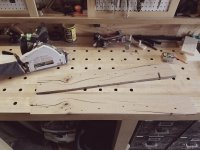
For a while I've been visualizing this image in my head of a curved door panel, so I decided to try to realize it on this project (I've subsequently figured out after my wife pointed it out that I was imaging, albeit poorly, an art nouveau design technique).
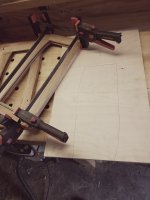
I made a template out of 1/4 MDF (I think now the curve should have been more exaggerated, but I was limited by the scrap I had to work with):
View attachment 10
Traced it onto one of the offcuts, and did a rough cut out of 4 pieces with the Carvex -- you'll see I had to take care to avoid crossing the prominent split that went down the center of that board, representing the point where the grain dipped back up (whatever you call the diameter line of the rings on a tree):
View attachment 11
View attachment 12
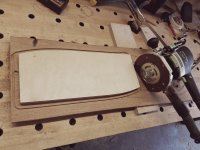
Then I reapplied the template to each piece with double sided tape, and routed the pattern flush on the router table:
View attachment 13
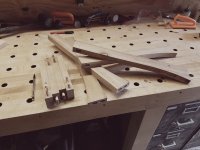
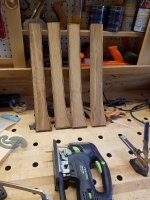
I decided only to do a curve on two pieces for each frame, rather than make another template to curve the smaller pieces, which, in my opinion, would have detracted from the natural beauty of the bookmatched panel by obscuring more of it, and so I just cut some regular shaped rails for the horizontal pieces:
View attachment 14
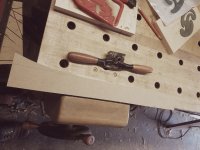
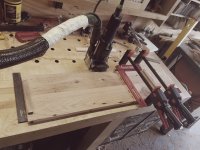
I dominoed the frame members and dry fit them with clamps so I could cut the slot for the panel on the router table:
View attachment 15
View attachment 16
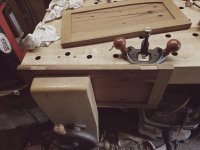
Knowing now the thickness I needed, I planed the panels down to size, taking care to remove an equal amount of material from both sides so I didn't expose the dominoes on the edge joint:
View attachment 17
To size the panels to account for the curves, I traced and cut a template on plywood:
View attachment 18
Which I then attached to the panels with double sided tape, and cut them out with a template guide bushing on the OF1400 that added slightly less than the depth of the slot:
View attachment 19
View attachment 20
[EDIT: Continued in next post after images didn't post]
To hit the projected linear feet, and to especially to make the planned bookmatched panels for the doors, I resawed a few of the beams using the Roubo Frame saw I got from Bad Axe tool works last month. Kerfed each piece on the table saw to assist in blade tracking:
View attachment 1
Then clamped them up one by one in the leg vise and sawed them in half:
View attachment 2
View attachment 3
The sawing went relatively quickly, and after planing them all to an equal size, I ended up with boards a bit thicker than 5/8. The frame saw has been a great addition to my arsenal, since my shop will not accommodate a serious resaw capable bandsaw.
For the verticals and door frame members, I simply planed down the remaining boards on the thicknesser to 1"+. You can see I was really scraping the bottom of the barrel at this point, and had to use planks as short as 12" to make sure I had enough wood. Even so, I ended up having to mix red and white oak to get all the wood I needed.
View attachment 4
I selected the boards for the bookmatched panels first, choosing those that had a good combination of grain patterns and nails holes. I straightened one edge with the tracksaw, and then joined them with 4mm dominoes. I jointed one side flat with a no. 8, but left them thick until I had an exact size for the door panel slot in the frame members:
View attachment 5
View attachment 6
The boards for the case were then ripped to width, and I dominoed the verticals as a pair to ensure level alignment (those boards on either end are just scrap pinned with a 23 gauge nailer to keep the boards aligned):
View attachment 7
View attachment 8
Clamped up the case, and then moved on to the doors:
View attachment 9
For a while I've been visualizing this image in my head of a curved door panel, so I decided to try to realize it on this project (I've subsequently figured out after my wife pointed it out that I was imaging, albeit poorly, an art nouveau design technique).
I made a template out of 1/4 MDF (I think now the curve should have been more exaggerated, but I was limited by the scrap I had to work with):
View attachment 10
Traced it onto one of the offcuts, and did a rough cut out of 4 pieces with the Carvex -- you'll see I had to take care to avoid crossing the prominent split that went down the center of that board, representing the point where the grain dipped back up (whatever you call the diameter line of the rings on a tree):
View attachment 11
View attachment 12
Then I reapplied the template to each piece with double sided tape, and routed the pattern flush on the router table:
View attachment 13
I decided only to do a curve on two pieces for each frame, rather than make another template to curve the smaller pieces, which, in my opinion, would have detracted from the natural beauty of the bookmatched panel by obscuring more of it, and so I just cut some regular shaped rails for the horizontal pieces:
View attachment 14
I dominoed the frame members and dry fit them with clamps so I could cut the slot for the panel on the router table:
View attachment 15
View attachment 16
Knowing now the thickness I needed, I planed the panels down to size, taking care to remove an equal amount of material from both sides so I didn't expose the dominoes on the edge joint:
View attachment 17
To size the panels to account for the curves, I traced and cut a template on plywood:
View attachment 18
Which I then attached to the panels with double sided tape, and cut them out with a template guide bushing on the OF1400 that added slightly less than the depth of the slot:
View attachment 19
View attachment 20
[EDIT: Continued in next post after images didn't post]
Attachments
-
 20170906_175350.jpg363 KB · Views: 194
 -
 20170916_134701.jpg219.3 KB · Views: 116
 -
 20170916_154335.jpg238 KB · Views: 130
 -
 20170916_170138.jpg210.7 KB · Views: 110
 -
 20170916_175822.jpg302.2 KB · Views: 117
 -
 20170917_113805.jpg252 KB · Views: 130
 -
 20170917_092939.jpg211 KB · Views: 120
 -
 20170917_122341.jpg222 KB · Views: 110
 -
 20170917_144911.jpg236.1 KB · Views: 148
 -
 20170916_104002.jpg307.8 KB · Views: 138
 -
 20170916_100615.jpg303.8 KB · Views: 121
 -
 20170916_094556.jpg250.5 KB · Views: 117
 -
 20170906_180926.jpg307.5 KB · Views: 175
 -
 20170906_192943.jpg344.3 KB · Views: 158
 -
 20170908_110849.jpg330.7 KB · Views: 135
 -
 20170913_105325.jpg237.6 KB · Views: 135
 -
 20170913_221359.jpg253.4 KB · Views: 138
 -
 20170915_104312.jpg274.8 KB · Views: 140
 -
 20170915_105116.jpg238.2 KB · Views: 122
 -
 20170915_180737.jpg431.2 KB · Views: 139