tjbnwi
Member
- Joined
- May 12, 2008
- Messages
- 7,391
"The drop slot you cut in the top, you need to move it" [eek] [eek] [eek]
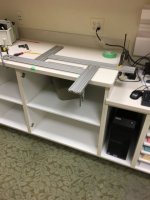
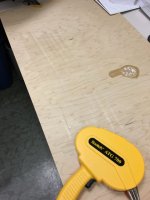
Need to move the slot form existing location to where the red tape is. View attachment 1
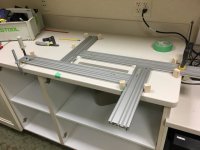
Job for the MFS. Using the corner filets created by FOG member Roseland and shipped through Shapeways. View attachment 2
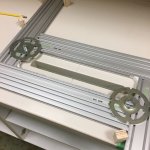
Clamped and registration blocks incase I have to reset the MFS.View attachment 3
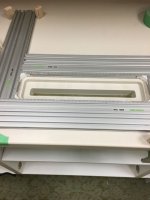
1" and 1/2" bushings for the 2200, using 1/4" spiral down cut bit. View attachment 4
Removed 1/2" material depth (1 layer)View attachment 5
ATG to retain the 'Dutchman". View attachment 6
2200 set up with 1/2" bushing. View attachment 8
I decreased the size of the MFS 1 mm each direction. Need adhesive squeeze in the seam to make this work. View attachment 7
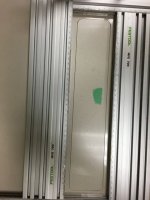
"Dutchman" dry fitted. View attachment 9
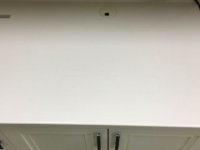
Done. View attachment 10View attachment 11
I used the MFS to make the slot at the rear of the counter. The MFS will not fit with the counter in place. Had to use hot melt glue to hold the 1/2" plywood template in place. A 3/4" bushing with 1/2" down cut serial bit was used to machine the slot. View attachment 12View attachment 13
Tom
Need to move the slot form existing location to where the red tape is. View attachment 1
Job for the MFS. Using the corner filets created by FOG member Roseland and shipped through Shapeways. View attachment 2
Clamped and registration blocks incase I have to reset the MFS.View attachment 3
1" and 1/2" bushings for the 2200, using 1/4" spiral down cut bit. View attachment 4
Removed 1/2" material depth (1 layer)View attachment 5
ATG to retain the 'Dutchman". View attachment 6
2200 set up with 1/2" bushing. View attachment 8
I decreased the size of the MFS 1 mm each direction. Need adhesive squeeze in the seam to make this work. View attachment 7
"Dutchman" dry fitted. View attachment 9
Done. View attachment 10View attachment 11
I used the MFS to make the slot at the rear of the counter. The MFS will not fit with the counter in place. Had to use hot melt glue to hold the 1/2" plywood template in place. A 3/4" bushing with 1/2" down cut serial bit was used to machine the slot. View attachment 12View attachment 13
Tom
Attachments
-
 IMG_0996.jpg27.9 KB · Views: 315
 -
 IMG_0997.jpg41.2 KB · Views: 292
 -
 IMG_0999.jpg41.9 KB · Views: 282
 -
 IMG_1002.jpg56.3 KB · Views: 297
 -
 IMG_1003.jpg39.5 KB · Views: 261
 -
 IMG_1004.jpg37.9 KB · Views: 266
 -
 IMG_1006.jpg43.5 KB · Views: 261
 -
 IMG_1005.jpg54 KB · Views: 246
 -
 IMG_1006.jpg43.5 KB · Views: 271
 -
 IMG_1008.jpg19.6 KB · Views: 242
 -
 IMG_1009.jpg15.2 KB · Views: 247
 -
 IMG_1010.jpg31.8 KB · Views: 255
 -
 IMG_0993.jpg30.6 KB · Views: 252