Does anyone really use/need Guide Bushings (Copy Rings) anymore?

That looks completely terrible and it's $70 at Tools Today. A 1/4" single flute bit in a cordless trimmer would be about 1000x faster.
Those single flutes without bearings are useless for using on any exposed edges as they burn and create grooves from the friction, especially on softer timbers.

The only things we used them for was to cut out the veneered panels on doors we'd be fitting beading and glass to, as it didn't matter how the inside edges looked. For a hobbyist they're possibly the most useless bit in the collection.
 
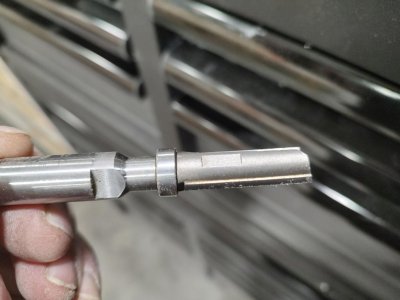
The part that really sucks about this, would be routing that slot, back where the client wants it.
It would be even worse, if they require the buildup too.
Me, the jerk that I am, would be very upset about this. "Who the hell is paying for this?"
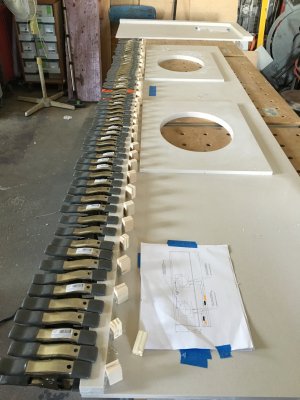
40 of them? all installed? .......oh, hell no!
IMHO, this is 100% the client's fault. They are the ones who approved the drawing. If that information turns out to be wrong later.....There is no way the fabricator could know that.
Fault and problem are different words for a reason. This is the client's fault, but they don't see it as their problem.
They just want it fixed. The person the "problem" lands on, is the one who has to fix it, even though it wasn't his fault.
I have run into this dozens of times, it makes me mad every time. The bosses always say, "it pays the same" (effectively meaning "get over it")
I never see it that way. I was doing something. If I have to stop that, to fix this, now I'm behind, on that job.
Sure, it pays the same, but this has to cost someone up-stream, they might not do it next time.
Personally, I would have questioned that original placement, especially over 40 of them. Even taking it to the actual project manager, if the engineers don't give satisfactory answers. They will generally confirm, with someone, on the other end. Sometimes, it still happens.....
Over the years, I have seen a drastic decline in people's ability to understand the drawing, in front of them. Even "designers" fall into this. They have a "look, in their minds" but don't not understand how it looks in shop drawings.

Sorry, unsolicited rant off

Great job Tom. It looks good.
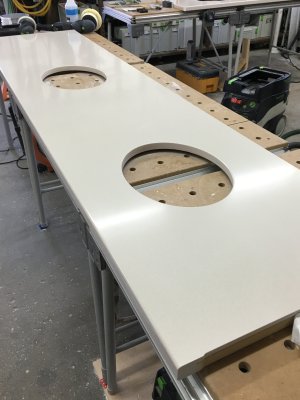
I need to respond to this, I made a total of ~40 tops, there were 6 with the slot.

A few of the other tops,

Tom
 

Attachments

  • IMG_0845.jpeg
    IMG_0845.jpeg
    1.7 MB · Views: 21
  • IMG_0847.jpeg
    IMG_0847.jpeg
    1.5 MB · Views: 15
  • IMG_0854.jpeg
    IMG_0854.jpeg
    1.4 MB · Views: 14
No, you just use shorter cut length bits. There are plenty of pattern bits with a cutting length under ¼", for instance. Great for door-hinge mortises. For many circumstances, you can choose a pattern bit with a cut-length of around ⅞"- that will enable routing at a shallow ⅛" depth with a ¾" thick template, or lower the bit and cut deeper. At some point, of course, your router's maximum depth of cut is reached, so you remove the template and use the previously cut walls as the template. At some depth point, however, your only option with bearings is to switch to a longer bit. So, switching bits for deep mortises is a downside for pattern bits, weighed against aligning the guide bushings with a single long enough bit that can be retracted for shallow cuts

You keep not getting it.


In both cases you need a template.

In the one case you need a guide bushing and be done

In the other case you need a range of bearing bits... THAT DO NOT EXIST.

I have the CMT 177.181.11 bit; 12mm shaft, 18mm diameter, 60mm cutter length, 110mm total length. You can cut 70mm+ deep mortises with that. The bits with bearing on top basicly all end at 25mm cutter length. Then comes the bearing... and above that you get the collet so at like 35mm the party is over.
 
Last edited:
Very nice job on the Dutchman Tom... :)...is it visible at all?

How did the slot become so far removed from where the client wanted it?

Love the printed corners, did you print them yourself or are they commercially available?
No it is not visible, if I went back to this job odds are I would not be able to find the repairs after the 10 years since it was completed.

I have no clue, way above my pay grade.

I believe I got the corners from someone on this forum 10-12 years ago. Still have and use them to this day.

Tom
 
In both cases you need a template.
In one case, the template is straight-forward to construct. In the other case, you need to accommodate the bit/bushing offset.

In the other case you need a range of bearing bits... THAT DO NOT EXIST. ... The bits with bearing on top basicly all end at 25mm cutter length. Then comes the bearing... and above that you get the collet so at like 35mm the party is over.
Maybe you're just not looking hard enough:
Screenshot 2025-09-21 at 9.29.47 PM.png

52mm cutting length, 95mm overall length.

But for the 70mm deep mortise use case I'd just pull out my DF700. IMO, the right tool for that job.
 
Last edited:
Totally, OT, but it looks like you ran out of gray spring clamps and had to use ONE orange. Good thing you're not OCD, and that's a ton of clamps.
I have 300+ of those spring clamps. When gluing up multiple parts you can’t run out of clamps before you run out of room/job.

This is not one of those things to be OCD about, no time to check colors. Once the adhesive is applied you have 3-5 minutes to get the clamps on. That is why the pieces are dry fit and the stop blocks are hot glued on to align the pieces.

I don’t do many tops now but the clamps are still used for making up lock miter corners.

Tom
 
That looks completely terrible and it's $70 at Tools Today. A 1/4" single flute bit in a cordless trimmer would be about 1000x faster.
Those single-flute flush-trim bits are the simplest and cheapest solid carbide bits, on the market. They are fantastic with laminate (HPL) but not so good for use on wood. The solid end drags, burns, scratches. You have to be careful, move continuously, and hopefully use some lube.
I need to respond to this, I made a total of ~40 tops, there were 6 with the slot.

A few of the other tops,

Tom
Ok, that relieves my blood pressure some. Thanks for the clarification.
Totally, OT, but it looks like you ran out of gray spring clamps and had to use ONE orange. Good thing you're not OCD, and that's a ton of clamps.
We ran into the same thing. Though the OCD was strong enough to store them in separate containers. The solid surface department has hundreds of them. Red Bessey, Orange Pony, Gray some off-brand Amazon?
They probably have about 50 of the big Pony, 6" ones. They are handy sometimes, but I don't like them. They push/twist and take two hands to operate.


If I were to do these vents today, it would be with a template, made with Origin. I think I would make it so that it skips every other slot, 5 or 6 slots. Then make just one between, in the correct single-spacing. Then make a couple of plugs, to fit the slots, one at the same thickness as the template, the other 1/4" or so thicker. The thicker one would index the double-spaced slots. The thin one would support the sides of the single-spaced slot. I would bet that a template made totally singled spaced would flex too much, thus the double spacing.


The pic below is what you get for asking the wrong person to order you a 1/2" shank pattern bit. I expected the usual 3/4" bit, 1/2" shank, appropriate bearing. What I got was the strangest thing I had seen lately. It is a 1/2" shank....but reduced on the end, with a smaller ID bearing, and the actual cutting flute section is screwed onto that shank. There are flats on both to facilitate that. I assume that this is "permanently" attached (Lock-Tite) because I have not seen the parts available separately. I would guess that they wouldn't trust a thing like that, in a customer's hands?
 

Attachments

  • Pattern bit.jpg
    Pattern bit.jpg
    185.8 KB · Views: 5
Last edited:
If I were to do these vents today, it would be with a template, made with Origin.
I would think BenchPilot with SO would simply pound these out, like I'd probably do with my CNC. Depends on how many you want to do, how accurate you need to be, etc.

On my sub-base build, I'm finding that designing in Fusion and banging out a couple prototypes on the CNC from scraps iterates pretty quickly - maybe more quickly than just measuring and building the normal ways.
With a BP, I might agree with you. My biggest concern is bending, and possibly exploding, one of the slots.
Maybe, with Origin, it would be a cool experiment to "onion-skin" them, at a slight offset, using a 4 or 5mm bit.
That would make an "inside cut" lap, rather than a straight plunge and drag. That should put less side pressure against the slots, and support them from the bottom. A tiny cleanup pass would finish it. All of that would be a pain, with templates, but it's a lot of driving Origin too.
At this point, I don't have that option. Someday though. I have just about everything else they make.
 
Maybe, with Origin, it would be a cool experiment to "onion-skin" them, at a slight offset, using a 4 or 5mm bit.
I think you mean don't cut all the way through, leaving a thin bottom wall? People do this on the CNC all the time. They also do "tabs" which are punched out and cleaned up afterwards. I've seen videos of guys doing tabs manually on the SO, but maybe there's an automatic way to do that too?

That would make an "inside cut" lap, rather than a straight plunge and drag. That should put less side pressure against the slots, and support them from the bottom. A tiny cleanup pass would finish it. All of that would be a pain, with templates, but it's a lot of driving Origin too.
I would think it pretty easy with a CNC using Fusion 360, where you can tell it to do one or more roughing passes (depending on depth of cut), and then one or more finishing passes (and could even use a compression spiral bit for the finishing pass). Even a moderate 4x2 CNC should be able to batch 4 or more grilles at a time, a 4x4 or 4x8 CNC could really pound them out while you did something else.

A nice thing about SO, though, is that it's got all sorts of programs already set up for things normally done by woodworkers, as well as an iterative design and cut work cycle right on the unit.
 
Back
Top