Torsion Box Planer Sled Issue-Please Help!

ChuckM said:
Michael Kellough said:
It’s not easy to build something truly flat.
Snip.

Many woodworkers spend lots of money on accessories, trying to get things "truly flat", "truly square", "truly straight" or "truly out of wind", with some only to find it either truly unachievable or truly not mattering as once the build is subject to use or environmental changes (humidity, for example), "truly whatever" is not really that critical in a lot of cases.

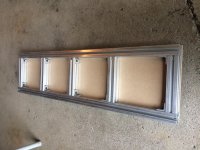
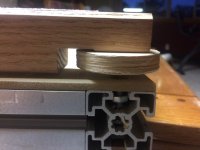
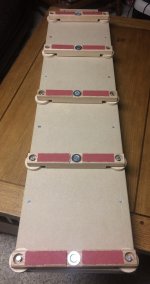
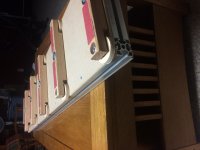
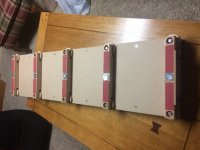
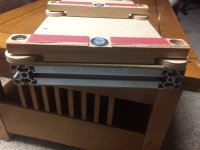
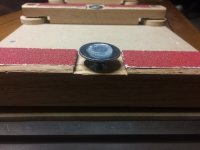
It's definitely true that in many cases you don't need things dead flat or dead straight or square. I like to start out with my lumber straight, square, and flat though. The reason many woodworkers spend hours setting their jointer beds coplaner and the outfeed table at the level of the knives is for that very reason, they want their lumber to be dead flat, straight, and square to start a project. I could probably get by with the sled the way it is but there are definitely some great ideas here that could help me improve it.
 
Michael Kellough said:
The Shopnotes sled seems unnecessarily elaborate and it uses a lot of the thickness capacity of the planer. The method ChuckM uses is efficient.

Agreed. It definitely is not necessary but I think it is very easy to adjust once assembled and will be really handy since I don't have a jointer.
 
Michael Kellough said:
Back to Star’s comment (which pretty much says it all) if you can easily flatten your existing sled enough to set the shims then it’s good enough already.

Very true.
Alanbach said:
Can’t you just shim the bases of the adjuster assemblies so that they are all dead flat relative to each other?

While this would make the board stable and the top flat it wouldn't change the fact that the bottom of the sled is bowed. So when the sled goes through the pressure rollers on the planer the bottom would be forced flat which in turn would curve the top. Once the sled exited the planer it would return to it's normal shape and the warp would still be there.

Here’s a cool video showing how this type of sled works:

Svar said:
Looking at Shop Notes picture I'd be tempted to use aluminum t-slot extrusions for the frame with hardboard for skins. All secured with bolts. T-slots on the sides will be handy.
If you want to keep what you have, just surface it flat somehow adding a layer of hardboard if needed.
You can even add two thin runners on the bottom instead (wood or UHMW) and plane those straight. It will slide easier.

This is an excellent idea! Thanks [member=15585]Svar[/member] !
I very well may pick up some aluminum extrusions for this project.
 
But you would need an aircraft carrier size jointer to match the width of even a lunchbox planer.

I think I would buy a 16"/32" drum sander before moving up to a 12" jointer as it would offer a
wider range of use in the shop.
 
Birdhunter said:
Looks like a perfect opportunity to go buy a very nice jointer wasted.

I’d rather have one less machine. Just personal preference I guess. Plus a 12” jointer would cost a couple thousand, especially with a helical head. I have Byrd’s shelix cutterhead on my Dewalt DW735. I think it’s easier to flatten boards on a planer as well with the leveling system on the planer sled.
 
I use an 8” Helical head jointer and a 14” Helical head planer. Both Powermatic. Both leave a surface that needs only light sanding. I had a bench top planer. The noise was terrible. The Powermatic is very quiet.
 
Ok so following the suggestion of [member=15585]Svar[/member] I used aluminum extrusion to make a dead flat surface and screwed MDF to the top and bottom for rigidity and smooth sliding through the planer. Thank you so much for the ideas!

[attachimg=1]

Rather than making the leveling bars detachable and slidable I just bolted them into the extrusions where the cross members are. They are evenly spaced and allow good support for any board that needs to be planed.

[attachimg=2]


Attachments

  • A507DCF0-A0EE-40E0-ADFD-772B3AB4A4FF.jpeg
    A507DCF0-A0EE-40E0-ADFD-772B3AB4A4FF.jpeg
    426.5 KB · Views: 2,597
  • 1CB9AC50-6FD8-4349-8333-7C53824959F2.jpeg
    1CB9AC50-6FD8-4349-8333-7C53824959F2.jpeg
    280.3 KB · Views: 2,825
Here are some photos of the completed sled. You will notice I added a center leveling foot to each leveling bar to help give support to the middle of an extremely cupped board if necessary.

[attachimg=1][attachimg=2][attachimg=3][attachimg=4][attachimg=5]
 

Attachments

  • 877461A0-37F0-4F6D-8531-E87E012851AF.jpeg
    877461A0-37F0-4F6D-8531-E87E012851AF.jpeg
    208.2 KB · Views: 2,787
  • 5EFFBBF0-35D4-46C0-B895-D6B932B4ABB1.jpeg
    5EFFBBF0-35D4-46C0-B895-D6B932B4ABB1.jpeg
    251.6 KB · Views: 2,603
  • EED34B51-8F9A-40E3-8A24-4887E76DE599.jpeg
    EED34B51-8F9A-40E3-8A24-4887E76DE599.jpeg
    322.1 KB · Views: 2,470
  • 3DCABA91-12DB-4BBD-BE9D-C682DE90CB72.jpeg
    3DCABA91-12DB-4BBD-BE9D-C682DE90CB72.jpeg
    286.2 KB · Views: 2,595
  • 59EA7A3D-9BC0-4E35-9F08-CD38C0604AEF.jpeg
    59EA7A3D-9BC0-4E35-9F08-CD38C0604AEF.jpeg
    265 KB · Views: 2,464
Y'all could save a ton of money by learning to use a handplane and winding sticks..... [unsure]
 
jcrowe1950 said:
Y'all could save a ton of money by learning to use a handplane and winding sticks..... [unsure]
That sled saves a ton of time, which is money.
 
Ok to thickness plane by hand for an one-off job or board (say the board is too large for a lunchbox planer or 8"jointer). But on a regular basis for every project? I personally don't know anyone (with handplaning skills) -- a hobbyist or full-time furniture maker -- who does that. I dislike stock prep. and can't magine thicknessing 50 bd ft of walnut/oak/maple by hand even though I own a low angle jack and a jointer plane.

Frankly, I use a sled (just a board with a cleat), but I still find it too labor-intensive and time-consuming. In my last project, it took me half a day just to get the stock (some over 7' long) planed (down to 3/4" or 1/2") and trued. By hand? It would've been days and more. And by the time I was done after days of "hard labor," I wonder if I would still have any energy left for the real treat of the project: joinery, door, hinges and whatnot.
 

Attachments

  • IMG_0941.jpg
    IMG_0941.jpg
    751.7 KB · Views: 298
ChuckM said:
Looks good on the execution. Any idea how heavy the sled is?

Thanks! My guess would be ~20-25lbs but I’m not sure. It definitely has some weight to it.
 
Svar said:
jcrowe1950 said:
Y'all could save a ton of money by learning to use a handplane and winding sticks..... [unsure]
That sled saves a ton of time, which is money.

I use an intermediate technique, especially with longer boards that won’t fit on a sled.

Stand the board on edge so gravity is not a factor and sight and mark the high spots.
Use a cordless power plane to knock those highest spots down.
Run the board thru to let the planer knock down the highest spots on the native side.
Flip the board end for end smooth the hand modified side some.

I don’t entirely smooth the whole surface of either side until both sides are close to flat.
It takes 5 to 10 minutes for a 10 foot board. Less if you just need to get it flat enough to rip on the tablesaw.

The result is not as fine as with a good sled but I find the longer the board ( the easier to bend into conformity) the less perfect it needs to be.
 
Michael Kellough said:
Snip.
Use a cordless power plane to knock those highest spots down.

Some twisted boards can be fed into the thickness planer without using the sled as long as the high (opposite) corners are knocked down with a plane, and the boards don't rock on a flat surface. Truth to be told, it's not a lot of fun working with a heavy stack (long, thick board plus sled) even with the help of infeed and outfeed roller stands.

 
ChuckM said:
Michael Kellough said:
Snip.
Use a cordless power plane to knock those highest spots down.

Some twisted boards can be fed into the thickness planer without using the sled as long as the high (opposite) corners are knocked down with a plane, and the boards don't rock on a flat surface. Truth to be told, it's not a lot of fun working with a heavy stack (long, thick board plus sled) even with the help of infeed and outfeed roller stands.

I agree if I had to surface a lot of lumber it wouldn’t be super fun. Being a hobbiest though and in my 30s I don’t mind lifting the sled. Being it’s only 49” long its pretty easy to pick up. I might run some boards through today. I’ll update you guys on how well (or not well) it works.
 
edwarmr said:
Snip.
Being a hobbiest though and in my 30s I don’t mind lifting the sled.

Based on my own experience, you need not worry about lifting for another 30 years or so! [tongue]
 
I know I'm a little late to this conversation but I recently found an alternative to making the wooden hand wheels.  Yes, they are more expensive than cutting out of hardwood, but you save dramatically on the time and effort of creating those hand wheels that may be prone to breaking. 
https://www.bhphotovideo.com/c/product/1340624-REG/kupo_kg012712_round_knurled_flange_disc.html

I also created my sled using 3/4 MDF for the base and routing out a 3/4" dado on each side to accept a 48" T-track. 
https://www.amazon.com/gp/product/B07MNK3D6R/ref=ppx_yo_dt_b_asin_title_o07_s01?ie=UTF8&psc=1

I drilled a hole through the side blocks as to pass a t-slot bolt to engage with the T-track.
https://www.amazon.com/gp/product/B0765NZKW2/ref=ppx_yo_dt_b_asin_title_o07_s02?ie=UTF8&psc=1

And cut the excess bolt off and capped it with acorn cap nuts
https://www.amazon.com/gp/product/B07CKP1LLK/ref=ppx_yo_dt_b_asin_title_o07_s00?ie=UTF8&psc=1

Otherwise my setup is the same, functional and serves its purpose.
 
DrJLT said:
I know I'm a little late to this conversation but I recently found an alternative to making the wooden hand wheels.  Yes, they are more expensive than cutting out of hardwood, but you save dramatically on the time and effort of creating those hand wheels that may be prone to breaking. 
https://www.bhphotovideo.com/c/product/1340624-REG/kupo_kg012712_round_knurled_flange_disc.html

I also created my sled using 3/4 MDF for the base and routing out a 3/4" dado on each side to accept a 48" T-track. 
https://www.amazon.com/gp/product/B07MNK3D6R/ref=ppx_yo_dt_b_asin_title_o07_s01?ie=UTF8&psc=1

I drilled a hole through the side blocks as to pass a t-slot bolt to engage with the T-track.
https://www.amazon.com/gp/product/B0765NZKW2/ref=ppx_yo_dt_b_asin_title_o07_s02?ie=UTF8&psc=1

And cut the excess bolt off and capped it with acorn cap nuts
https://www.amazon.com/gp/product/B07CKP1LLK/ref=ppx_yo_dt_b_asin_title_o07_s00?ie=UTF8&psc=1

Otherwise my setup is the same, functional and serves its purpose.

Do you have a picture of your sled?  Sounds very interesting with these changes.
 
Back
Top