I used the Combo Plane, bought in January or so, for the first time this weekend. If you are familiar with its sister, the Plow Plane, you should have little problem transitioning into this big brother. I heard some users struggling with the set-up or use but it should just be a plain learning curve thing, rather than anything related to its design.
After using the plane for hours and hours, I found these important:
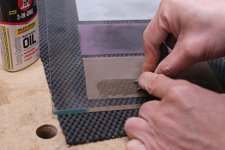
1) Light cuts -- depth of cut over 0.5mm could be a cause for pushing troubles on maple (with reverse grain); 0.25mm or 0.35mm worked best for me on cherry or maple.
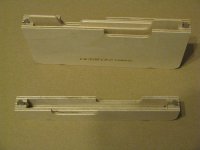
You can get away with 0.5mm or a little more cuts on pine/spruce (I had a close call on the SawStop with ripping a test-cut scrap spruce [eek] -- see image)
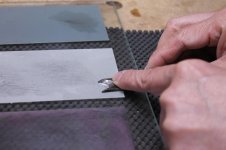
2) Waxing -- more important for this tool than for bench planes, especially when reeding
3) Use the fence on the other side now and then so you don't injure your dominant hand's shoulder!!! I use both the left and right hand fences on the Combo more for this reason than for grain issues
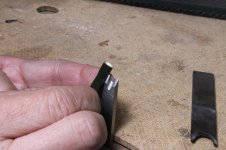
4) The new PM-V11 reeding and beading cutters were holding their edges well; I honed them before I started and rehoned them in-between after hours of work.
I have borrowed a Stanley 45 and will try it out with the Veritas reed cutter tomorrow. By the way, it was hot in shop even when it was 12C or so...if you plowed for hours!
After using the plane for hours and hours, I found these important:
1) Light cuts -- depth of cut over 0.5mm could be a cause for pushing troubles on maple (with reverse grain); 0.25mm or 0.35mm worked best for me on cherry or maple.
You can get away with 0.5mm or a little more cuts on pine/spruce (I had a close call on the SawStop with ripping a test-cut scrap spruce [eek] -- see image)
2) Waxing -- more important for this tool than for bench planes, especially when reeding
3) Use the fence on the other side now and then so you don't injure your dominant hand's shoulder!!! I use both the left and right hand fences on the Combo more for this reason than for grain issues
4) The new PM-V11 reeding and beading cutters were holding their edges well; I honed them before I started and rehoned them in-between after hours of work.
I have borrowed a Stanley 45 and will try it out with the Veritas reed cutter tomorrow. By the way, it was hot in shop even when it was 12C or so...if you plowed for hours!
![20180318_154915[1].jpg](/data/attachments/42/42268-87a992e534758d66bb34e641fc3e089f.jpg?hash=QJY3KoC51n)
![20180317_144513[1].jpg](/data/attachments/42/42273-6bdd597245f8a7d8c2f67a79d98cdedd.jpg?hash=TqTW9lyTOa)
![20180317_104814[1].jpg](/data/attachments/42/42275-aa431af2a08bf150dfaef20bd41e6a8d.jpg?hash=gO42xbYnmp)

")