So many great sharers on here, I feel like a slacker. I've been knee deep in a master bath/closet remodel and haven't documented the process at all.
Thought I could start with the closet shelving that I'm building.
Wifey picked walnut as the material so I have lots of solid 1x walnut as well as walnut veneer ply.
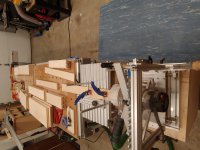
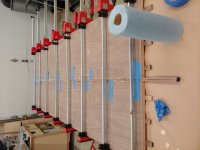
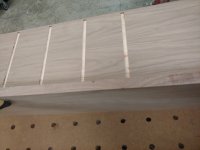
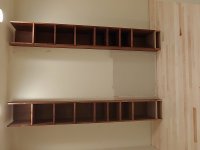
The first thing I'm working on is two units of floor to ceiling shelves. I ripped/sliced some 1x4 on the bandsaw to create some 3/8- x 13/16" edge banding.
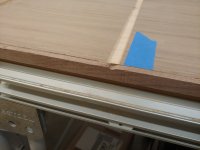
Got that glued and clamped. My little Makita palm router with trim guide worked okay to level out the edging except where I forgot about the dado dipping.... Now I need to figure out how I'm going to hide a couple of gouges. Or if I route the dado all the way through the sides and have the shelves protrude 1/4" past the tower sides... I used my OF1400 with rail to route the dados. Super easy but definitely time consuming. Can't think of a quicker/easier way to route the edging to match.
I recently aquired a RO150 to do some hardwood floor work. I was a little afraid to use it on these panels but it seriously cut the time down by a ton! I had one or two spots where I was a little aggressive and sanded through the plywood veneer. Hopefully I can cover those with some thinned out putty.
Definitely a learning experience, always. I've built lots of projects but I'm never an expert at anything that I'm doing.
Thanks to the help from here I can at least attempt.
Thought I could start with the closet shelving that I'm building.
Wifey picked walnut as the material so I have lots of solid 1x walnut as well as walnut veneer ply.
The first thing I'm working on is two units of floor to ceiling shelves. I ripped/sliced some 1x4 on the bandsaw to create some 3/8- x 13/16" edge banding.
Got that glued and clamped. My little Makita palm router with trim guide worked okay to level out the edging except where I forgot about the dado dipping.... Now I need to figure out how I'm going to hide a couple of gouges. Or if I route the dado all the way through the sides and have the shelves protrude 1/4" past the tower sides... I used my OF1400 with rail to route the dados. Super easy but definitely time consuming. Can't think of a quicker/easier way to route the edging to match.
I recently aquired a RO150 to do some hardwood floor work. I was a little afraid to use it on these panels but it seriously cut the time down by a ton! I had one or two spots where I was a little aggressive and sanded through the plywood veneer. Hopefully I can cover those with some thinned out putty.
Definitely a learning experience, always. I've built lots of projects but I'm never an expert at anything that I'm doing.
Thanks to the help from here I can at least attempt.
")