What - non Festool - tool / workshop related gizmo/stuff did you buy today?

  • Thread starter Thread starter six-point socket
  • Start date Start date
festal said:
[member=58857]Crazyraceguy[/member] do you have any pictures of the screw clamp and the dog hole?  Don't see it in the picture.  Home made?

It's right there with the plane. That flathead #3 Phillips bolt in the far side jaw, between the pivot nuts is connected to a wooden pin that I made real quick that day. It is just a piece of Maple cut into an octagon shape, to fit the hole. I drilled and ran a 1/4"-20 tap into it, for the bolt.
It was just what I had to hand at the moment. A more elegant solution is in the works. Probably the same bolt, just adding an aluminum "dog", made just for it.
I don't have a pic of the back side, showing the wooden dog.
 
Crazyraceguy said:
festal said:
[member=58857]Crazyraceguy[/member] do you have any pictures of the screw clamp and the dog hole?  Don't see it in the picture.  Home made?

It's right there with the plane. That flathead #3 Phillips bolt in the far side jaw, between the pivot nuts is connected to a wooden pin that I made real quick that day. It is just a piece of Maple cut into an octagon shape, to fit the hole. I drilled and ran a 1/4"-20 tap into it, for the bolt.
It was just what I had to hand at the moment. A more elegant solution is in the works. Probably the same bolt, just adding an aluminum "dog", made just for it.
I don't have a pic of the back side, showing the wooden dog.

Ah now i see it.  Totally missed it in the picture. wanted to know what's on the other side and now i got my answer.  Thank you.  I have few aluminum dogs that I might try to repurpose for this
 
Michael Kellough said:
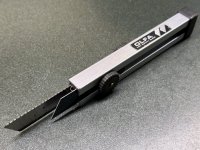
Olfa used to make an 18mm saw blade. [member=418]darita[/member] might recognize this discontinued tool. [not worthy]

[attachimg=1]

That thing looks really cool, razor blade or saw, mighty convenient.

six-point socket II said:
Japanese saw blades for typical 18mm snap-off utility knives. Cuts easier + faster than regular small saws and is more precise. The width of the blade makes straight cuts a breeze. Still, a gimmick/ problem solving tool and not a replacement for high quality hand saws, obviously.

[attachimg=1]

Kind regards,
Oliver

For cutting off a protruding dowel or something though, it would be handy.
 
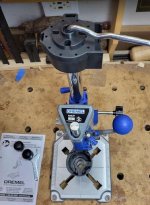
Lowe's Clearance Item for $25 Cdn. As usual, the assembly instructions in the manual can be less than clear in some parts.

[attachimg=1]

By the way, that little wrench is not a wrench for bolts or nuts, but just for removing the rubber feet!
 

Attachments

  • dremel.JPG
    dremel.JPG
    49 KB · Views: 424
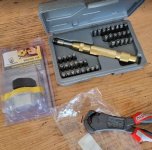
Automatic punch set, mag-switch 150, German NWS high-leverage end-cutter and half a dozen 4" F-clamps (not shown):

[attachimg=1]


Attachments

  • end cutter.JPG
    end cutter.JPG
    52.6 KB · Views: 339
ChuckS said:
Automatic punch set, mag-switch 150, German NWS high-leverage end-cutter and half a dozen 4" F-clamps (not shown):

That automatic punch set looks pretty sweet Chuck...it would be especially nice if they were to offer some sort of easy registration guide that would allow for lateral registration as well as equal spacing between each character.
 
Cheese,

You're right about the spacing guide, and I do have that thinge, which seems to have sold out:https://www.leevalley.com/en-ca/shop/tools/hand-tools/punches/75171-hand-stamp-spacing-guide

I've used the automatic punch before, and unlike hammering, it delivers a consistent indentation on the work.

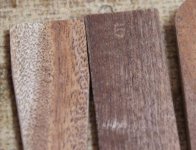
When making multiples of identical components, I use numbering to keep track of the mating pieces (you can adjust the tension/impact to suit the wood type):

[attachimg=1]
 

Attachments

  • numbering parts.JPG
    numbering parts.JPG
    30.6 KB · Views: 1,413
ChuckS said:
Cheese,

You're right about the spacing guide, and I do have that thing, which seems to have sold out:https://www.leevalley.com/en-ca/shop/tools/hand-tools/punches/75171-hand-stamp-spacing-guide

I've used the automatic punch before, and unlike hammering, it delivers a consistent indentation on the work.

That's a good thing... [smile]

My experience with these metal punches/markers is from the automotive/motorcycle perspective where the marking of individual components is imperative to ensure that the individual components that are "fitted" to each other retain that stature. Con rods and con rod bearing caps along with crankshaft bearing caps need to be marked. However, as you've noted, the traditional method of hammering the punch is fraught with problems. It's easy to hold the punch at a slight angle so the typical result is that there is an uneven marking or the marking is just completely unintelligible if you have to re-stamp it.
 
I received four of the Taylor Tools 123 blocks that can be attached to each other and also a Narex set of six mortise chisels.
 
rst said:
I received four of the Taylor Tools 123 blocks that can be attached to each other and also a Narex set of six mortise chisels.

What is different about theirs? 123 blocks are one of the most handy machinist tools for the woodworker. I have had a pair for years, using them frequently. They are even good for a square in small spaces.
 
They have a method to connect them at angles or inline.  I already have 123 and 246 blocks but was intrigued after watching the vid...not to mention I'm a sucker for new or weird tools.
 
Great info [member=25351]rst[/member]...I've owned a set of Brown & Sharpe 123 blocks for over 30 years, nice stuff. However, they never really focused on promoting them for anything other than metalworking. The blocks I own have tapped holes in them but that was always for attaching other items onto them, it was never suggested that you could attach them onto themselves to form various squaring standards. That's really interesting because of the precision machined surfaces.

I plan on ordering a set of the 123 block connection fasteners tomorrow.  [smile]
 
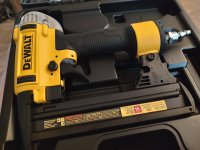
I had to get a new narrow crown stapler. The Rigid one that I have had since the fire (3 1/2 years) finally gave up today. It has been misfiring for a couple of days. I assume that the driver is worn enough to allow it to slip? I think that is what was happening anyway. Instead of driving it in, the staples slide back against the  spring? It would do ok with a fresh stick of staples, but as it got close to running out, the spring pressure would be less? The staples would deflect and nothing would come out.
I suppose it's only fair, the thing has seen a ton of use, probably a lot more than it was ever designed to do.
I would bet that it has driven well over 200K of the 1 1/4" staples alone, plus smaller ones too.
I might have tried to replace the driver if it hadn't decided to disassemble itself this afternoon.
I need it tomorrow, so I had to get something on the way home, which limits options a little.
A Dewalt from the big orange store gets the next round of torture... [big grin]
 

Attachments

  • Dewalt stapler.jpg
    Dewalt stapler.jpg
    237.2 KB · Views: 103
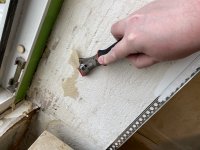
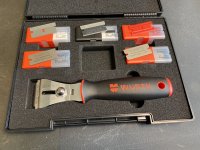
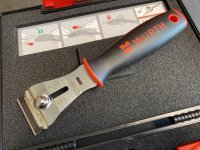
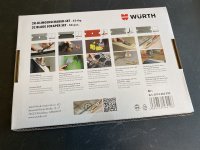
Scraper.

[attachimg=2]

[attachimg=3]

[attachimg=4]

[attachimg=1]

Kind regards,
Oliver
 

Attachments

  • IMG_7541.jpg
    IMG_7541.jpg
    269.4 KB · Views: 1,120
  • IMG_7457.jpg
    IMG_7457.jpg
    396.1 KB · Views: 1,161
  • IMG_7458.jpg
    IMG_7458.jpg
    425.7 KB · Views: 1,125
  • IMG_7460.jpg
    IMG_7460.jpg
    259.5 KB · Views: 1,119
Back
Top