Alex's Major Home Improvement Thread

I don’t think skimming is a method to level the coat. What happens is that the smaller particles in the plaster (that are floating in the water, kind of) are forced to the surface by applying pressure and this results in a finer and harder surface. So, this is more of a 'polishing' action than a levelling action — comparable to the way concrete floors are treated during the initial curing with floats and those big saucer things.

(I may be totally wrong about this — I have always avoided doing plastering… So, correct me, by all means.)
 
Bert Vanderveen said:
I don’t think skimming is a method to level the coat. What happens is that the smaller particles in the plaster (that are floating in the water, kind of) are forced to the surface by applying pressure and this results in a finer and harder surface. So, this is more of a 'polishing' action than a levelling action — comparable to the way concrete floors are treated during the initial curing with floats and those big saucer things.

(I may be totally wrong about this — I have always avoided doing plastering… So, correct me, by all means.)

Yes Bert, sorry but I have to totally correct you on this.

A skim coat is just a thin coat of plaster over a surface, nothing else to it. It is common technique with drywall where you just put 1 or 2 mm of plaster on it, instead of 10 to 20 mm like we do over a stone wall. It can also be used to level out an existing wall with minor damage.

As for the particles, your plaster should always be well mixed so it is a homogenous compound. It becomes hard by a chemical reaction, and pushing on it has no influence. In the case of drywall compound, like what's used in America, or the Fill & Finish I use, it dries by the water vaporating out of it.

This video explains a skim coat.

 
[member=5277]Alex[/member]  Right — another illusion shattered.  [wink] [big grin]
 
Very interesting Alex, I've never seen the skim coating done with a roller before.  [smile]

A friend of mine has been in the drywall/painting/plastering business for 40+ years and watching him work is always a treat. When he skim coats he just uses a standard knife & mud pan and holds a normal conversation with you like the two of us were talking over a cup of coffee.

When he's done, everything is flat & straight and when he sands there's barely any dust on the floor. Impressive indeed.  [big grin]
 
Cheese said:
Very interesting Alex, I've never seen the skim coating done with a roller before.  [smile]

Me neither. Is says on the bucket you can do it with a roller, but I don't see the benefit. I doubt you work much faster that way, while I would guess you spill a lot more than with a trowel.
 
I assume the main benefit is getting an even distribution of material, which then is flattened.

Just load it up on the sprayer  [tongue]
 
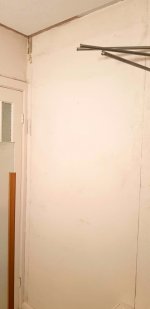
While the plaster in the living room had to dry, I thought I'd expand my activities to the bathroom upstairs. Remodeld by my father in 1984, and I have always hated every part of it. It had a much too big and clumsy built closet, very ugly vinyl wallpaper on the walls which didn't even line up, and a ceiling that looked horrible. Tiling was also all over the place, and so was the thinset. And don't get me started about the radiator.

I ripped almost everyting out except for the tiles, because new tiles are not in the budget with these daring covid times. Have to save that for later.

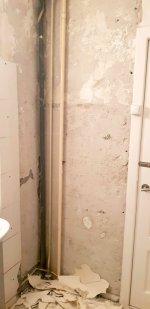
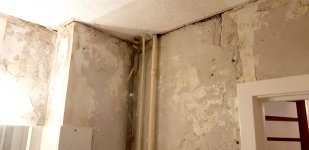
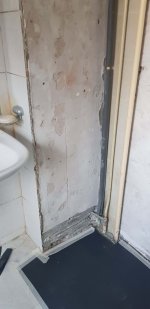
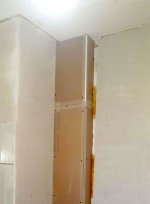
Here used to be the closet, I forgot to take a picture of it. Was just made out of particleboard and severly degraded by all the water it had to endure over time. Behind it was a wall with very old tiles. I removed the tiles, they were so loose I could almost rip them off by hand. It also revealed the gas and water pipes that go up to the central heater in the attic.

[attachimg=1] [attachimg=2]

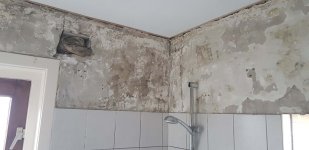
The very ugly vinyl wallpaper.

[attachimg=3]

[attachimg=4]

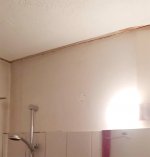
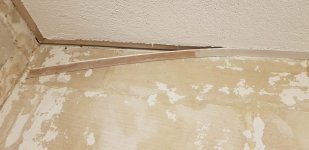
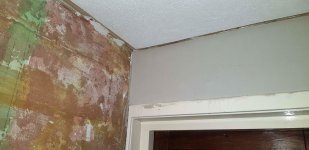
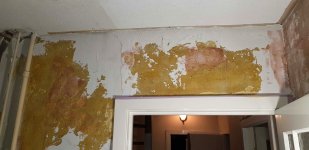
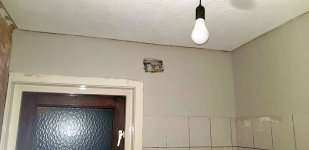
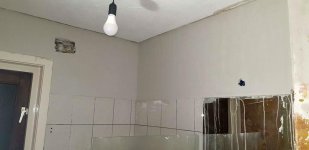
For some reasons the ceiling had these thin pieces of trim around it, and the ceiling was done very unevenly with a textured plaster we call spachtelputz. I never understood why my father just didn't let it go all the way to the walls and cover the ceiling entirely. Of course the trim was never painted also. I once started to paint them, but when I was half way I thought, sod it, I'd better rip them out once I have time.

[attachimg=5] 

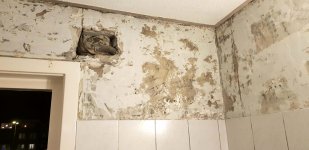
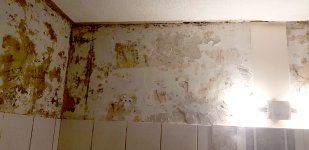
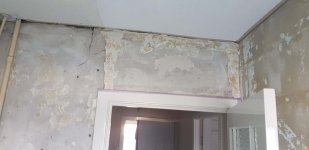
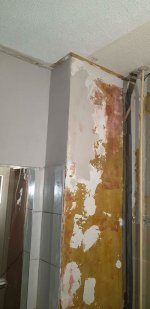
After I removed all the wallpaper I was left with this un-earthly landscape: top layer plaster, bottom layer sandlime, residual wall paint and patches of vinyl wallpaper glue. 

[attachimg=6]

[attachimg=7]

[attachimg=8]

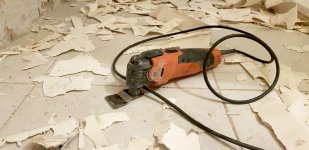
Taking the vinyl off was pretty easy with the multimaster and a scraping attachment.

[attachimg=9]

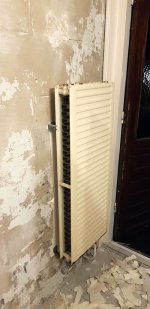
And another headscratcher: this radiator was placed sideways. There was not much room to place it normally though, but why install this thing instead of getting a proper bathroom radiator? Not only is it way too big for a 2 x 2 meter room, but installing it sideways blockes all the fins so it won't even work properly.  [huh]

It is totally rusted on the bottom too, so I'm gonna replace this with a proper one.  [cool]

[attachimg=10]

And some pics the next day.

[attachimg=11]

[attachimg=12]

[attachimg=13]
 

Attachments

  • 096-20201230_182043.jpg
    096-20201230_182043.jpg
    281.9 KB · Views: 301
  • 108-20210101_135853.jpg
    108-20210101_135853.jpg
    291.6 KB · Views: 296
  • 107-20210101_135848.jpg
    107-20210101_135848.jpg
    262.2 KB · Views: 294
  • 106-20210101_135840.jpg
    106-20210101_135840.jpg
    255.8 KB · Views: 292
  • 105-20201230_202715.jpg
    105-20201230_202715.jpg
    362.7 KB · Views: 294
  • 104-20201230_202708.jpg
    104-20201230_202708.jpg
    399.6 KB · Views: 326
  • 103-20201230_200355.jpg
    103-20201230_200355.jpg
    334.8 KB · Views: 297
  • 102-20201230_200350.jpg
    102-20201230_200350.jpg
    409.3 KB · Views: 299
  • 101-20201230_200341.jpg
    101-20201230_200341.jpg
    334.5 KB · Views: 296
  • 100-20201230_200336.jpg
    100-20201230_200336.jpg
    318 KB · Views: 299
  • 099-20201230_182226.jpg
    099-20201230_182226.jpg
    185.1 KB · Views: 292
  • 098-Untitled-1.jpg
    098-Untitled-1.jpg
    241.9 KB · Views: 299
  • 097-20201230_182058.jpg
    097-20201230_182058.jpg
    237.1 KB · Views: 320
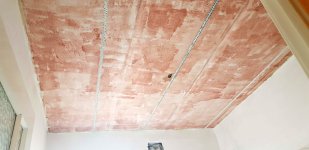
The grey bottom layer of sandlime was pulvering. Where neccesary I treated it with a primer that "glued" it all together. Then, before I could start plastering, I had to apply primer for the plaster itself.  This time I used the red stuff, Knauf Betokontak, and this is a primer that is quartz based, and you use it on surfaces that are non-porous, and have very little suction. It is very rough stuff, it feels like Saphir 24 sandpaper when it is dry, because of all the quartz particles in it. Makes for very good adhesion of your plaster.

[attachimg=1]

Other parts needed the yellow primer too, to regulate it's suction. The white parts are a quick drying plaster I used to fill all the deeper holes in the walls so I was left with a more or less even surface for the final layer.

[attachimg=3]

[attachimg=2]

Then started plastering, the smaller parts first.

[attachimg=4]

[attachimg=5]

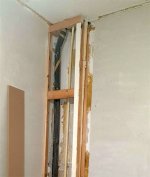
The water pipes needed a solution, can't let them remain visible like that. I'd figure I put some drywal around it.

[attachimg=6]

Used a bit of scrap wood to build the frame. I put them as close as possible to the pipes, I don't want to waste space.

[attachimg=7]

And all drywall applied, and the seams taped. 4 hours work.

[attachimg=8]

[attachimg=9]

I made a fine mess out of it ofcourse, so time for a bit of clean up. That's why I think Festool vac should be good in cleaning too. They're not, not really.  [sad]

And all plastered. Now it needs to dry.

[attachimg=10]

[attachimg=11]

[attachimg=12]

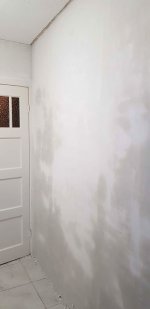
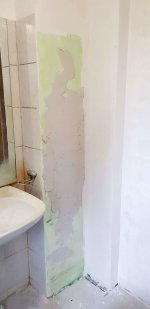
When it was dry I noticed this wall was concave, I had to fix that with a centimeter of extra plaster. Green primer is the same is the red, but from another brand.

[attachimg=13]

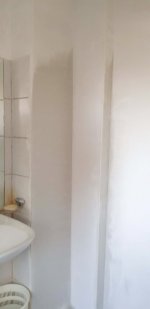
And done. Now this wall is nice and straight, because I want to make a new closet against it.

[attachimg=14]
 

Attachments

  • 117-Untitled-1.jpg
    117-Untitled-1.jpg
    270.6 KB · Views: 285
  • 118-20210112_170758.jpg
    118-20210112_170758.jpg
    192.1 KB · Views: 300
  • 119-20210112_170801.jpg
    119-20210112_170801.jpg
    186.3 KB · Views: 297
  • 120-20210112_170830.jpg
    120-20210112_170830.jpg
    179.4 KB · Views: 291
  • 121-20210121_141231.jpg
    121-20210121_141231.jpg
    217.6 KB · Views: 293
  • 122-20210122_134402.jpg
    122-20210122_134402.jpg
    167.8 KB · Views: 293
  • 116-Untitled-1.jpg
    116-Untitled-1.jpg
    162.8 KB · Views: 291
  • 115-Untitled-1.jpg
    115-Untitled-1.jpg
    177.6 KB · Views: 297
  • 109-20210104_224829.jpg
    109-20210104_224829.jpg
    339.2 KB · Views: 290
  • 110-20210104_224836.jpg
    110-20210104_224836.jpg
    355.1 KB · Views: 294
  • 111-20210104_224844.jpg
    111-20210104_224844.jpg
    360.6 KB · Views: 312
  • 112-20210104_224817.jpg
    112-20210104_224817.jpg
    308.7 KB · Views: 283
  • 113-20210104_224904.jpg
    113-20210104_224904.jpg
    41.5 KB · Views: 292
  • 114-20210107_105314.jpg
    114-20210107_105314.jpg
    273.1 KB · Views: 293
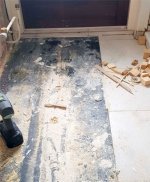
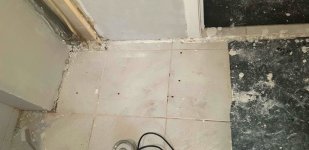
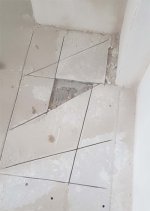
When my father made the closet, he found it wise the bolt the closet to every surface he could find. Two walls, the ceiling, and oddly enough also the floor. Yes, he drilled holes in the floor tiles. Totally not necessary, and actually a big no-no, because you compromise the waterproving of the floor. Well, I had to do something about that. Time to put a few new tiles in.

[attachimg=1]

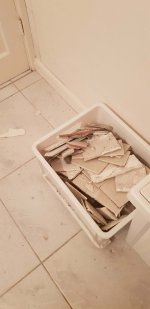
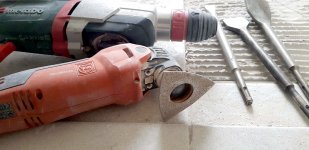
I cut the old tiles with an angle grinder and a diamond disc. This way they were easy to remove in small parts with a chissel.

[attachimg=2]

[attachimg=3]

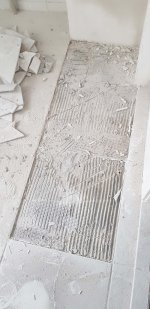
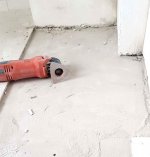
But now I'm left with the old thinset, and that's hard stuff. Thought the hammer drill might do it with a spade bit. Then clean up with the MultiMaster and a diamond coated blade.

[attachimg=4]

All cleaned up. The blade of the MM act as sandpaper for thinset, and it works wonders. It is all flat now and ready for the new tiles.

[attachimg=5]

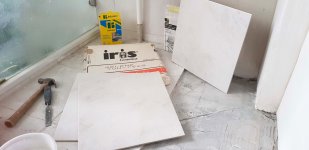
Luckily we had some tiles left over. I tell you, these have been laying in the attic since they were originally installed, and that's almost 37 years ago. I can't count the times I have thought of throwing them out only to say to myself, nah, maybe they come in usefull one day. Well, that glorious day has finally arrived.  [smile]

[attachimg=6]

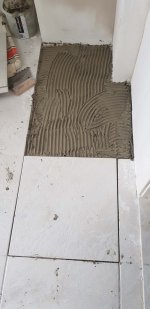
Thinset applied with a 10 mm comb so I can gently lay the tiles down and wiggle them to the exact height to line up with the rest.

[attachimg=7]

You can use these little crosses to create the proper size seams between the tiles. I leave them in while the thinset dries. In the past, I have taken them out too soon, only to find out later that tiles can move while thinset hardens, also on horizontal surfaces. Not gonna make that mistake once again.

[attachimg=8]

All ready. Except that I can't fill the seams with grout because I don't have any and I can't buy any due to the lockdown. I've got to come back to that later.

[attachimg=9]
 

Attachments

  • 132-20210126_132948.jpg
    132-20210126_132948.jpg
    241 KB · Views: 277
  • 131-20210124_155829.jpg
    131-20210124_155829.jpg
    251.1 KB · Views: 277
  • 129-20210124_154046.jpg
    129-20210124_154046.jpg
    305.9 KB · Views: 276
  • 128-20210124_152140.jpg
    128-20210124_152140.jpg
    288.9 KB · Views: 281
  • 127-Untitled-1.jpg
    127-Untitled-1.jpg
    160.6 KB · Views: 285
  • 126-20210124_144805.jpg
    126-20210124_144805.jpg
    397.8 KB · Views: 280
  • 125-20210124_144219.jpg
    125-20210124_144219.jpg
    378.8 KB · Views: 279
  • 124-Untitled-1.jpg
    124-Untitled-1.jpg
    166.9 KB · Views: 273
  • 123-20210107_110106.jpg
    123-20210107_110106.jpg
    357.1 KB · Views: 282
Nice work! As for the lockdown, at some DIY stores you can order online and pick up (hornbach for example), or if you have a friend that is a building professional they can still get materials at building supply stores.
 
I was going thru withdrawal waiting for a new episode of "this old Netherlands house".  You been busy for sure.

So, get a bit spatially lost here. Is this a bathroom with a door in the middle of the room?  Is the door frame steel? And or what frame material do they use for houses of this kind of instruction? Block buildings here tend to have steel door frames built into them as building is built. I don't see you removing trim, so curious.

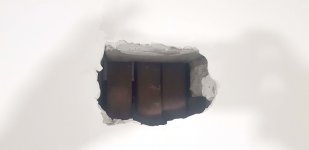
What is the hole in the wall by the shower/door.  A dead sea scroll jammed in there?

Can't tell the size of the room, but yeah, that looks like an absolutely massive radiator in there.

So you can't get out to a hardware store at all? States varied here on such things over the past year. For the most part, hardware stores were kept open, they figured out the best way to keep people home, was to allow them to get suppliers for projects. Can you order something and someone one a cargo bike pedals it out to you? Be a great time to order some really heavy/awkward stuff  [smile]

Keep it coming. Hoping at some point this gets shoring up levies and dredging canals, I assume your father wall papered those too.
 
DeformedTree said:
So, get a bit spatially lost here. Is this a bathroom with a door in the middle of the room?  Is the door frame steel? And or what frame material do they use for houses of this kind of instruction? Block buildings here tend to have steel door frames built into them as building is built. I don't see you removing trim, so curious.

In the Netherlands brick walls — interior and exterior — were usually built around the door– and windowframes (which means that these double function as setup for the bricklayer). Frames are still mostly wood. Because they are kind of integrated into the brick walls, frames can be of thinner and thus cheaper material.
More recently the practice is shifting to build with openings and place windows and doors later on. I see aluminium frames being used more often.
It is strange to see how building practices differ from country to country, here in Europe. I live close by the German border and a few km’s in, the style and material of homes really change to something more German, even though quite a few Dutch live in Germany on account of the cheaper land and lower cost of living.
 
DeformedTree said:
So, get a bit spatially lost here. Is this a bathroom with a door in the middle of the room?  Is the door frame steel? And or what frame material do they use for houses of this kind of instruction?

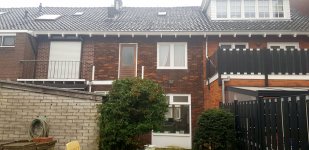
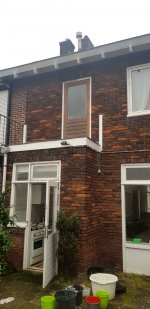
This bathroom has a door that exits to a small balcony behind it. The door frame is wood, everything in this house is made out of brick walls, wood floors and wood window and door frames. No steel used.

Here is a picture of the back from the garden. The brown door on the second floor is were the bathroom is. There used to be a fence on there around the balcony but since it was rotten my father removed it in 1984. Or better said, I removed it on his orders.

[attachimg=1]

[attachimg=2]

DeformedTree said:
What is the hole in the wall by the shower/door.  A dead sea scroll jammed in there?

That a ventilation hole, way too big for modern standards, and blocked off by an old towel that's been in there for 4 decades. I'll try and see if I can find an holy scriptures on it. When my father was young he wanted to become a priest, so who knows what's hidden around here.  [wink]

DeformedTree said:
Can't tell the size of the room, but yeah, that looks like an absolutely massive radiator in there.

2 x 2 meter = 4 square meters. The same size radiator is used in other rooms up to 12 square meters in size.

DeformedTree said:
So you can't get out to a hardware store at all? States varied here on such things over the past year. For the most part, hardware stores were kept open, they figured out the best way to keep people home, was to allow them to get suppliers for projects. Can you order something and someone one a cargo bike pedals it out to you? Be a great time to order some really heavy/awkward stuff  [smile]

Hardware stores are open for order & pickup, but they all have minimum order amounts. So if I only want to buy a small thing I can't. On top of that, their stock is severely diminished also. And thanks to the lockdown I am facing financial disaster because I haven't made a buck in two months now because the government closed all my ways of making money, so I have to be very frugal right now. I am not exactly living my live by the book, so the government has no scenario for people like me on the shelf.

DeformedTree said:
Keep it coming. Hoping at some point this gets shoring up levies and dredging canals, I assume your father wall papered those too.

Oh my God, I seriously hope not. But then again, I would not be suprised if it did.  [scared] [big grin]
 

Attachments

  • 133-20210201_101432.jpg
    133-20210201_101432.jpg
    447.5 KB · Views: 661
  • 134-20210201_101411.jpg
    134-20210201_101411.jpg
    373.7 KB · Views: 645
We stopped building purely brick buildings (structural brick) here probably 80 years ago, those probably were wood frames, I think more often it a wood header put into the brick.  A brick building now is either wood or concrete/concrete block, with brick veneer.  Concrete block walls, get a light steel doorframe, assembled as the walls built.  Just like running the electrical boxes/conduit in the walls as the masons lay them up.  Poured concrete will get wood bucks put in the forms, but they are pressure treated, not something you do for the finish work.  Wood in direct contact with concrete/masonry has long been a no-no. You have to either use pressure treated or a gasket separator and so forth between wood and masonry.  Bit curious what you guys do since you would have wood contacting masonry everywhere.

I've watched shows where they are building homes in Europe, the window frames getting put in early in construction (mainly large floor to ceiling windows) and then having things like concrete floor poured up against the frame is curious to me, what happens in these buildings if a window breaks or needs to be replaced, some of what I have seen it looks like they would have to jackhammer the building to replace it. This is probably done one some commercial stuff here too.
 
Alex said:
DeformedTree said:
What is the hole in the wall by the shower/door.  A dead sea scroll jammed in there?

That a ventilation hole, way too big for modern standards, and blocked off by an old towel that's been in there for 4 decades. I'll try and see if I can find an holy scriptures on it. When my father was young he wanted to become a priest, so who knows what's hidden around here.  [wink]

So, this is curious.  Are you saying you guys had vents in bathrooms and now are getting rid of them.  The issue here was bathrooms didn't have vents, it was just "open the window" to let moisture out.  Which doesn't work well for various obvious reasons.  So now vent fans are mandated, general issues is most folks don't have enough ventilation in the bathrooms, so interesting to someone say too much ventilation.  I don't see any vents coming out your roof or sidewall for the bathroom.
 
DeformedTree said:
So, this is curious.  Are you saying you guys had vents in bathrooms and now are getting rid of them.  The issue here was bathrooms didn't have vents, it was just "open the window" to let moisture out.  Which doesn't work well for various obvious reasons.  So now vent fans are mandated, general issues is most folks don't have enough ventilation in the bathrooms, so interesting to someone say too much ventilation.  I don't see any vents coming out your roof or sidewall for the bathroom.

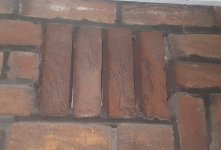
This is how they look, from the inside and the outside. They're massive, and if you left that open you'd freeze in the bathroom in the winter. You need to have ventilation in the bathroom, just not that big. Energy efficiency is a big thing here in homes.

[attachimg=1]

[attachimg=2]


Attachments

  • 146-Untitled-1.jpg
    146-Untitled-1.jpg
    192.6 KB · Views: 480
  • 145-20210205_203439.jpg
    145-20210205_203439.jpg
    165.8 KB · Views: 485
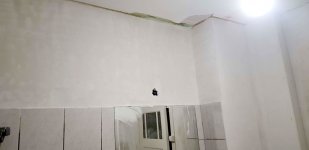
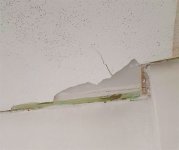
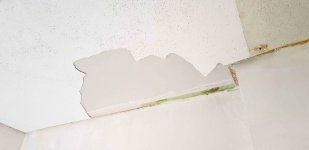
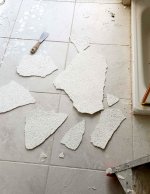
I had hoped to be able to let the ceiling in place and just touch it up a bit. Idle hope as it turned out. A big piece just crumbled off by itself. When I started pulling on it, more came off, easily.

[attachimg=1]

[attachimg=2]

The floor tiles are 50 x 50 cm, so you get an idea of how easily the ceiling came off.

[attachimg=3]

And then just an entire corner came loose. Whoa! [scared]

[attachimg=4]

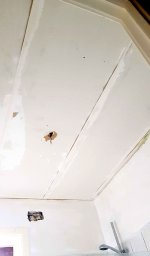
With the spachtelputz removed the old ceiling made out of 3 boards of drywall was reveiled. The spachtelputz hadn't stuck at all on the painted drywall. It only stuck on the ceiling because the seams between the boards were filled with a filler. The entire layer of spachtelputz only stuck to those 2 little seams. So, always prime!

[attachimg=5]

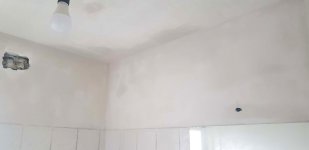
An I did, ceiling all primed and decked out with the usual profiles. The boards weren't even either, so I could not just do a skim coat as I had preferred, but it needed a 6 mm layer of plaster to even it all out. Another milestone for me, plastering a ceiling. I was very exited, but also expected this to be difficult, and very messy.

[attachimg=6]

Turned out it went fairly smooth. The plaster went on well, and not that much dropped down. All in all it took me 5 hours to do the ceiling including preparations and clean up after. Just need a tiny bit of touch up in some places. I planned to do more that day, but after working above my head for 5 hours my arms were just spaghetti. The good type you know, that my friend Mario used to serve in his Italian restaurant Donna Louise. But I just could not do anything else anymore.

[attachimg=7]

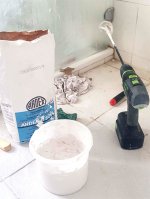
I was gifted this small bag of Ardex 826 A. This is expensive stuff, Ardex is sort of the Festool of building materials. Where a normal plaster costs only €10 for a bag of 25 Kg, this stuff costs €60 for the same amount. In return, it always hardens quickly and becomes very strong. Always a joy to work with Ardex. Very good brand, if you're willing to spend the dough.

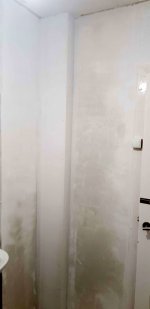
I used it to smooth out the walls, a very thin layer all around, < 1 mm.

[attachimg=8]

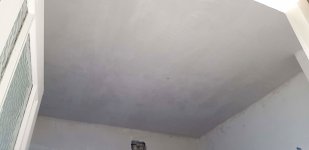
Looks good now, ready to be painted.

[attachimg=9]
 

Attachments

  • 143-20210131_160508.jpg
    143-20210131_160508.jpg
    160.8 KB · Views: 459
  • 142-Untitled-1.jpg
    142-Untitled-1.jpg
    207.1 KB · Views: 468
  • 141-20210127_160323.jpg
    141-20210127_160323.jpg
    185 KB · Views: 460
  • 140-20210127_114702.jpg
    140-20210127_114702.jpg
    357.3 KB · Views: 511
  • 139-Untitled-1.jpg
    139-Untitled-1.jpg
    183 KB · Views: 472
  • 138-20210124_125606.jpg
    138-20210124_125606.jpg
    332.6 KB · Views: 509
  • 137-Untitled-1.jpg
    137-Untitled-1.jpg
    247.3 KB · Views: 512
  • 136-20210124_125327.jpg
    136-20210124_125327.jpg
    218 KB · Views: 467
  • 135-Untitled-1.jpg
    135-Untitled-1.jpg
    109.4 KB · Views: 470
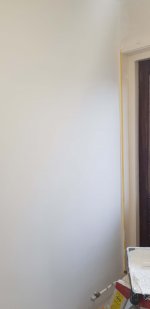
Time to place the new radiator. I first painted this wall with Sigmatex wall paint. In the bathroom you always need to make sure you have a wall paint that's moisture regulating (ie water vapour can pass through because of little pores). This is essential to prevent fungus.

Sigmatex is simply the best there is, world champion No1. I bought a 10 L can worth €175 for €3 in a thrift store, only 5% used up. [cool] I know it is the real deal because I recognise the smell, viscosity and texture.
[attachimg=1]

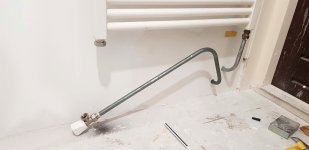
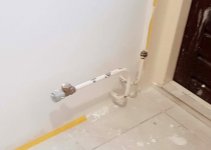
The old pipe on the left was too small for the new radiator so I had to make that one new. Pipes, tubes, you make a difference, I don't, we call them pipes here in Holland, so I call them pipes.
[attachimg=2]

Opening the heating system is always a tedious job. All the water above has to drain out first. Messy, and time consuming.
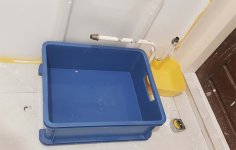
[attachimg=3]

And on the other side of the wall, had to disconnect both pipes and cut through them to make them a little bit shorter. The Protool grinder works great for that. I really like this grinder, it is nicer than the old Elu I had for the last 23 years. It makes less noise, while it is stronger, and when the motor runs you just feel it pulsating with power. And it's a tiny bit smaller.

[attachimg=4]

Time to install the supports for the radiator. As you can see, I did it wrong again the first time. Well, thanks Hornbach for that.

They give you this miniscule pamflet of instructions that doesn't say anything but the order the parts go in. So I'm eyeballing these 4 wall plugs, and thinking, are they 10 or 12 mm? I can't see any mark, and nothing on the pamflet either. So I'd figure I start with a 10 mm hole. I try to put the plug in and I have to hammer so hard to get it in that the plug deformes. OK, let's try 12 mm. Now it goes in just fine. But when I put in the bolt to bolt it down, it just keeps turning and turning forever because the plug turns in its hole. Great. So it must have been 10 after all.

Well, better try a new hole, this one's toast. 10 mm again, and this time I take it very slowly and use some pliers to keep the plug secured and in shape while I hammer it in, slowly. Luckily it did work now. Thanks Hornbach, those few drops of ink to mark it 10 mm were to expensive? We'd like to get there without trial and error, if you please. Now I have to patch the bad holes up also. Luckily you won't see a thing when I'm finished.
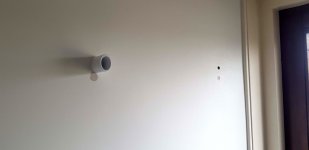
[attachimg=5]

The Ti15 makes it a breeze to get the bolts in. I don't like its noise, but I do like its precision with bolts.
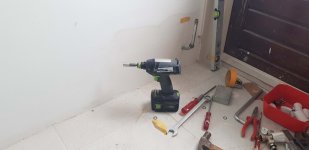
[attachimg=6]

Make sure the supports are level. I use yellow tape to mark out the spots. I don't like using pencils for that. Because you have to remove all the marks later on.

[attachimg=7]

And the radiator installed. So much nicer than that old, rusty thing that used to hang there. And now I can dry 4 towels at once.
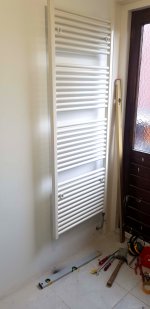
[attachimg=8]

The new pipe fitted. But it's too straight, I don't like straight. I like curves.
 
[attachimg=9]

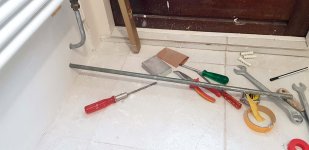
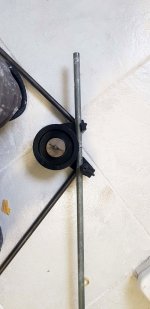
I put it in the pipe bender I borrowed from my neighbour. One side is steady, the other has a roller. You need to use quite a bit of force, but it works.
[attachimg=10]

Looks just fine.

[attachimg=11]

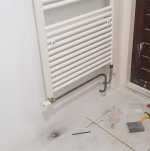
And everything connected. Started this last night but couldn't finish it. So my heater was out for 24 hours, and it's getting colder here. Glad I can turn it on again.
[attachimg=12]

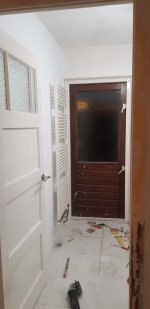
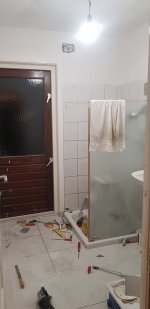
The bathroom is shaping up nicely, almost done. Only some paint work on the walls and doors, and install the lights.
[attachimg=13]  [attachimg=14]
 

Attachments

  • 154-20210203_115203.jpg
    154-20210203_115203.jpg
    330.9 KB · Views: 479
  • 155-20210203_115702.jpg
    155-20210203_115702.jpg
    347.5 KB · Views: 469
  • 156-20210203_180202.jpg
    156-20210203_180202.jpg
    242.5 KB · Views: 425
  • 157-Untitled-1.jpg
    157-Untitled-1.jpg
    127.4 KB · Views: 431
  • 158-20210203_184443.jpg
    158-20210203_184443.jpg
    259.1 KB · Views: 468
  • 153-20210203_114132.jpg
    153-20210203_114132.jpg
    292.1 KB · Views: 484
  • 152-20210203_112043.jpg
    152-20210203_112043.jpg
    220.3 KB · Views: 436
  • 151-20210203_111839.jpg
    151-20210203_111839.jpg
    237.8 KB · Views: 440
  • 150-20210203_111833.jpg
    150-20210203_111833.jpg
    198.1 KB · Views: 440
  • 149-Untitled-1.jpg
    149-Untitled-1.jpg
    348.4 KB · Views: 491
  • 148-Untitled-1.jpg
    148-Untitled-1.jpg
    193.8 KB · Views: 448
  • 147-Untitled-1.jpg
    147-Untitled-1.jpg
    97.3 KB · Views: 450
  • 146-20210202_152624.jpg
    146-20210202_152624.jpg
    141.3 KB · Views: 455
  • 159-20210203_184449.jpg
    159-20210203_184449.jpg
    255.3 KB · Views: 472
Alex said:
DeformedTree said:
So, this is curious.  Are you saying you guys had vents in bathrooms and now are getting rid of them.  The issue here was bathrooms didn't have vents, it was just "open the window" to let moisture out.  Which doesn't work well for various obvious reasons.  So now vent fans are mandated, general issues is most folks don't have enough ventilation in the bathrooms, so interesting to someone say too much ventilation.  I don't see any vents coming out your roof or sidewall for the bathroom.
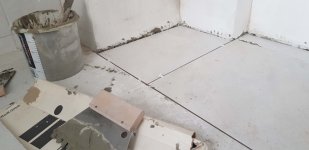
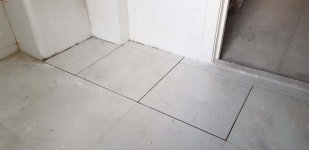
This is how they look, from the inside and the outside. They're massive, and if you left that open you'd freeze in the bathroom in the winter. You need to have ventilation in the bathroom, just not that big. Energy efficiency is a big thing here in homes.

I can see it now with the pic, hard to pic out on the original outside photo.  It looks like it was just a hole.  We have powered vents with a damper.  So when not running, no air flow.  Usually a 4 or 6" pipe.  That looks like there was nothing there but a hole.

Efficiency has been very big here for a very long time.  Remember, it gets extremely cold, and extremely hot here.  It's hard to find a place in the US with as mild a climate as the Netherlands, but Seattle Washington is as close as I can find (comparing average temps thru every month). It looks like in the past few years Netherlands has upped their energy codes to catch up to the US.

So are you putting something else in place of this for ventilation, some powered/damped unit someplace?
 
Back
Top