Alex's Major Home Improvement Thread

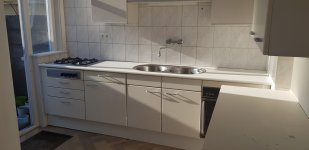
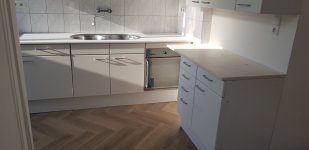
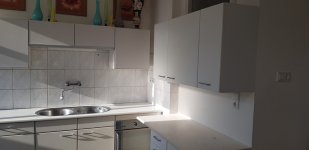
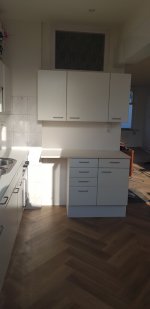
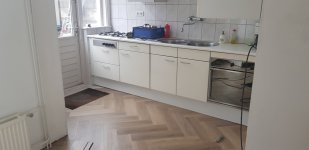
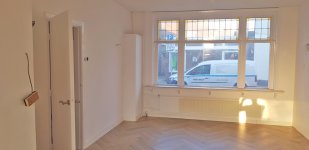
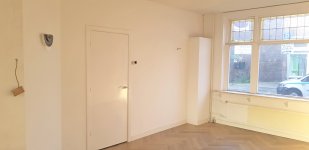
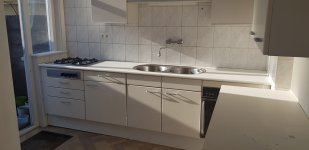
And the kitchen all finished in a sweet late afternoon sun shine. Also notice the PVC laminate floor I installed in the mean time.

[attachimg=1]

[attachimg=2]

[attachimg=3]

[attachimg=4]

Now I only have to change the old doors on the four cabinets above the sink. I do have enough leftover doors to make 4 doors for these. There's only one problem, and that is that the doors are rounded over and then have a layer of melamine laminate over them. If I cut them to size, and round them over with the router, they will have bare MDF exposed. I'm still trying to figure out how to fix that properly.
 

Attachments

  • 270-20210602_192830.jpg
    270-20210602_192830.jpg
    254.8 KB · Views: 552
  • 271-20210602_192835.jpg
    271-20210602_192835.jpg
    226.9 KB · Views: 493
  • 272-20210602_192837.jpg
    272-20210602_192837.jpg
    220.2 KB · Views: 491
  • 273-20210602_192853.jpg
    273-20210602_192853.jpg
    222.4 KB · Views: 494
DeformedTree said:
pic did not work.  The original sink setup shows no trap or vent pipe, it just has the 2 sinks join together and go into a pipe.  No trap, no vent. Maybe something is missing in the angle of the photo.

But the new one, you have a trap in there, but it's an S trap, looks to have no Trap arm to make it a P trap (legal), but still no vent pipe.  Is there some sort of wet vent going on here, or additional plumbing under the floor?

Maybe we have different terms, but I would pretty sure plumbing of this sort of thing is pretty universal.

Not proper here but it’s functional since it’s a double sink. As long as one sink is unstoppered the other will drain just fine.
 
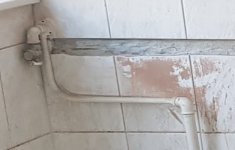
I needed to do a bit of soldering for the new kitchen equipment. The gas tap was now sticking out above the new countertop and I had to install a water tap for the dish washer. Changing the gas pipe was easy, adding water wasn't.

The old gas tap.

[attachimg=1]

Made the new piece so it would fit under the countertop. First bend the pipe as required, then soldered the fittings on it.

[attachimg=2]

And installed.

[attachimg=3]

Then I had to solder a fitting on the new water pipe.

[attachimg=4]

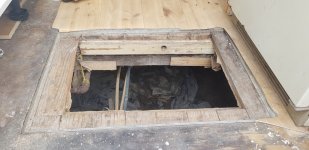
My favourite part of the house, the crawlspace. I had to connect the new pipe to an existing line there. Installed a T-fitting and split off the new line. I first tried to solder them, but that didn't work in the limited space I had there laying on my back in the dirt, so I used screw fittings under the floor. This was on 2nd Easter day, and all the stores were still closed due to the lockdown, so it was incredibly difficult to find new fittings. After a long dig in my neighbour's storage we found two pieces I could use. But it worked out fine in the end.

[attachimg=5]

[attachimg=6]
 

Attachments

  • 283-20210409_113048.jpg
    283-20210409_113048.jpg
    226.1 KB · Views: 399
  • 282-20210404_160149.jpg
    282-20210404_160149.jpg
    378.6 KB · Views: 398
  • 281-20210404_160132.jpg
    281-20210404_160132.jpg
    391.8 KB · Views: 394
  • 280-20210331_151948.jpg
    280-20210331_151948.jpg
    283.7 KB · Views: 394
  • 279-20210331_142317.jpg
    279-20210331_142317.jpg
    533.3 KB · Views: 408
  • 278-Untitled-1.jpg
    278-Untitled-1.jpg
    124.9 KB · Views: 400
Alex said:
Sparktrician said:
Alex, it looks like access to the oven is blocked by the cabinets on the right.  How do you plan to address this? 

Also, the "cooking-air-away-sucker" as you call it, is called an exhaust hood. 

Maybe this is a job for Alexangelo...  [big grin]

Yeah, I was still fiting it all together in that picture.

See reply #192 for Alexangelo's solution. [smile]

Alexangelo rides again!!!  [big grin]
 
The kitchen came out great Alex, I like it a lot.  [cool]

The pointy helper thingies are called dowel centers or dowel pins or dowel transfer pins.  [smile]

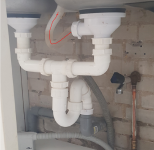
I recently refurbished the kitchen sink area and reconstructed the P-trap assembly that's made up of all the hand-tightened fittings into a monolithic assembly of pvc tubing with pvc fittings cemented together. It now has only 2 fittings that are removable. They attach the P-trap assembly to the 2 sink drain bodies.

Be advised that the removable connections will loosen after a bit because of expansion & contraction with hot & cold water. Check them after about a week of use and then every 6-9 months.
 
Alex, is this flex line for your dishwasher?

If yes I would reposition or shorten the hose so that the trapped area is removed.

This could collect debris and bits of food from the dishwasher and eventually clog the line.
 

Attachments

  • Alex_Sink_1.png
    Alex_Sink_1.png
    484.2 KB · Views: 265
Cheese said:
Be advised that the removable connections will loosen after a bit because of expansion & contraction with hot & cold water. Check them after about a week of use and then every 6-9 months.

Yes, I will keep an eye on them.

Bob D. said:
Alex, is this flex line for your dishwasher?

If yes I would reposition or shorten the hose so that the trapped area is removed.

No, that little bend is from the overflow hole in the sink. I had a look at shortening it so it won't have water standing in it, but the ends on both sides are molded on.

The dishwasher hose is the grey one coming up from the back.
 
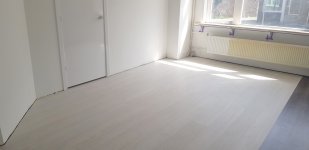
Now that most of the rough work downstairs is done, it is time to install the PVC laminate floor. I got this floor for free from people, it is basically new. They paid €4000 for it including installation, but it did not work for them because their floor wasn't flat enough to accept the thin boards. Because it is so thin, unlike normal wooden laminate, it is not able to correct uneven spots and came loose. All warranty work for them, and they were happy that somebody came to relieve them from the old boards. Having laid many laminate floors by now, but this my first PVC floor, I was sure I could figure out a way to make this work.

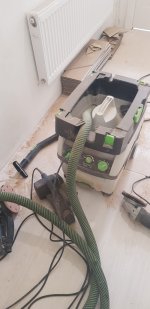
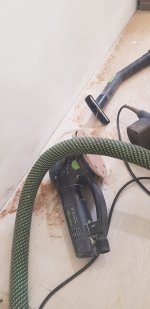
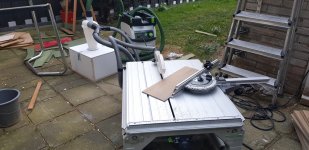
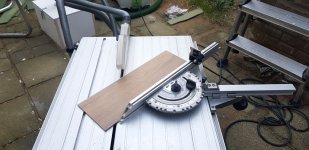
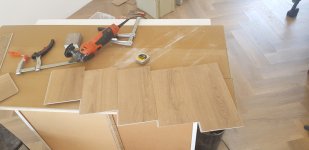
Being a herringbone floor, everything is connected in a 45 degree angle. The CS70 was indispensible to cut this all. Installed the special laminate blade for perfect cuts.

[attachimg=1]

[attachimg=2]

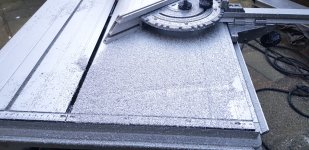
The PVC chips made a huge mess though. I had all my DC connected, but it was impossible to suck it up. I guess it gets statically charged, it would stick to everything.

[attachimg=3]

I first tried to see if it was possible to lay it over the old carpet. This would be no problem with normal laminate.

[attachimg=4]

But it separeted almost immediately.

[attachimg=5]

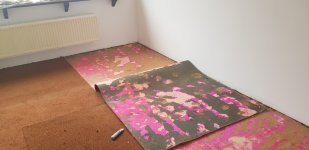
So I had to take the old carpet out. I cleared the entire room and started to pull the carpet out. 47 years old by now, but very good quality and still in a good shape.

[attachimg=6]

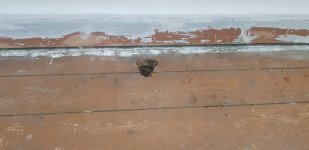
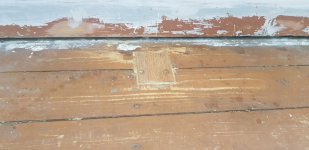
Along the way I would find these old holes for heating pipes. I thought it best to close them up. Quickly routed a recess and filled it with a little block and glued it in.

[attachimg=7]

[attachimg=8]

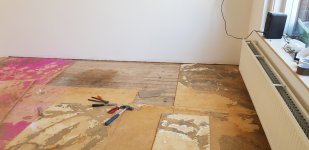
The old subfloor also had to go.

[attachimg=9]

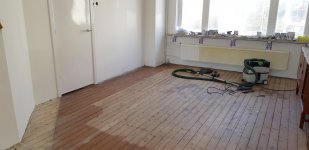
And the entire room is empty. Now I can put in the new.

[attachimg=10]

[attachimg=11]
 

Attachments

  • 296-20210423_161131.jpg
    296-20210423_161131.jpg
    308.3 KB · Views: 240
  • 295-20210423_161058.jpg
    295-20210423_161058.jpg
    268.6 KB · Views: 236
  • 294-20210423_135110.jpg
    294-20210423_135110.jpg
    318.1 KB · Views: 263
  • 293-20210322_130412.jpg
    293-20210322_130412.jpg
    347.2 KB · Views: 246
  • 291-20210322_122926.jpg
    291-20210322_122926.jpg
    302.7 KB · Views: 233
  • 289-20210318_132743.jpg
    289-20210318_132743.jpg
    337.8 KB · Views: 248
  • 288-20210318_122805.jpg
    288-20210318_122805.jpg
    339.9 KB · Views: 244
  • 287-20210313_195433.jpg
    287-20210313_195433.jpg
    201.9 KB · Views: 245
  • 286-20210313_183853.jpg
    286-20210313_183853.jpg
    520.7 KB · Views: 238
  • 285-20210313_182445.jpg
    285-20210313_182445.jpg
    397.2 KB · Views: 238
  • 284-20210313_182440.jpg
    284-20210313_182440.jpg
    430.5 KB · Views: 250
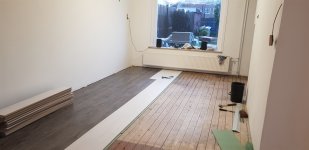
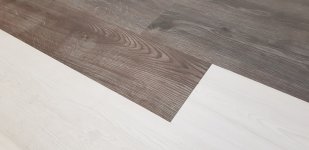
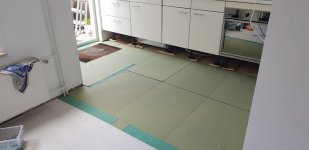
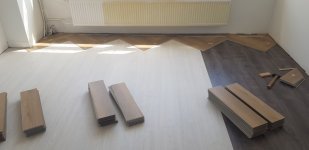
I thought it best to lay a normal laminate floor under it to provide a level and incompressable surface. Picked it all up for almost nothing. I had 35 square meters of the white floor, but it wasn't enough for the entire surface, so I had to use a bit of brown floor also. I had a way devised in my head to connect the two different laminates, but it turned out that wasn't neccessary. Though they're two different types of two different brands (Gamma & Ikea), they connected together without problem. Most of the time you're not that lucky as each brand uses its own type of grooves.

[attachimg=1]

[attachimg=2]

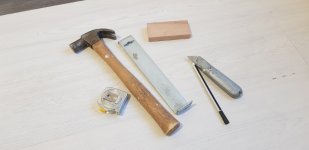
This little set of tools is all you need to lay wooden HDF laminate flooring. And a jigsaw to cut it.

[attachimg=3]

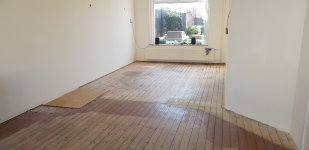
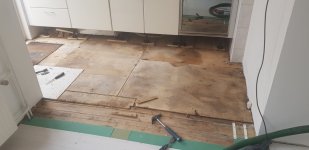
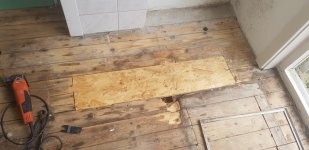
As I progressed in the living room I came to the kitchen area where I still had to remove the old subfloor.

[attachimg=4]

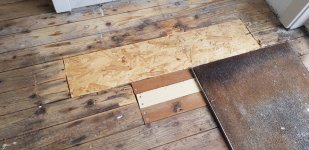
A few floor boards were rotten due to leakage from and old refrigerator long ago. Had some OSB and oak scraps laying around to fill the gaps.

[attachimg=5]

[attachimg=6]

And the new subfloor boards in.

[attachimg=7]

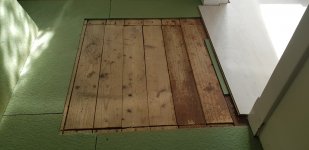
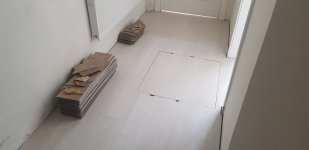
In the hallway there's a hatch to access the crawlspace underneath. Well, hatch is a big word, just a hole cut in the floor boards. But I had to keep this hatch accessible for future maintenance tasks.

[attachimg=8]

So I installed the white laminate floor and made a hatch that can easily be pried out.

[attachimg=9]

The entire laminate floor done. Now I can place the good stuff on top of it.

[attachimg=10]

[attachimg=11]
 

Attachments

  • 304-20210426_103232.jpg
    304-20210426_103232.jpg
    339 KB · Views: 243
  • 305-20210428_124234.jpg
    305-20210428_124234.jpg
    198 KB · Views: 240
  • 306-20210428_124248.jpg
    306-20210428_124248.jpg
    242.8 KB · Views: 245
  • 307-20210428_124256.jpg
    307-20210428_124256.jpg
    211.9 KB · Views: 251
  • 303-20210425_152953.jpg
    303-20210425_152953.jpg
    259 KB · Views: 233
  • 302-20210425_144130.jpg
    302-20210425_144130.jpg
    477.5 KB · Views: 243
  • 301-20210425_133226.jpg
    301-20210425_133226.jpg
    391.9 KB · Views: 239
  • 300-20210425_121808.jpg
    300-20210425_121808.jpg
    272.6 KB · Views: 245
  • 299-20210423_205848.jpg
    299-20210423_205848.jpg
    235.7 KB · Views: 241
  • 298-20210423_205826.jpg
    298-20210423_205826.jpg
    273.2 KB · Views: 241
  • 297-20210423_205805.jpg
    297-20210423_205805.jpg
    261 KB · Views: 244
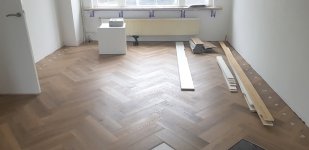
And finally time to put in the nice floor. Have been waiting months to get to this point.

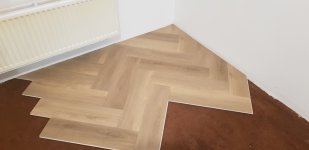
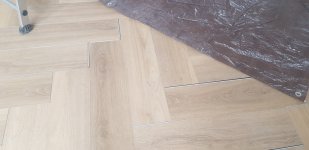
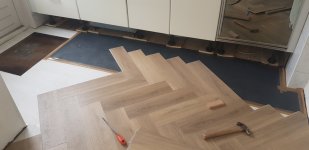
You start out by making the starting points, literally. Then with these points in place you can progress with the rest of the floor. The boards have a Left and a Right direction, so you have to alternate them constantly. This makes it quite a bit of a challange compared to normal, straight laminate. It also means you have to cut a lot more boards to size, and always think in angles. I have to admit, I have screwed up quite a few boards by cutting them in the wrong direction.

[attachimg=1]

But once you have a starting point, progression goes quickly. Only thing that takes a lot of time is cutting the boards along the wall to the proper size.

[attachimg=2]

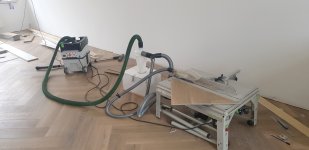
It was raining outside that day, so I had to put the CS70 inside for cutting. I don't really like that, but what can you do.

[attachimg=3]

I decided to let everything run over the entire floor, also in the kitchen. Normally, wooden laminate isn't the best choice in the kitchen because it is not waterproof. But PVC laminate is. I only put in a patch of plastic stucloper in front of the sink to protect the floor under it.

[attachimg=4]

Almost done now.

[attachimg=5]

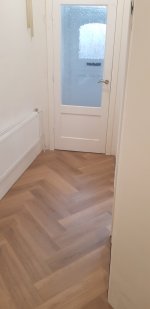
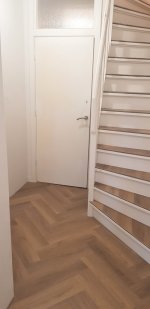
And the hallway also.

[attachimg=6]

[attachimg=7]

[attachimg=8]
 

Attachments

  • 315-20210529_202944.jpg
    315-20210529_202944.jpg
    217.7 KB · Views: 921
  • 314-20210529_202936.jpg
    314-20210529_202936.jpg
    199.8 KB · Views: 909
  • 313-20210529_202922.jpg
    313-20210529_202922.jpg
    228.1 KB · Views: 909
  • 312-20210430_132140.jpg
    312-20210430_132140.jpg
    231 KB · Views: 923
  • 311-20210429_152239.jpg
    311-20210429_152239.jpg
    270.1 KB · Views: 915
  • 310-20210429_150122.jpg
    310-20210429_150122.jpg
    266.3 KB · Views: 926
  • 309-20210429_103336.jpg
    309-20210429_103336.jpg
    261.1 KB · Views: 903
  • 308-20210428_130747.jpg
    308-20210428_130747.jpg
    247.2 KB · Views: 915
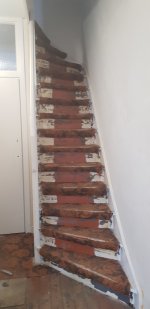
The stairs needed a lot of work. Originally it had carpet on it, but this 70's pattern had to go. I thought it was nice if it also had PVC laminate on it.

What a work, the stairs was in a very used shape, a few layers of paint on it, carpet, and carpet glue. Especially the glue was very hard and difficult to remove. Also a few nails sticking out from the underside. Never knew that with the carpet on it, but the original installers in 1938 didn't give a hoot and used nails that were a few mm too long so they stuck out in some places. I had to cut those points all away. The treads were also severely cupped in the middle due to the pressure of 80 years of use. And 80 years worth of dings and scratches.

I think it took me 12 hours of sanding to make this all better.

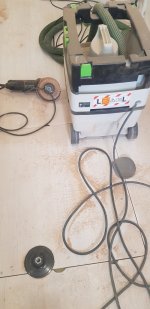
And just this week I lend the RAS to a carpenter buddy of mine. I thought I could do it with the Rotex, but it wasn't up to the task. I resorted to the EHL 65 planer and the Protool angle grinder with a flap disc. That worked faster, but it became very messy again. I have a nack for that.

I had removed some of the carpet when I painted the sides of the stairs, I didn't yet knew then what to do with it.
[attachimg=1]

Removed the last carpet from the treads. Then the sanding began. Horror job. Difficult to access all spots, and the dried up glue was very hard. This is what happens to your paper if you hit a nail.
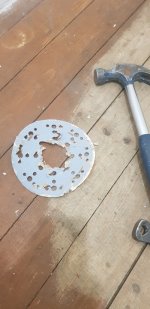
[attachimg=2]

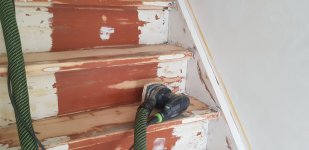
Slowly but surely I go on. The DTS was best here to get into all the corners.

[attachimg=3]

Close up of a tread. The dark grey stuff is glue, and it is as hard as concrete.
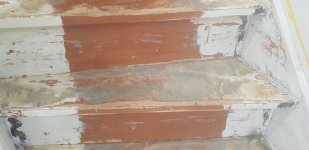
[attachimg=4]

I could not get it away with the Rotex so I switched to the angle grinder. This became very messy, and then tried the planer in the spots where I could reach. Eventually it worked out, after many hours of sanding. Removed most of the cupping, essential when you want to put laminate on it.
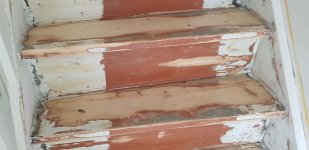
[attachimg=5]

[attachimg=6]

The tools used.

[attachimg=7]

[attachimg=8]

The entire hallway was filled with a layer of dust. Good I had a respirator.
[attachimg=9]

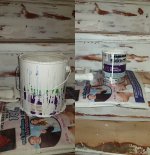
Then it was time to put the first groundcoat on it. After this, I had to fill all the dings and holes with putty and sand it all again. I used Sigma oil based primer and when that ran out, I switched to Sikkens.
[attachimg=10]

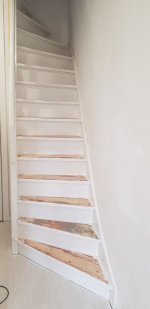
But in the end it is worth all the effort. Quite the difference.
[attachimg=11]


Attachments

  • 326-20210506_134305.jpg
    326-20210506_134305.jpg
    204.3 KB · Views: 906
  • 325-20210522_121932.jpg
    325-20210522_121932.jpg
    751.5 KB · Views: 928
  • 322-20210504_145049.jpg
    322-20210504_145049.jpg
    347.8 KB · Views: 888
  • 321-20210504_145031.jpg
    321-20210504_145031.jpg
    330.4 KB · Views: 912
  • 320-20210504_145028.jpg
    320-20210504_145028.jpg
    316.1 KB · Views: 894
  • 324-20210506_111249.jpg
    324-20210506_111249.jpg
    301.8 KB · Views: 884
  • 323-20210505_104921.jpg
    323-20210505_104921.jpg
    314.6 KB · Views: 877
  • 319-20210504_133809.jpg
    319-20210504_133809.jpg
    332.8 KB · Views: 909
  • 318-20210504_133803.jpg
    318-20210504_133803.jpg
    235.6 KB · Views: 915
  • 317-20210322_145250.jpg
    317-20210322_145250.jpg
    316.4 KB · Views: 900
  • 316-20210322_131522.jpg
    316-20210322_131522.jpg
    246.3 KB · Views: 901
That looks really nice Alex. Great job.

Are you keeping the house when you are done?

Ron
 
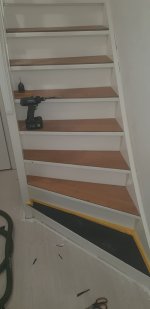
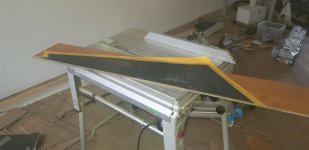
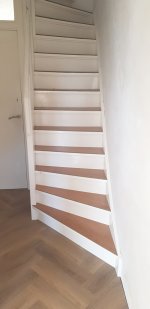
Now I had to install laminate on the treads.

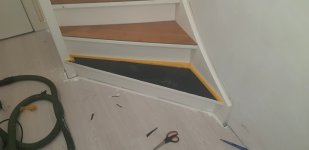
To get the exact shape of the tread I made a template out of "stucloper", as we call it, which is a type of plastic to protect the floor when you work.

First you cut it so it covers the tread entirely, except on the edges, and then tape up the edges exactly along the sides. This way it is easy to get the right shape. There are more ways to do this, but this is what worked for me.
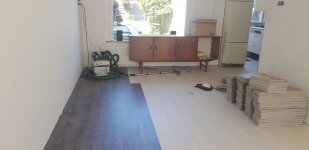
Because of the PVC laminate's thin nature, I first had to install a sub board of normal laminate again, or it would become a mess.

[attachimg=1]

[attachimg=2]

You take the template and stick it on a board, and transfer the shape with a pencil. And then you cut it. Most treads were bigger than a single board so I had to join two together.

[attachimg=3]

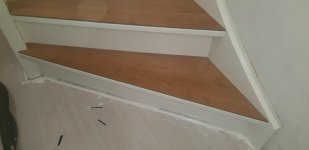
And this is how it looks installed. Not glued together yet as I need the treads as a template for the next layer.

[attachimg=4]

And this layer is done. It doesn't look half bad, but because it is wood it is very noisy to walk on, and it is also very smooth and slippery, no grip at all and pretty dangerous to walk on actually.

[attachimg=5]

[attachimg=6]

So on to the final layer.

Now I have to use the treads I made previously as template. I cut the PVC boards to size and put them on it to cover it completely, put the wooden template on top, and cut out the shape with the MultiMaster. This worked out fine and gave me very sharp edges.

[attachimg=7]

[attachimg=8]

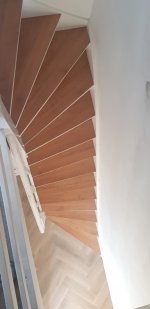
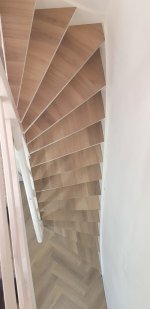
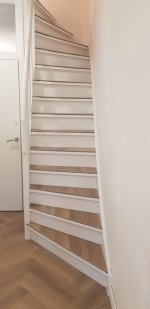
And the new PVC top layer of the tread installed. This looks great, and is very nice to walk on because it has a very pronounced texture that gives you good grip. It is also very quiet. Now I can glue it all together.

I love how the lighting differences between top and bottom give it this gradient from yellowish on the bottom to reddish on top.

[attachimg=9]

[attachimg=10]

[attachimg=11]
 

Attachments

  • 334-20210530_152519.jpg
    334-20210530_152519.jpg
    307.6 KB · Views: 866
  • 335-20210531_203033.jpg
    335-20210531_203033.jpg
    231 KB · Views: 862
  • 336-20210602_205053.jpg
    336-20210602_205053.jpg
    218.6 KB · Views: 857
  • 337-20210602_205055.jpg
    337-20210602_205055.jpg
    199.8 KB · Views: 865
  • 333-20210530_144339.jpg
    333-20210530_144339.jpg
    285.1 KB · Views: 876
  • 332-20210530_130315.jpg
    332-20210530_130315.jpg
    217.2 KB · Views: 875
  • 331-20210530_130244.jpg
    331-20210530_130244.jpg
    215.7 KB · Views: 860
  • 330-20210525_205435.jpg
    330-20210525_205435.jpg
    233.1 KB · Views: 873
  • 329-20210525_204123.jpg
    329-20210525_204123.jpg
    292.9 KB · Views: 860
  • 328-20210525_203822.jpg
    328-20210525_203822.jpg
    205.8 KB · Views: 852
  • 327-20210525_203811.jpg
    327-20210525_203811.jpg
    222.2 KB · Views: 889
rvieceli said:
That looks really nice Alex. Great job.

Are you keeping the house when you are done?

Ron

Hi Ron, Thanks.

It is not my property, long story because the inheritence had to be divided. I'd like to keep on living in it, but it looks like I'm going to get kicked out because I had no work thanks to my government's lockdown from december to may and could not pay my rent. Court case against me is this friday and I could be evicted in a matter of days.

Until then, I keep the faith it is going to be alright.

I worked my ass off last year because I had a lot of work. Government imposes lockdown, and all work falls away for me. 3 clients withdrew because their businesses were also shut down. Early may the lockdown is lifted, I get 10 jobs in 2 weeks time which will keep me occupied for the next 6 months. But the damage is done.

 
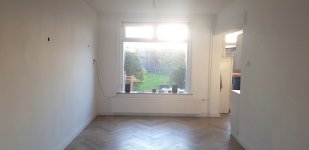
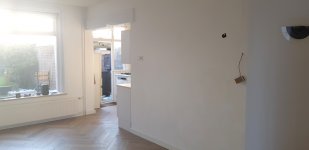
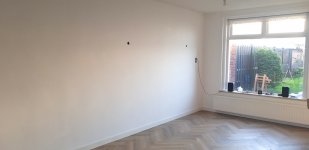
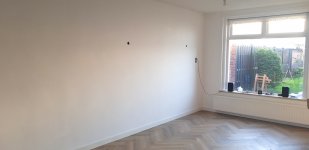
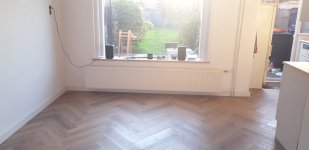
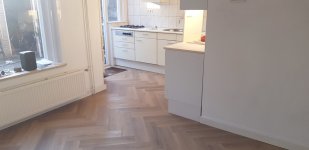
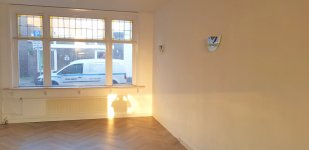
And it basically all finished now. Just a bit of paint work here and there, like the radiator and a bit of touching up on a wall.

[attachimg=1]

[attachimg=2]

[attachimg=3]

[attachimg=4]

[attachimg=5]

[attachimg=6]

[attachimg=7]

[attachimg=8]

[attachimg=9]

[attachimg=10]
 

Attachments

  • 340-20210602_204046.jpg
    340-20210602_204046.jpg
    212.4 KB · Views: 850
  • 339-20210602_204032.jpg
    339-20210602_204032.jpg
    264.1 KB · Views: 866
  • 338-20210602_204029.jpg
    338-20210602_204029.jpg
    261.5 KB · Views: 849
  • 337-20210602_203246.jpg
    337-20210602_203246.jpg
    231.1 KB · Views: 875
  • 336-20210602_203240.jpg
    336-20210602_203240.jpg
    262.3 KB · Views: 849
  • 335-20210602_203234.jpg
    335-20210602_203234.jpg
    221.9 KB · Views: 836
  • 334-20210602_203234.jpg
    334-20210602_203234.jpg
    221.9 KB · Views: 846
  • 333-20210602_203226.jpg
    333-20210602_203226.jpg
    203.1 KB · Views: 852
  • 332-20210602_203217.jpg
    332-20210602_203217.jpg
    221 KB · Views: 851
  • 270-20210602_192830.jpg
    270-20210602_192830.jpg
    254.8 KB · Views: 845
Alex said:
rvieceli said:
That looks really nice Alex. Great job.

Are you keeping the house when you are done?

Ron

Hi Ron, Thanks.

It is not my property, long story because the inheritence had to be divided. I'd like to keep on living in it, but it looks like I'm going to get kicked out because I had no work thanks to my government's lockdown from december to may and could not pay my rent. Court case against me is this friday and I could be evicted in a matter of days.

Until then, I keep the faith it is going to be alright.

I worked my ass off last year because I had a lot of work. Government imposes lockdown, and all work falls away for me. 3 clients withdrew because their businesses were also shut down. Early may the lockdown is lifted, I get 10 jobs in 2 weeks time which will keep me occupied for the next 6 months. But the damage is done.

OMG! All that time and money spent on this beautiful home-improvement and you don't own it, and even might be evicted? Just doesn't seem right. Best of luck!
 
Back
Top