Another holy bench.

RickyL

Member
Joined
Jun 13, 2016
Messages
68
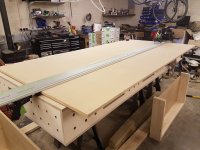
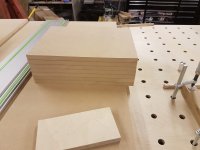
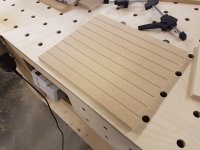
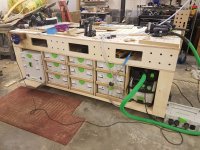
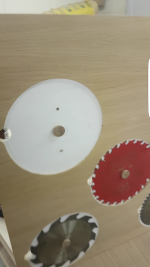
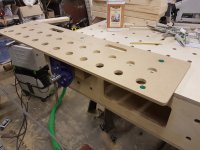
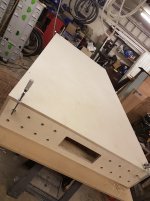
A little different from most Paulk style benches i've seen on here.

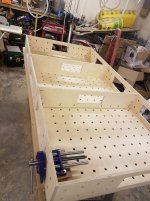
I was keen to have dogs on the side as well as the top.

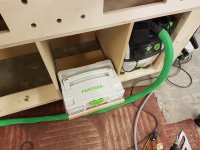
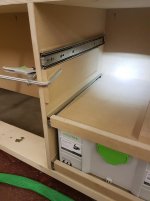
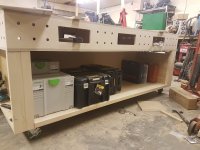
I'm going to build some storage underneath for the systainers.
View attachment 1

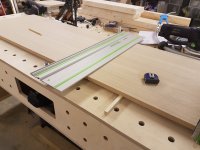
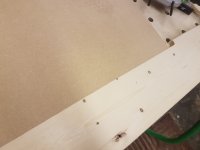
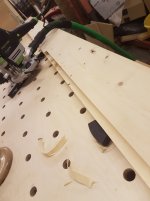
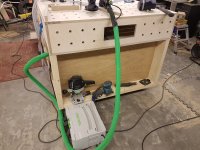
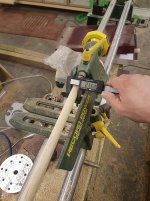
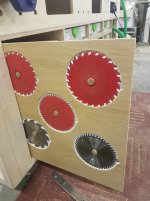
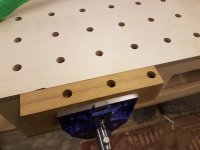
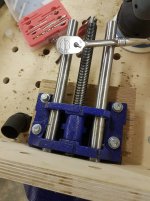
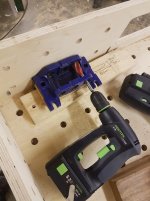
Drilling for the vice,
View attachment 2

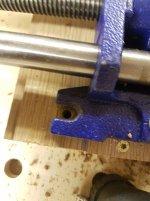
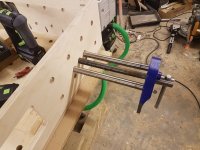
Vice fitted, I later realised I should have made better use of the side dogs.
View attachment 3

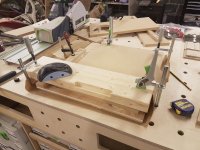
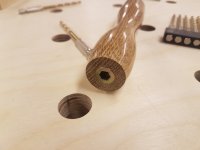
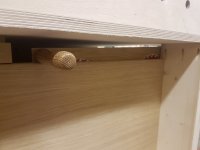
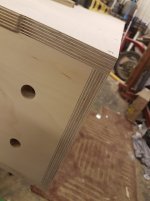
Mounted on Iroko and oak scraps I had laying around, I drilled and tapped for m8 bolts.
View attachment 4

Bolted on.
View attachment 5

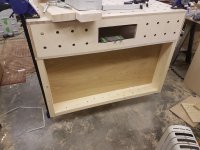
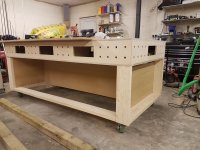
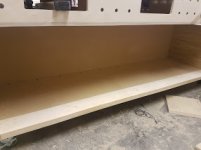
I didn't bother with a centre brace.
View attachment 6

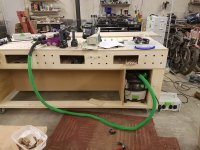
Ready to flip over, this was incredibly hard on my own on wobbly trestles.
View attachment 7

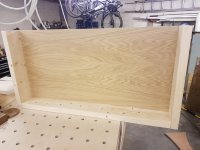
Trimming the edges with a flush bit.
View attachment 8

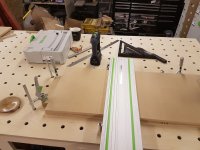
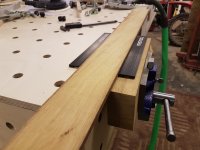
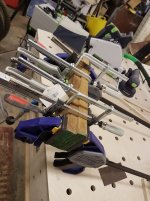
Making use of the new vice.
View attachment 9

A piece of iroko from the scrap bin to use for vice jaws. I had to freehand plane/sand it.
View attachment 10

I also lack decent clamps.
View attachment 11

Dogs cut in the jaws
View attachment 12

View attachment 13

Works Great
View attachment 14

I'll start making the stand and systainer storage tomorrow.


Attachments

  • 20161227_192714.jpg
    20161227_192714.jpg
    549.3 KB · Views: 564
  • 20161228_230513.jpg
    20161228_230513.jpg
    500.1 KB · Views: 535
  • 20161228_225043.jpg
    20161228_225043.jpg
    418.2 KB · Views: 325
  • 20161228_223945.jpg
    20161228_223945.jpg
    600.3 KB · Views: 426
  • 20161228_202559.jpg
    20161228_202559.jpg
    419 KB · Views: 301
  • 20161228_202559.jpg
    20161228_202559.jpg
    419 KB · Views: 345
  • 20161228_195557.jpg
    20161228_195557.jpg
    620.5 KB · Views: 330
  • 20161228_190556.jpg
    20161228_190556.jpg
    223.6 KB · Views: 345
  • 20161228_184928.jpg
    20161228_184928.jpg
    441.4 KB · Views: 421
  • 20161228_184638.jpg
    20161228_184638.jpg
    456.3 KB · Views: 12,651
  • 20161228_183903.jpg
    20161228_183903.jpg
    403.8 KB · Views: 338
  • 20161228_183622.jpg
    20161228_183622.jpg
    288.5 KB · Views: 364
  • 20161227_212628.jpg
    20161227_212628.jpg
    679.1 KB · Views: 452
  • 20161227_211709.jpg
    20161227_211709.jpg
    373.8 KB · Views: 466
Looks like you used the CNC Design Pro Jig to make the top yourself.  Was the accuracy of the jig up to your expectations?  I assume that you also used the 20mm Festool router bit to cut the holes.  Did you need to back the holes when you cut them?  Also, did you notice any slop creeping in as you used the jig over time?

Looks like CNC Designs only ships to UK addresses.  Anyone know how to get one shipped to the US?

I've also been looking at the parf guide system for making tops.  It includes everything needed for making the tops except the small parf dogs, while this kit requires me to buy the right size guide bushing and the bit.  With that, the CNC solution is a little less expensive, but not as dramatic as the price of the jig itself might suggest.  Any comments on that?
 
I have tried 3 ways.

My own system, loosely similar to the parf style. It was basically a gaint set square with a series of holes in it. It worked but required a lot of moving around and my drill was blunt.

I tried this jig and that works. Care needs to be taken though or you could get things wrong. To put all the holes in birch ply took around 2 hours none stop cutting.

The final way was simply a copying template with a 1/2" cutter and bearing This worked but was the most troublesome.

To do it in MDF is a little over half that time.

I have a handling account at work and would ship any over. I don't think it'd be worth it for just one though. I have never used the parf setup, but it would probably make more sense. Axminster are usually very good.

HarveyWildes said:
Looks like you used the CNC Design Pro Jig to make the top yourself.  Was the accuracy of the jig up to your expectations?  I assume that you also used the 20mm Festool router bit to cut the holes.  Did you need to back the holes when you cut them?  Also, did you notice any slop creeping in as you used the jig over time?

Looks like CNC Designs only ships to UK addresses.  Anyone know how to get one shipped to the US?

I've also been looking at the parf guide system for making tops.  It includes everything needed for making the tops except the small parf dogs, while this kit requires me to buy the right size guide bushing and the bit.  With that, the CNC solution is a little less expensive, but not as dramatic as the price of the jig itself might suggest.  Any comments on that?
 
As someone who has been looking at the Paulk Workbench I enjoying see the additions. Fantastic job and love the vice addition.

I'm buying the parf system because I can build an MFT top which I will use to build the Paulk Workbench. hose 2 tabletops will pay for it instead of of CNC services.
 
Mine isn't designed to move, (apart from on wheels around the shop) so weight is a good thing for me rather than hinderance.

I've been busy with other things today, but just had a couple of hours in the workshop.

The "legs", and cross brace. I put a back in. This side will be for hand tools. I'm not sure if I'm going to leave the other side open for drills etc when working. Putting them inside the bench with the smaller holes is awkward. I might end up putting draws in, but then they'll just get full of dust.
View attachment 1

How they will sit.
Because i've started using the bench, i'm getting used to the really high nature. I've decided to make my bench higher 1000mm. It was going to be 850mm but I much prefer this height. I'm not that tall, 6'.
View attachment 2

My holes are square at least. I don't want to cut into the top yet so have used spacers. I would like a 3d printed model for some low profile dogs.
View attachment 3

This is the "spine" of the bench. Underneath is going to be drawers one side and shelves the other for systainers.
View attachment 4

I'm not good at the drawing part. I quickly sketched this then started.
View attachment 5


Attachments

  • 20161229_171936.jpg
    20161229_171936.jpg
    447.8 KB · Views: 448
  • 20161229_200618.jpg
    20161229_200618.jpg
    698.3 KB · Views: 312
  • 20161229_183741.jpg
    20161229_183741.jpg
    586.5 KB · Views: 292
  • 20161229_180605.jpg
    20161229_180605.jpg
    631.4 KB · Views: 299
  • 20161229_180105.jpg
    20161229_180105.jpg
    606.8 KB · Views: 234
RickyL said:
I have tried 3 ways.

My own system, loosely similar to the parf style. It was basically a gaint set square with a series of holes in it. It worked but required a lot of moving around and my drill was blunt.

I tried this jig and that works. Care needs to be taken though or you could get things wrong. To put all the holes in birch ply took around 2 hours none stop cutting.

The final way was simply a copying template with a 1/2" cutter and bearing This worked but was the most troublesome.

To do it in MDF is a little over half that time.

I have a handling account at work and would ship any over. I don't think it'd be worth it for just one though. I have never used the parf setup, but it would probably make more sense. Axminster are usually very good.

...

Thanks for the very kind offer and the input.  I'd sort of settled on the parf setup anyway, but had forgotten that the DNC jig existed.  Maybe someday it (or something like it) will be available in the US.  Meanwhile, the parf guide it is.
 
I did a little bit more today.

I put a rebate in the bottom cross bar.
View attachment 1

The shelves will slot into this.
View attachment 2

On its wheels.
View attachment 3

Extractor in place.
View attachment 4

I then went ahead and cut the bases for the systainer drawers. Only to realise after thery aren't big enough. I should have made them a couple of 100mm bigger on the back edge to add storage.
At least its only cheap MDF.
View attachment 5


Attachments

  • 20161230_233442.jpg
    20161230_233442.jpg
    483.6 KB · Views: 229
  • 20161230_225621.jpg
    20161230_225621.jpg
    692.4 KB · Views: 1,964
  • 20161230_211955.jpg
    20161230_211955.jpg
    621.2 KB · Views: 1,350
  • 20161230_162029.jpg
    20161230_162029.jpg
    469 KB · Views: 181
  • 20161230_161930.jpg
    20161230_161930.jpg
    243.8 KB · Views: 218

Attachments

  • 20161231_130718.jpg
    20161231_130718.jpg
    542 KB · Views: 212
  • 20161231_134554.jpg
    20161231_134554.jpg
    551.2 KB · Views: 234
  • 20161231_144243.jpg
    20161231_144243.jpg
    783.6 KB · Views: 232
  • 20161231_152345.jpg
    20161231_152345.jpg
    284 KB · Views: 222
  • 20161231_161142.jpg
    20161231_161142.jpg
    866.9 KB · Views: 408
Just about finished, I want to use the sides as hand tool storage.

But I didn't get a place to put my track saw, or the router. The systainers didn't fit on the "front side" that said, i'll never push the bench upto the wall, so might just add storage on the other side.

Sanders are under the vice, I have a 28mm gap if I use the same width shelve. The side can be 18mm, but that still leaves 10mm. I'd like to use all the space I can, but not sure what I could put in there. I thought about something for saw blades,

View attachment 1

Other side.
View attachment 2
View attachment 3

View attachment 4


Attachments

  • 20170101_175819.jpg
    20170101_175819.jpg
    765.4 KB · Views: 286
  • 20170101_163653.jpg
    20170101_163653.jpg
    595.9 KB · Views: 504
  • 20170101_163240.jpg
    20170101_163240.jpg
    14.5 KB · Views: 195
  • 20170101_175810.jpg
    20170101_175810.jpg
    893.3 KB · Views: 4,964
I decided to use the spare 10mm I had for blade storage. I dug out some scrap 4mm. Made a quick template with the jigsaw and round cutter. (do festool make a trammel for the 1400?

Turning down some oak into a dowel.
View attachment 1

Clamping the 2 pieces of 4mm together. I didn't take any other pictures because it was only 30 mins work.
View attachment 2

I parted them so far then used a pull saw to finish the cut. I need to make some longer vice jaws.
View attachment 3

This again was scrap, it was the first thing I ever turned on the lathe. Kind of good to put it to use.

View attachment 4
I purchased some 5mm magnets to fix my T18 chuck but they were too large, so I used them for this.

View attachment 5

Handle so you can move it in and out.
View attachment 6

Works pretty well.
View attachment 7


Attachments

  • 20170103_221616.jpg
    20170103_221616.jpg
    518.4 KB · Views: 235
  • 20170103_224508.jpg
    20170103_224508.jpg
    595.2 KB · Views: 230
  • 20170104_212858.jpg
    20170104_212858.jpg
    22 KB · Views: 212
  • 20170104_223422.jpg
    20170104_223422.jpg
    219.1 KB · Views: 213
  • Screenshot_20170104-231006.png
    Screenshot_20170104-231006.png
    1.1 MB · Views: 229
  • 20170104_223935.jpg
    20170104_223935.jpg
    298.5 KB · Views: 190
  • 20170104_223920.jpg
    20170104_223920.jpg
    287.8 KB · Views: 256
[member=61604]RickyL[/member]

Really nice job on the bench!  It looks massive!  What are the overall dimensions?

Thanks for posting all the photos.  Lots of great ideas there!

Mike A.
 
Thanks,

Its a full sheet of 8' x 4'. Or over here 2440 x 1220. With a little cut off when I did the holes. Finished size is around 2420 x 1210mm now.
It is however higher. I figured out I like working higher when assembling it. Its much higher than a normal bench at around 39" or just under a meter.
 
Back
Top