You are using an out of date browser. It may not display this or other websites correctly.
You should upgrade or use an alternative browser.
You should upgrade or use an alternative browser.
Brines M10-A10 MLT Speaker Build.
- Thread starter iamnothim
- Start date
iamnothim said:Wuffles said:Can you get a photo of the re-saw with your third hand please? I'm curious. Not about the third hand, that's a given, but about the re-saw.
Like this?
[attachimg=1]
Oh hello. NO HANDS!
Beautiful work.
Sparktrician
Member
That's going to look spectacular once you get the finish on it. Good choice!
Cheese
Member
Why did you have to vacuum bag the burl but not the quilted maple?
iamnothim
Member
- Joined
- Feb 5, 2014
- Messages
- 1,435
Hi CheddarCheese said:Why did you have to vacuum bag the burl but not the quilted maple?
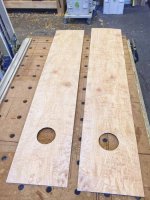
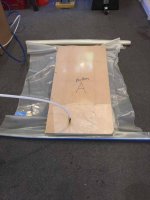
Veneers are 0.50mm thick. They are wavy with bubbles and do not lye flat. The re-sawn quilted maple is 3.0mm thick and board flat.
As such I can use clamps and a caul. If I bagged the assembly without the sides the press would crush it.
The sides get tiger maple veneer. I will bag those before assembly. Note in the photo small index blocks to keep the veneer in position while cauls are aligned and it is loaded into the bag and . The blocks are applied with a dab hot melt glue. The back also get's veneer but will be assembled before the veneer is applied. With the sides on, the assembly should be stout enough to bag. I'm debating it. I would hate to come out and find a bunch of pancaked boards.
[attachimg=1]
Attachments
Cheese
Member
I like the idea of the index blocks alot. As soon as I saw the little blocks I thought "he's making his life easier"! Using the bag without the blocks could be a hit or miss situation.
Cheese
Member
Also Luke, what are you using for glue, and is the same glue used for both the bag and the caul method?
iamnothim
Member
- Joined
- Feb 5, 2014
- Messages
- 1,435
Sparktrician said:That's going to look spectacular once you get the finish on it. Good choice!
I hope you are right [member=7493]Sparktrician[/member]. aka Sparky
(Every electrician I've ever known was nicknamed "Sparky")
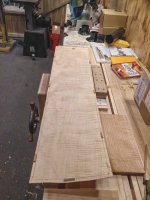
The quilted has a very faint pink color, where the tiger is just white. Hence, I think it needs a dye to equalize the color and make the grain pop.
The formula I used for the craftsman lamp is General Finishes water based dye.
2 parts Light Brown
1 part Amber
1/4 part Cinnamon
It's the dark part on the test board. The light side of the test board is diluted by half. I like it lighter but the Amber came out too strong. So I will cut the Amber in half and see what I get. I've also used the same recipe except substituting Orange for the Amber. I prefer a touch of the Amber tone. I tend not to like straight brown.
I with top coat with Deft satin finish.
Comments and suggestions are always welcome.
[attachimg=1]
Attachments
iamnothim
Member
- Joined
- Feb 5, 2014
- Messages
- 1,435
Cheese said:I like the idea of the index blocks alot. As soon as I saw the little blocks I thought "he's making his life easier"! Using the bag without the blocks could be a hit or miss situation.
I learned this from The Master Paul Schurch.
iamnothim
Member
- Joined
- Feb 5, 2014
- Messages
- 1,435
Cheese said:Also Luke, what are you using for glue, and is the same glue used for both the bag and the caul method?
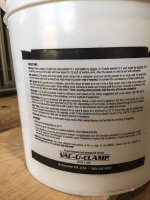
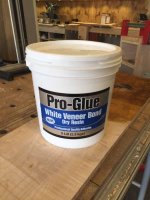
For burl I use Pro-Glue powder because burl is porous and this glue doesn't stain as much as wood glue. However I Hate The Stuff. I've tried both mixing methods and there's always drama with clumps. Even with a drill and mixing paddle.
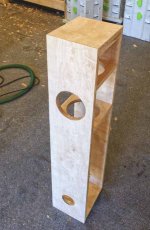
Note: It was a darn good thing I took the burl off. I neglected to sand the finish off the plywood and over time, based upon how easy it was to remove, it would have lifted. Again, I knew better but I always get crazy during glue up.
With the tiger maple I will use Titebond III. The veneer isn't porous and the application is much easier.
[attachimg=1]
[attachimg=2]
Attachments
iamnothim
Member
- Joined
- Feb 5, 2014
- Messages
- 1,435
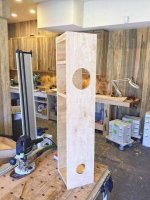
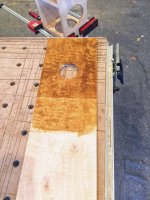
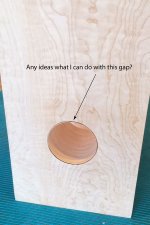
Re: Gap between veneer and face.
I can't figure out how to make a bezel that would look decent. I have a set of Mohawk Finishes wax fill sticks. I could shoot a coat of finish then fill with a wax color that is close. The leveling scraper works great. Either way there will be a noticeable ring.
Ideas???
[attachimg=1]
I can't figure out how to make a bezel that would look decent. I have a set of Mohawk Finishes wax fill sticks. I could shoot a coat of finish then fill with a wax color that is close. The leveling scraper works great. Either way there will be a noticeable ring.
Ideas???
[attachimg=1]
Attachments
iamnothim said:Re: Gap between veneer and face.
I can't figure out how to make a bezel that would look decent. I have a set of Mohawk Finishes wax fill sticks. I could shoot a coat of finish then fill with a wax color that is close. The leveling scraper works great. Either way there will be a noticeable ring.
Ideas???
[attachimg=1]
Bearing guided bit in a router?
Jamie_MA said:
I was thinking that too, but perhaps making something out of a bit of the maple and sticking it on the front. I couldn't work out the "gap" positive or negative to the ply carcass so decided, why not just bevel it.
iamnothim
Member
- Joined
- Feb 5, 2014
- Messages
- 1,435
Jamie_MA said:
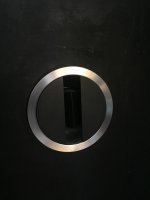
Interesting. I have an inside port.....
iamnothim
Member
- Joined
- Feb 5, 2014
- Messages
- 1,435
Wuffles said:Bearing guided bit in a router?
I looked. A bevel will make it worse. I could try to make the hole large with a flush bit, but I don't like the risk reward...
Cheese
Member
Similar threads
- Replies
- 0
- Views
- 255