RNEMTP said:
Well, as people have stated on here, it takes a little getting used to. While practicing on some scrap I had several alignment issues. Most, if not all were user error. I find the trim stops to be cumbersome and just another way to introduce error. I’ll keep them around because I bought them with the kit and someday they might become useful. It took a little time to align the cursor correctly. The instructions in the supplemental guide were ambiguous. It shows a diagram of the misalignment and tells you to move the cursor left or right. Is it left or right facing the tool or as you would hold it? The picture in the guide shows the cursor window facing you opposite of how you would hold it. I’m really enjoying it though and I think it opens up a lot of possibilities for projects. As I become more familiar with the tool, I might even take a swing at the zig zag chair.
I bought all the extras with my DF500 and only regret getting the cross stops. The trim stop is superb and not difficult to set up once you have had a practice go. I find it brilliant for doing multiple slots in the ends rails. It is also very useful for putting slots in rails or styles at right angles to the long edge of the piece - the sort of thing one might need for face frames where there are intermediate rails (front of a drawer unit say).
One gets more accurate the more you use the Domino. Take a firm grip on the body with one hand and firmly press the head of the machine against the work piece with the other ensuring that both the face of the fence is flat against the piece. Plunge slowly, say about 3 seconds per cut, and always use dust extraction.
When fitting a cutter do not use any force to tighten it with the spanner - just nip it up lightly. I occasionally put one drop of light oil on the end of the drive shaft thread whilst changing cutters. If I could find where I put it I would use some with graphite instead.
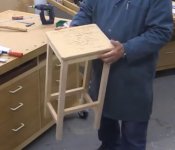
The DF 500 is perfect for most types of furniture. I have made a number of chairs and stools and they are all very strong with no sign of joint weakening. PM me if you would like the plans for either a chair or a simple stool. If you are new to the tool then I would recommend making my workshop stool as it can be made from anything you have lying around.
[attachimg=1]
Peter