Michael Kellough
Member
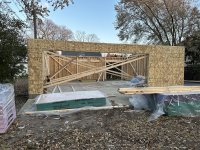
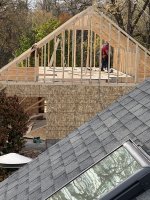
Looks like plenty of extra space for lightweight storage above. Gonna be a nice sized shop.
Tom Gensmer said:Cheese,
Looks like you're making great progress! I'm curious what you have planned for your insulated wall assembly?
I'm in the Minnetonka area with an existing 28' x 26' space. Original walls were 2x4, I've furred them out to 2x6 depth, currently working on installing R-21 mineral wool batts in the walls, and am working with the local code enforcement official on identifying an appropriate peel-and-stick membrane to use in conjunction with TimberBoard exterior insulation. Really excited to finally see these exterior wood fiber insulation products find their way to North America, looking forward to incorporating them into my remodeling process.
You had mentioned metal working tools, are those just high amperage single phase machines or will you be installing a phase converter for three phase?
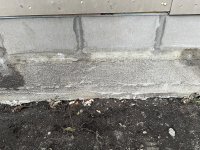
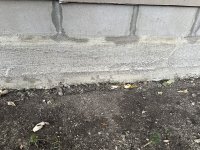
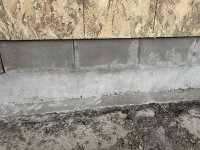
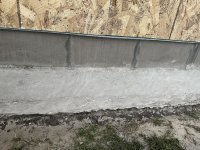
FestitaMakool said:Wow, what a tedious job with insulation of the concrete blocks. However, nicely done [smile]
[member=2726]Tom Gensmer[/member] too:
I’m using the TimberBatt, well in our version, it looks the same. Usually in new builds there’s the regular mineral wool. However my reason is restoring and remodelling an old house with none real chance of adding the mandatory plastic foiling inside and the breathable windstopper outside. Reason is that the TimberBatt is absorbing any condensation thus not drain condensed water down to the horizontal framing..(and releases the moisture slowly too) which mineral based insulation will do if not near airtight sealed wall. On the plus side: The wood based insulation is a dream to work with: No itching, nice smell and is fairly easy to handle.
I think you have too: Bitumen impregnated boards for wind proofing and moisture resistant 1/2” thick. This is also what I use, as it also have breathable qualities, which are what any skilled carpenters advise of when restoring old buildings without complete tear down to the bone..
If you have the chance Cheese, check pricing and recommendations if you still have time.
(Though your building new.. and can “easily” follow regulations and recommendations)
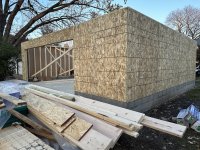
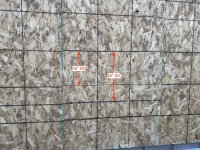
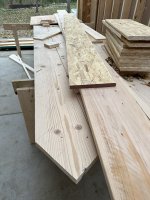
bobtskutter said:Why does the OSB on the outside surface appear to be in roughly 2' x 2' sections with sealant between the boards, but the inside surface appears to be 8x4 sheets?
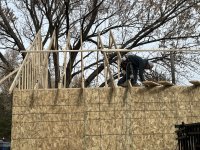
Michael Kellough said:Those guys are fast!
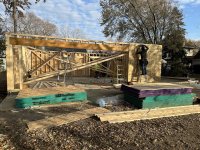
What is on the studs on the left side of the garage door opening? Looks like Sheetrock.
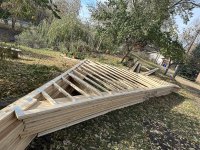
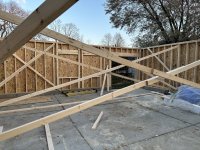
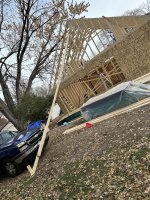
Michael Kellough said:The varied spacing of the trusses is to accommodate roof sheathing?
I see two trusses are moved over a couple inches.
I guess if all the “slack” was taken out by moving just one truss the span between trusses would be too much and you’d have to consider buying an additional truss or nailing a bunch of blocking? A couple sheets of plywood waste must cost a lot less.
FestitaMakool said:I also liked the temporary lumber rack inside!