Fences and stops

tjbnwi

Member
Joined
May 12, 2008
Messages
7,064
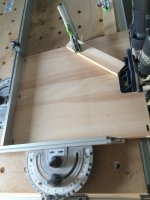
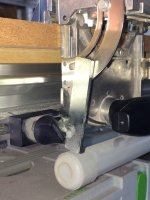
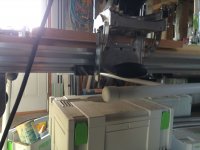
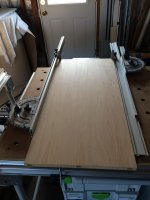
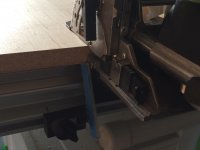
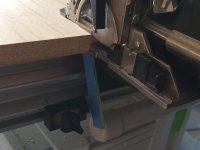
Using the fences and stops to locate Domino mortices.

Tom
 

Attachments

  • IMG_4092.jpg
    IMG_4092.jpg
    595.1 KB · Views: 589
  • IMG_4094.jpg
    IMG_4094.jpg
    1.2 MB · Views: 595
  • IMG_4095.jpg
    IMG_4095.jpg
    1.3 MB · Views: 494
  • IMG_4098.jpg
    IMG_4098.jpg
    1.6 MB · Views: 502
  • IMG_4101.jpg
    IMG_4101.jpg
    1.1 MB · Views: 459
  • IMG_4099.jpg
    IMG_4099.jpg
    783.1 KB · Views: 394
  • IMG_4100.jpg
    IMG_4100.jpg
    385.2 KB · Views: 380
  • IMG_4102.jpg
    IMG_4102.jpg
    1.3 MB · Views: 400
  • IMG_4103.jpg
    IMG_4103.jpg
    1.3 MB · Views: 417
Great idea...thanks for the pics. Would not have thought to put the stop flag in the side groove.  [thumbs up] [thumbs up] [thumbs up] [thumbs up]
 
[member=4105]tjbnwi[/member] if I understand this correctly you use the domino pins for the end mortises, then the stop for the center?

So to make unhanded panels the center stop needs to be dead-on precise in the middle of the panel, offset for the width of the Domino itself. Is this correct?

RMW
 
Richard/RMW said:
[member=4105]tjbnwi[/member] if I understand this correctly you use the domino pins for the end mortises, then the stop for the center?

So to make unhanded panels the center stop needs to be dead-on precise in the middle of the panel, offset for the width of the Domino itself. Is this correct?

RMW

Yes the pins for the end mortices.

The center mortice is laid out on the mortice center line. The picture with the board clamped to the MFT holding the Domino in place frees up the hands to get the stop set, you can see the pencil line. You can set up as many stops as you need for the panel.

Tom
 
Back
Top