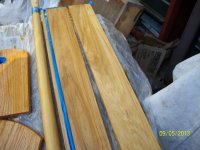
Finishing before or after assembly

HowardH

Member
Joined
Jan 23, 2007
Messages
1,572
I am going to build a small open top box  - about 200mm square by 100mm or so high as a "catch all" box for wallet, keys, coins, etc.  I plan on using highly figured wood and want to use lacquer and then polish it to a high gloss using the method shown by Sedge in his Festool Live video. With such small pieces, I was wondering if I should cut all the pieces and finish them first before assembling the box? My thinking is I could lay them all out on a table where it would be much easier to do the polishing vs. trying to do it after the box is glued up. With such small pieces, I would probably double-sided tape them to the table to prevent them from sliding around while polishing. Or would I be better off doing the construction first and applying the finish later?
 
I'd spray after assembly to get the unified seams.  Although polishing inside a hard edged box is definitely a skill builder and falls into dremel/die grinder territory and not sander.  Buffing can be done by hand for the most part.

If the box is more of a captured bottom style and it's expected that the panel floats, then spray before assembly.

So... it depends, on the one that best looks intentional.
 
If you want the same level of finish both inside & outside, I’d pre-finish and then assemble. If you  only want the outside polished, I’d assemble and then finish.
 
I would pre-finish the interior only, for the reasons you gave.  And finish the exterior after assembly. 

Alternatively you could line the interior with mohair or velvet (real mohair is very hard wearing and is made from wool).

I would be inclined to adhere mohair fabric to picture framer’s mat board and cut to size for the bottom.  That is the part that will experience the most wear and the cardboard could be removed and replaced with new. 

You can also find matboard with fabric already adhered from the factory.  But that fabric is not designed for wear.  It is easier, but would not stand up to daily use.

Information about mohair fabric:
https://overstockupholsteryfabric.c...ric-why-is-it-the-preferred-textile-for-decor

Note:  You only need the smallest off-cut—what an upholstery shop would throw in the bin.  You might visit an upholstery shop to see if they have any off cuts.

For leather, look for the book binding leather.  It is very thin and easy to work.  It is sold in small quantities for book binding.  You can find these on line.
 
For the ultimate you can apply the first coat of finish and then lightly sand before you cut out the parts. This will reduce tearout and scratches while cutting and handling the stock.
 
Packard said:
I would pre-finish the interior only, for the reasons you gave.  And finish the exterior after assembly. 

Alternatively you could line the interior with mohair or velvet (real mohair is very hard wearing and is made from wool).

I would be inclined to adhere mohair fabric to picture framer’s mat board and cut to size for the bottom.  That is the part that will experience the most wear and the cardboard could be removed and replaced with new. 

You can also find matboard with fabric already adhered from the factory.  But that fabric is not designed for wear.  It is easier, but would not stand up to daily use.

Information about mohair fabric:
https://overstockupholsteryfabric.c...ric-why-is-it-the-preferred-textile-for-decor

Note:  You only need the smallest off-cut—what an upholstery shop would throw in the bin.  You might visit an upholstery shop to see if they have any off cuts.

For leather, look for the book binding leather.  It is very thin and easy to work.  It is sold in small quantities for book binding.  You can find these on line.

Actually, you are very close to the plan. My wife has an old Louis Vuitton purse she wants to have cut into pieces and use that on the interior to line the bottom and up the inside of the box sides.  I'm only concerned about finishing the exterior and the top edges. We know a high end shoe shop who would be able to cut and glue in the pieces. 
 
That leather should add a level of elegance and durability.

I suggested adhering the leather to a board and then inserting the board.  I’ve tried to install box liners and I can only say that I would not try again to install the fabric directly to the interior.  I ended up with creases, wrinkles, and alignment issues.

It is far easier to fit a board to size and then adhere the leather.  You can use mat board (most are called “archival” and ar ph neutral), or very light gage Baltic birch.  You can get small pieces of that plywood at hobby shops.

I’m not sure which will last longer.  The Baltic birch is stronger, but not ph neutral.  The mat board is just cardboard and is ph neutral.  I would use the mat board just because you can trim the leather and the board at the same time using a sharp utility knife (use a fresh blade).  I like 3M 77 adhesive for this application. Buy it from Walmart, cheaper that Amazon.com.
 
I like finishing the project beforehand that way the glue causes less problems and it's easier to scrap off.
Then I can detail the project as needed.
YMMV

View attachment 1
 

Attachments

  • DFBC950B-7A2A-4BA9-B4BF-A71DFCFAF8F9.jpeg
    DFBC950B-7A2A-4BA9-B4BF-A71DFCFAF8F9.jpeg
    1.4 MB · Views: 83
If you want to make the bottom padded, then go to the Dr. Scholl’s section of your pharmacy (foot care).  They sell sticky-back foam sheets meant to cushion bunions.  Tje sheets are about 6” square, so this is for smaller projects. 

Stick the foam onto the backer board, then spray the foam and the leather back with 3M 77 adhesive and glue down.  You will have to leave about 1/2” extra leather all around so you can wrap the edges and glue that down. It does make a classy presentation. 

There are probably cheaper places to find the foam, but I never needed more than one sheet, so it did not pay to shop around.
 
I think I found my answer. I very expensive answer but a fun one.  Lamello Zeta P2 Tenso connectors.  Can pre-finish and then snap them together. I like it! 
 
I have a very similar question to OP, except for large frameless cabinets. I'm building a four-piece bathroom vanity cabinet set right now, from hardwood veneer plywood that I'll be clear coating. I'd like to finish the inside and out, since it will be in the bathroom and subject to humidity. I'll spray with HVLP, but I've never had good luck spraying the inside of enclosed cabinets. The spray ends up bouncing around the inside edges (especially the inside corners) and doesn't adhere well. So my plan is to finish them after I've applied veneer, still in their panel form. Glue-up might pose some issues, but I'll scotchbrite those surfaces and use Roo Glue rather than Titebond as it's better at adhering to flat or glossy surfaces. Any concerns?
 
Mask, not Roo Glue.  Melamine is bonded via glue.  Any finish on the other hand is bonded mechanically at the grit level and is relatively weak.  Hence why we have the scratch and tape tests.  You'll just end up Roo Gluing from top-coat to top-coat and one of them is going to peel away from the substrate.

 
Back
Top