I'm preparing to do a kitchen worth of cabinets and will be cutting out a lot of same sized parts with my TS55.
To avoid too much thinking at once, I'm making some templates of the cabinet parts now so I can set up my parallel guides based on an existing component rather than reading the scales on the t-track (I have the precisiondogs guide system. The t-track scale always seems slightly off from my measuring tape).
Since I'm referencing these components to set up for cuts, I'm trying to make sure the two sides are as close to parallel as possible. I reset the splinter guard on the rail before I started cutting these pieces out, just to make sure that isn't contributing to any error.
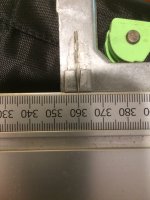
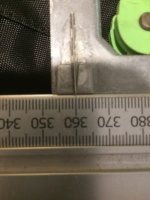
What I'm finding, though, is that I am not getting dead-on parallel cuts. Instead, there is a small amount of deviation happening. For example, today I laid out a part at 590mm. By the time I was done, I had one edge measuring at just touching the line of 590mm on the tape, and the other line just past the line on the tape. I'd say around 1/8 - 1/4 of a mm. Not a huge difference, but ideally it would be dead-on. Since the template is MDF, it's a little harder to plane it into compliance.
What do folks do to help ensure the most precise layout and cut possible? Any good tricks for achieving 'dead-on' accuracy?
And, how much is that kind of deviation (theoretically spread over 96") going to cause me grief/regret when it comes time to install?
Thanks,
Adam
To avoid too much thinking at once, I'm making some templates of the cabinet parts now so I can set up my parallel guides based on an existing component rather than reading the scales on the t-track (I have the precisiondogs guide system. The t-track scale always seems slightly off from my measuring tape).
Since I'm referencing these components to set up for cuts, I'm trying to make sure the two sides are as close to parallel as possible. I reset the splinter guard on the rail before I started cutting these pieces out, just to make sure that isn't contributing to any error.
What I'm finding, though, is that I am not getting dead-on parallel cuts. Instead, there is a small amount of deviation happening. For example, today I laid out a part at 590mm. By the time I was done, I had one edge measuring at just touching the line of 590mm on the tape, and the other line just past the line on the tape. I'd say around 1/8 - 1/4 of a mm. Not a huge difference, but ideally it would be dead-on. Since the template is MDF, it's a little harder to plane it into compliance.
What do folks do to help ensure the most precise layout and cut possible? Any good tricks for achieving 'dead-on' accuracy?
And, how much is that kind of deviation (theoretically spread over 96") going to cause me grief/regret when it comes time to install?
Thanks,
Adam