Help !Kem Aqua virgin ! Any advise PLEASE!

Mikeyfondu

Member
Joined
Mar 13, 2014
Messages
83
I finally got some kem Aqua in my hands! It took me a while to find but after a few calls , then getting past to a rep. Then  driving  a hour I finnaly have it in my hands.

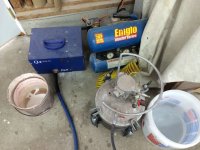
I am planning on spraying it with my Fuji mini mite 4 I will be shooting it with t-series syphon gun.I have the stock 1.3mm and 1.8mm air cap.

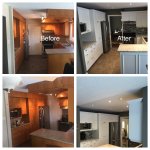
I got the surfacer and kem Aqua plus white, and will be spray some cabinet for a family member.
Plan of attack
Degrease with tsp.
Sand 120
Wipe with tack cloth
Spray surface then sand with 220
Give two coats of kem Aqua plus white.

Any tips or tricks would be appreciated! Thank you .
 
Not sure if you have used your recipie above or not yet as this was posted some time ago, but I wouldn't use a tack cloth as they are for solvent based coatings and will create problems when used with water Bourne coatings. Use distilled water and a lint less cloth or synthetic rag to wipe down after sanding. You don't have to sand to 220.
You will probably find that you can spray the pigmented Kem Aqua with your Mini 4 and a larger cap set, but you will have to thin it. You will get better atomization, thinner mil, less runs and drips if you use a pressure pot and a smaller cap set.
Sorry 'bout the late response.
Tim
 
A little KA+ White. Sprayed them this morning with a Q4 and T-70.

The MM 4 has the same turbine as my Q4.

I use diluted dishwashing liquid to wash the cabinets. Rinse and dry well, blow out all crevasse, you can use the MM 4 as a blower.

I'd do the prep sand with 180 Granat with the ETS 125 and RTS. Any hand work would be with the HKC. All connected to a CT. You do not mention the type of wood, you may have to use a grain filler to get things smoothed out. You may have to do an overlay on the exposed side panels, they may be a vinyl cover over the substrate. 

Surfacer--spray straight using the 1.8 air cap set. Sand with 240 between coats, use two coats, final sand with 240 prior to top coat. If you must thin it, no more than 2% (you should not need to thin it at all).

The KA+ White---1.0mm air cap set, thin with General Finish Enduro Extender up to 10% (no more than). Start at 5% see how it holds the vertical surfaces. Do not exceed 4 wet mills, if you do, lift the runs with masking tape. KA+ White does not lay down real pretty unless thinned a little, just the nature of the beast. This is one product where I prefer the Extender over WW fluid or water.

I also apologize for the delayed response, I did not see your post until Tim responded.

(I think Seth or Peter will fix the photo)

Tom


Attachments

  • IMG_0414.JPG
    IMG_0414.JPG
    2 MB · Views: 754
Just my experience here...whatever Tom says is pretty much always right. Every piece of help/advice he's ever provided has been either dead on or always on the safe side. Maybe have to spray a little more,but rarely have I had to redo anything following  his instructions.
 
Tim and Tom  thank you for your wisdom.
I had already sprayed them it went well.

I also took down the bulkheads
Sanded down popcorn ceiling with planex plaster smooth.
Installed new l.e.d pot lights
New counters/ tile backsplash/ crown/vallence.

The painting went alright, i spray kem+white with 1.8 no thinning.
I will try the extender next time
 

Attachments

  • image.jpeg
    image.jpeg
    3 MB · Views: 988
Mikey f said:
I had already sprayed them it went well.

Good to hear it went well.

Mikey f said:
I also took down the bulkheads
Sanded down popcorn ceiling with planex plaster smooth.
Installed new l.e.d pot lights
New counters/ tile backsplash/ crown/vallence.

There's a lot of hard work there.

Mikey f said:
The painting went alright, i spray kem+white with 1.8 no thinning.
I will try the extender next time

Do you want to try the extender because it was slow going or were there other issues?
Tim
 
Do you want to try the extender because it was slow going or were there other issues?
Tim
[/quote]

Hey Tim the spraying went well, I just want see if it help flow a bit better. I did not have any orange peal but if it was really hot I could see it drying to fast.  Thanks again for your help.

Mike
 
Tim Raleigh said:
Not sure if you have used your recipie above or not yet as this was posted some time ago, but I wouldn't use a tack cloth as they are for solvent based coatings and will create problems when used with water Bourne coatings. Use distilled water and a lint less cloth or synthetic rag to wipe down after sanding. You don't have to sand to 220.
You will probably find that you can spray the pigmented Kem Aqua with your Mini 4 and a larger cap set, but you will have to thin it. You will get better atomization, thinner mil, less runs and drips if you use a pressure pot and a smaller cap set.
Sorry 'bout the late response.
Tim
How does the use of a pressure pot affect runs and drips?
 
wptski said:
How does the use of a pressure pot affect runs and drips?

If your machine is under powered (low pressure) and you are spraying higher viscosity coatings and you thin it you are more prone to runs and drips. Obviously this depends on operator skill and experience and the orientation of the part being sprayed.
A pressure pot allows you to spray higher viscosity coatings without thinning. With the higher pressure than is normally achieved with a turbine HVLP, a pressure pot will allow you to better atomization heavier viscosity coatings allowing for a thinner mil coating.
Tim
 
Tim Raleigh said:
If your machine is under powered (low pressure) and you are spraying higher viscosity coatings and you thin it you are more prone to runs and drips. Obviously this depends on operator skill and experience and the orientation of the part being sprayed.
A pressure pot allows you to spray higher viscosity coatings without thinning. With the higher pressure than is normally achieved with a turbine HVLP, a pressure pot will allow you to better atomization heavier viscosity coatings allowing for a thinner mil coating.
Tim
Using a "standard" pressure pot with a turbine setup, you are still using low pressure to your gun.  Pressure on the PP just pushes the product up the much longer route to the gun where viscosity really matters.  A PP just gives you a bigger product supply with a ability to aim your gun easily in all directions without possibly tilting away from the product level in a smaller cup.

I question your point only because I'm never read this anywhere before.

In fact, some PP like a Fuji 2 quart use the same turbine pressure.
 
wptski said:
Using a "standard" pressure pot with a turbine setup, you are still using low pressure to your gun. 
I use a compressor with the pressure pot at 12-15lbs. At that pressure I am getting more than twice the pressure behind the coating than I would with just the turbine. All the pressure and air flow generated by the turbine is used to atomize the coating. No pressure from the turbine is diverted to the pot.

wptski said:
Pressure on the PP just pushes the product up the much longer route to the gun where viscosity really matters.  A PP just gives you a bigger product supply with a ability to aim your gun easily in all directions without possibly tilting away from the product level in a smaller cup.

True. But none of the pressure from the turbine is used for this and in some cases the pressure from the turbine is incapable of keeping enough coating at the tip of the gun to spray with any speed.
wptski said:
I question your point only because I'm never read this anywhere before.

No worries. My comments are only based on observation and usage.
I could be totally wrong and it's just my imagination.

wptski said:
In fact, some PP like a Fuji 2 quart use the same turbine pressure.

Yes. I am aware of the Fuji 2 quart cups. I don't think that approach adds a lot of value other than the points you made about larger product supply and tilting away from the product supply. PPS cups and liners allow you to avoid the tilting issue, so the only advantage to the Fuji 2 quart cup is volume supply.

 
wptski said:
Tim Raleigh said:
I use a compressor with the pressure pot at 12-15lbs. At that pressure I am getting more than twice the pressure behind the coating than I would with just the turbine. All the pressure and air flow generated by the turbine is used to atomize the coating. No pressure from the turbine is diverted to the pot.

Yes, that's the way a generic PP works.

Tim Raleigh said:
True. But none of the pressure from the turbine is used for this and in some cases the pressure from the turbine is incapable of keeping enough coating at the tip of the gun to spray with any speed.
In that case, you need to thin the product.

Tim Raleigh said:
No worries. My comments are only based on observation and usage.
I could be totally wrong and it's just my imagination.
A daily occurrence for me!!

Tim Raleigh said:
Yes. I am aware of the Fuji 2 quart cups. I don't think that approach adds a lot of value other than the points you made about larger product supply and tilting away from the product supply. PPS cups and liners allow you to avoid the tilting issue, so the only advantage to the Fuji 2 quart cup is volume supply.

As far as I know that's the only advantage to any PP.  You are just separating or extending the cup form it's normal position.  I modified a Graco PP system used on their handheld airless to use a Fuji Gxpc gun with a Q4 Gold turbine.  Since the airless system it has to be primed so there are two lines to the PP.  I plugged the return line because it's not used but this creates an small issue.  The PP is powered by a 9V battery and the pump creates only 10psi supposedly.  When the pump is started, air is trapped in the paint supply line so I need to depress the gun trigger with the turbine off normally till the product makes its merry way to the gun.  I start the turbine just prior to making a mess, check the pattern, etc.

The last time I did was when the latex paint I was trying to use with the airless kept on plugging the tip up and it worked without any physical straining or thinning.
 
My (very) few cents (or lack of sense) on the pressure pot.

Fluid delivery to the air cap is the primary issue with a turbine HVLP set up. The fewer the stages of the turbine the lesser the pressure to the cup/fluid. Even with a 4 or 5 stage turbine the best one can hope for is 11 pounds of pressure on the fluid.

The ways I know of to increase fluid flow to the nozzle/needle are thinning or applying more pressure. Increasing nozzle/needle size does nothing to increase fluid flow to the assembly. I feel an air cap set that is to large hurts the application process.

Thinning affects the body and chemistry of the product.

The cups on my guns get full turbine pressure whether the trigger is being pulled or not. I modified the pressure line so it is tied into the hose from the turbine before the restriction valve that connects to the gun. Even at full pressure from the turbine there are some latex paints it will not deliver well at full body.

With a pressure pot, the pressure can be increased on the fluid to get the fluid to the nozzle/needle. Ultimately that's the goal. This can be a two edge sword---to much pressure and the fluid can be forced past the air cap to quickly for the air to finish the atomization process.

Earlier I made the statement that to large of an air cap set can hurt the process. This restriction is the first place the fluid begins to break up. If the "restriction" is to large the process of breaking up the fluid may not be what it should be. There are times I will go one size up or down on the air cap in relation to the needle/nozzle in the gun.

When I have to shoot more than 3 quarts of a product at a time I use a pressure pot with an auto mixer.

Tom

 
tjbnwi said:
My (very) few cents (or lack of sense) on the pressure pot.

Fluid delivery to the air cap is the primary issue with a turbine HVLP set up. The fewer the stages of the turbine the lesser the pressure to the cup/fluid. Even with a 4 or 5 stage turbine the best one can hope for is 11 pounds of pressure on the fluid.

The ways I know of to increase fluid flow to the nozzle/needle are thinning or applying more pressure. Increasing nozzle/needle size does nothing to increase fluid flow to the assembly. I feel an air cap set that is to large hurts the application process.

Thinning affects the body and chemistry of the product.

The cups on my guns get full turbine pressure whether the trigger is being pulled or not. I modified the pressure line so it is tied into the hose from the turbine before the restriction valve that connects to the gun. Even at full pressure from the turbine there are some latex paints it will not deliver well at full body.

With a pressure pot, the pressure can be increased on the fluid to get the fluid to the nozzle/needle. Ultimately that's the goal. This can be a two edge sword---to much pressure and the fluid can be forced past the air cap to quickly for the air to finish the atomization process.

Earlier I made the statement that to large of an air cap set can hurt the process. This restriction is the first place the fluid begins to break up. If the "restriction" is to large the process of breaking up the fluid may not be what it should be. There are times I will go one size up or down on the air cap in relation to the needle/nozzle in the gun.

When I have to shoot more than 3 quarts of a product at a time I use a pressure pot with an auto mixer.

Tom
What kind and/or brand of spray gun are you talking about?

If I follow this correctly, you have the pressure paint line from the pot also going to the guns turbine input?

I've converted all pressure tube barb fittings to push to connect type as I hate those fittings-
 
wptski said:
tjbnwi said:
My (very) few cents (or lack of sense) on the pressure pot.

Fluid delivery to the air cap is the primary issue with a turbine HVLP set up. The fewer the stages of the turbine the lesser the pressure to the cup/fluid. Even with a 4 or 5 stage turbine the best one can hope for is 11 pounds of pressure on the fluid.

The ways I know of to increase fluid flow to the nozzle/needle are thinning or applying more pressure. Increasing nozzle/needle size does nothing to increase fluid flow to the assembly. I feel an air cap set that is to large hurts the application process.

Thinning affects the body and chemistry of the product.

The cups on my guns get full turbine pressure whether the trigger is being pulled or not. I modified the pressure line so it is tied into the hose from the turbine before the restriction valve that connects to the gun. Even at full pressure from the turbine there are some latex paints it will not deliver well at full body.

With a pressure pot, the pressure can be increased on the fluid to get the fluid to the nozzle/needle. Ultimately that's the goal. This can be a two edge sword---to much pressure and the fluid can be forced past the air cap to quickly for the air to finish the atomization process.

Earlier I made the statement that to large of an air cap set can hurt the process. This restriction is the first place the fluid begins to break up. If the "restriction" is to large the process of breaking up the fluid may not be what it should be. There are times I will go one size up or down on the air cap in relation to the needle/nozzle in the gun.

When I have to shoot more than 3 quarts of a product at a time I use a pressure pot with an auto mixer.

Tom
What kind and/or brand of spray gun are you talking about?

If I follow this correctly, you have the pressure paint line from the pot also going to the guns turbine input?

I've converted all pressure tube barb fittings to push to connect type as I hate those fittings-

Fuji T-70 is the gun I use with the pressure pot. I also have 2 G-Xpc guns. My turbine is a Fuji Q-4.

Air pressure to the pot is supplied via a Rolair Jc-10 or an Emglo 2 hp. compressor. Air line to the pot air regulator, fluid line from pot to where the cup would go on the T-70. Atomization air is supplied to the gun with the Q4 turbine. The turbine hose goes where it normally would.

The only pressure tube connection I have to be concerned with is the hose to the PPS cup. I use a silicone hose check valve to cup. The guns pressure tube ports are blocked by check valves installed backwards. When the gun is connected to the pot, I remove the fitting with the cup pressure line.

Tom
 

Attachments

  • IMG_3201.jpg
    IMG_3201.jpg
    52.1 KB · Views: 602
  • IMG_0320 (1).jpg
    IMG_0320 (1).jpg
    51.6 KB · Views: 633
Tom:

Gosh, don't want to go OT too much plus highjack this thread but that's your PPS system in the bottom picture.  The connection to your gun, is that a steel against steel fitting?  Those steel to steel fittings have a tendency to loosen easily, do you have that issue with it?
 
wptski said:
Tom:

Gosh, don't want to go OT too much plus highjack this thread but that's your PPS system in the bottom picture.  The connection to your gun, is that a steel against steel fitting?  Those steel to steel fittings have a tendency to loosen easily, do you have that issue with it?

Yes, one of 3. All connect to the cup the same way.

Brass on steel----nope, no issues with loosening or leaking at all.

I'm pretty sure this thread has long ago been hijacked ;)

Tom

 
tjbnwi said:
Yes, one of 3. All connect to the cup the same way.

Brass on steel----nope, no issues with loosening or leaking at all.

I'm pretty sure this thread has long ago been hijacked ;)

Tom

Thanks, I found your YouTube videos, I believe you are using a 8oz cup with a Gxpc gun in this video, I see now that is states an 8oz cup.

video.

The so-called Fuji steel "L" fittings, I have three I think, they either leak or loosen up when used with a 1qt cup or pressure pot line.  I found a brass 1/4" swivel to 3/8" NPT fitting and would need to use a 3/8" NPT 90 with on Amazon but 6-9 weeks delivery.  Ordered two on 2/27 with a shipping date of 4/25!!  [scared]
 
[member=60643]wptski[/member]

Bill,

Are you referring to the cup to gun fitting? If so the stock fitting has not been on any of my guns for a very long time.

On the G-Xpc guns the fittings are #10 3M PPS fittings. The T-70 takes a #18 PPS fitting. No issues with these coming loose.

In the video you linked it is an 8 once PPS cup. In that cup I can use a 3 or 8 ounce liner. In the quart cup shown in the previous post I can use a 28 or 32 ounce liner.

If you have not seen or used the 3M PPS system look into it. I would not be without it.

Tom
 
Back
Top