Since this is your first Domino project you’ll probably benefit from making a test joint with flat stock that is all the same thickness. You’ll discover that the braces need to be attached to the aprons first and then the legs plug in to the tenons sticking out of the ends of the aprons and braces.
I’d do that test first because of the added complexity in the real project, that is, allowing for the offsets from the surfaces of the stock to place the mortises in the same plane. Actually they don’t have to be in the same plane but that is the usual method.
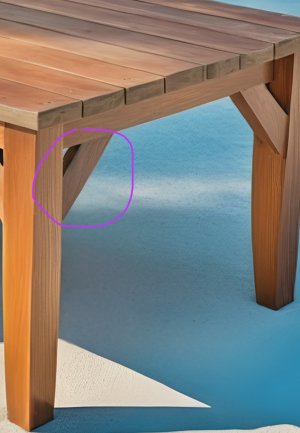
Can’t tell if the braces are the same thickness as the aprons. Everything will be easier if they are, particularly marking the location of the mortise for the brace. It’s trickier if the surface of the brace isn’t even with the surface of the apron when you strike the registration mark, ideally on both parts at the same time. If they aren’t the same thickness it would be worth making a shim to bring the brace even with the apron for marking purposes.
After marking, if they are the same thickness then you simply set the fence so the center of the mortise is near the middle of the stock. Assuming the apron ends are cut square go ahead and make those mortises with the tight setting. If the legs are splayed you’ll have to figure it out. Too complex to quickly put into words.
The upper mortises in the legs will be the same distance from the top of the leg as the apron mortise is from the top of the apron, but you’ll set the fence higher to match the offset of the apron to the leg surface. For the lower mortises in the leg you can measure and mark or test fit the apron/brace assembly to the leg and transfer the mark. If the brace is thinner that the apron raise the fence more to account for the additional offset.
At glue up (you do need to glue these Dominos) you’ll assemble the narrow ends of the table first then after they’re dry you’ll add the long aprons/braces.


 ” Just try a few different shim thicknesses.
