Joining Mitered Edges with Dominos

Joined
Jan 22, 2007
Messages
53
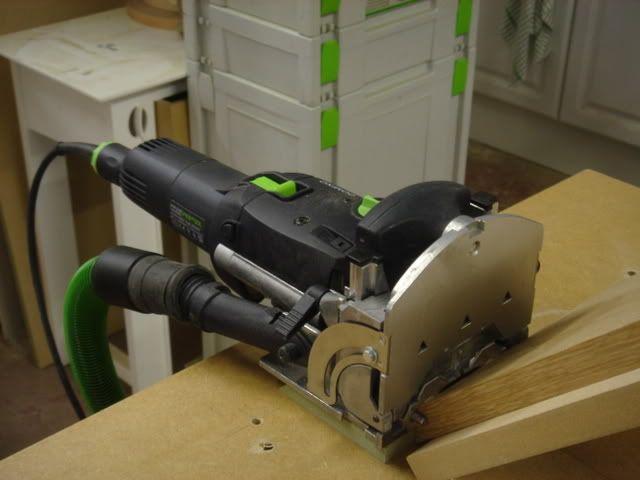
I am using the Domino to join mitered edges of two boards (as one would miter all four edges of six boards to form a cube).  I am using (true) 3/4" ply.  I did some calculations to determine fence height and mortise depth, depending on which dominos I used:

Material thickness: 0.75"/19mm
Domino    Fence       Mortise      Domino
Size        Height       Depth        Length
   5             20            15             28
   6             22            15             28
   8             20            12             22
10             20            12             22

If 5mm are used, the fence should be set to 20mm and the normal 15mm mortise is cut.  If larger dominos are used, the dominos must be shortened to the lengths indicated.

For material 1" thick or greater, the fence should be set at its maximum height, 30mm, and standard mortise depths should be cut, up to 20mm (i.e., 15mm for 5mm dominos, 40mm for larger ones).   10mm dominos must be shortened (to about 38mm) to fit into 20mm mortises.

For material 1/2" thick or less, even 5mm dominos must be shortened, so I didn't bother doing those calculations.

I thought this information might be of interest to Domino owners.

Cary

PS I edited my original post to change the fence heights slightly to correspond to an indent (40mm), where possible.

 
I agree with Rick. I just finished mortising  mitered legs for a bench out of 1 x 4 clear cedar. The material thickness was 11/16" actual. 15 mm deep mortises for 5x30 dominoes, registered off of the fence at it's lowest position and off of the "blunt" or obtuse side of the miter, just cut through the finished face. I cut some dominoes down to 22 mm in length with a japanese saw, very easy, and inserted them into 12mm deep mortises on the legs.

By the way the registration of the pieces was spot on with minimal clamping required. Much easier than with biscuits. :)

Jim

 
Michael Kellough said:
Cary, wouldn't you put the Dominoes in the center of the stock regardless of the thickness?...
If you do that, Michael, in many situations (3/4" stock, for example), you would have to use a (non-standard) plunge depth less than 12mm (and shorten the dominos) to keep the bit from cutting through the outside of the stock.  By moving the mortise closer to the inside corner, you can plunge deeper.

Cary
 
Rick Christopherson said:
...Beveled mortises should be registered from the blunt corner of the bevel...]
Rick, you are so right, of course.  In fact, I'm sure I read that in your manual a couple of years ago, and forgot it.  I just finished doing some edge joins, registering from the outside edge, with the help of 45 degree block.  It worked out fine, but the block and my notes have gone into the trash can.  Thanks for straightening me out on this.  I considered deleting my post, but figure there's probably some educational value by leaving it up.

After posting this, I did a couple of calculations.  With the fence at its lowest setting (7mm), the center of the mortise is actually about 10mm from the inside corner (because the fence is set at 45 degrees).  If plunging 15mm, for 5mm dominos, the bit will cut through the outside edge if the material is less than about 19.4mm, as Jim Metzger found out.  That would include 3/4" (=19.1mm) material.   Therefore, for 3/4" material, one should use the 12mm depth setting, and trim the 5mm dominos.  Alternatively, one could place a thin spacer between the fence and the top of the material (4mm thick, perhaps), to bring the mortise closer to the inside corner.

Cary
 
 
I do a lot of mitered corners in baltic birch because the mitered edges look the best. Miters present the problem that they must be clamped with equal pressure from both sides, which in practice means that you have to glue up the whole piece in one go. Angled dominoes do not eliminate this problem although they do ensure good alignment in two planes.

I'm experimenting with using dominoes which are not angled in the miter joints. I can't sketch it at the moment but you first cut the domino hole to the 30mm depth into the end of the cab or box side, and cut the corresponding 15mm holes into the matching face. Then you cut the miters. The dominoes are parallel with one side and perpendicular to the other and the corner is mitered. Big advantage: You only need to clamp in one plane. And that allows multiple glue-ups, which I like when there are fixed shelves.

You do have to cut the dominoes down but I took a scrap of plywood, cut shallow domino holes down the lengh of it, cut two dominoes to the desired length, inserted them in the first and last holes, inserted full-length dominoes in the other holes (there are eight), aligned a TS rail to the ends of the short ones, and cut the others down.
 
square said:
...you first cut the domino hole to the 30mm depth into the end of the cab or box side, and cut the corresponding 15mm holes into the matching face. Then you cut the miters. The dominoes are parallel with one side and perpendicular to the other and the corner is mitered. Big advantage: You only need to clamp in one plane....

That's a great idea, [your name goes here]!  Another advantage is that all the calculations are so much easier for different dimensions and dominos.  For example, to make sure you don't cut through the thinner piece (i.e, where you are cutting into facegrain), you just have to make sure the plunge depth is less than the board thickness.

The same approach could be used to miter corners (as with a picture frame), so long as the boards are not too wide.  Anybody do mitered corners that way?

Cary

Cary
 
Slightly different question.  I've been making a mirror frame with mitered corners, 5 mm dominos.  So these are mitered corners, but in the flat plane of the wood.

I hand marked the centerline for the mortis; cut each one trying to center the line in the little hole on the plastic guide.  Came out a little off. 

What I would like to see is, is there a way to make a guide that would do reciprical (45 left, 45 right) and mechanically registered  mortis' frm the end of the mitered point?  Don't know if that's clear, but the guide for straight sticks allows multiple accurate cuts.

Thanks, Mike
 
Cary Swoveland said:
That's a great idea, [your name goes here]!  Another advantage is that all the calculations are so much easier for different dimensions and dominos.

I made some ottoman seat/storage boxes like this a while back. I made a test joint first in 18mm MDF and once glued-up it was incredibly strong - I couldn't break the joint putting all my weight on it... Like Square says above, I cut the domino mortices as if it was a butt joint, then bevelled the workpiece and used cut-down dominos, all glued together. Works well.

Cheers, Pete.
 
I needed to Domino some mitred wide oak boards indexed from the pointed end, so I made an angled
support to hold the boards on my bench mounted Domino. To position the height of the slot
I just change the thickness of the packer bolted between the Domino and the bench.

Domino.jpg


Paul
 
T. Michael said:
Slightly different question.  I've been making a mirror frame with mitered corners, 5 mm dominos.  So these are mitered corners, but in the flat plane of the wood.

I hand marked the centerline for the mortis; cut each one trying to center the line in the little hole on the plastic guide.  Came out a little off. 

I've been doing something similar in maple, and using the registration pins. I'd thought that my mis-alignment was due to my reluctance to pull the pin up hard against the narrow point, so I was going to build a jig for this, but I tried a picture frame recently and realized that during glue-up I could easily get a millimeter or so of play depending on how I clamped stuff. Which led to my extended corners.

However, on the way there I was thinking that something that was a narrow strip glued to a reverse miter, with a hole for the registration pin, could be used reversibly. Just plunge through the strip (so I'd have to account for that in plunge depth), and the miter on the outside of that strip would let me pull hard against the thin fragile outside edge.

Just got back from a weekend out of town (with new toys, now I'll have a killer router table!), I'll try to do drawings and take some illustrative pictures tomorrow.
 
Cary Swoveland said:
After posting this, I did a couple of calculations.  With the fence at its lowest setting (7mm), the center of the mortise is actually about 10mm from the inside corner (because the fence is set at 45 degrees).  If plunging 15mm, for 5mm dominos, the bit will cut through the outside edge if the material is less than about 19.4mm, as Jim Metzger found out.  That would include 3/4" (=19.1mm) material.   Therefore, for 3/4" material, one should use the 12mm depth setting, and trim the 5mm dominos.  Alternatively, one could place a thin spacer between the fence and the top of the material (4mm thick, perhaps), to bring the mortise closer to the inside corner. 

I came to a different conclusion.  Here's my calc assuming 45 degree bevel cut and taking into account the bit diameter.  Using the fence in its lowest setting, I measured the distance from the inside of the bevel corner to the center of the mortise to be 6 mm.  (Not 10mm as above.)

Max depth of cut for domino = Material Thickness*1.414 - (6 + bitdiameter/2)

Example: 3/4 undersized ply (about 18.5 mm) and 5mm bit:
Max depth = 18.5*1.414 - (6 + 5/2) = 17.7 mm
Therefore the 15mm depth setting is okay.  (I measured the actual depth of the mortise as 16mm.)
It leaves 17.7 - 16 = 1.7 mm material remaining.  I did a few test cuts and measured about 2 mm material.
 
square said:
I do a lot of mitered corners in baltic birch because the mitered edges look the best. Miters present the problem that they must be clamped with equal pressure from both sides, which in practice means that you have to glue up the whole piece in one go. Angled dominoes do not eliminate this problem although they do ensure good alignment in two planes.

If you mitre the faces to be joined, then cut the mitre mortices, then glue up pairs, e.g. the top and one side, the bottom and the other side, then you may not have to deal with all the corners and sides at once.  I have used band clamps to draw pieces together.  When working with solid wood components, I have glued on 45 degree caul blocks using brown kraft paper between the cauls and the surface of the workpiece.  The 45 degree caul blocks allow use of ordinary bar clamps or hand screws to draw the joints together.  After the primary joints are glued and set, the cauls can be split off within the paper and the remnant of the paper and glue sanded off.  Obviously, this is not reliable if working with veneered stock such as birch plywood.

Dave R.
 
Back
Top