Joints for a large frame & panel box

rmwarren

Member
Joined
Jul 11, 2010
Messages
3,063
I'm trying to come up with a design for a large box, around 16" tall, somewhere around 14-16" wide and perhaps 12" deep. I want use up a large supply of 3/4 by 2" cherry strips I have and make the sides from frames then rabbet the inside edges and infill with ~1\4" panels overlaid with leather (another on hand material). Picture a common frame and panel cabinet door. Not sure yet what the top would consist of.

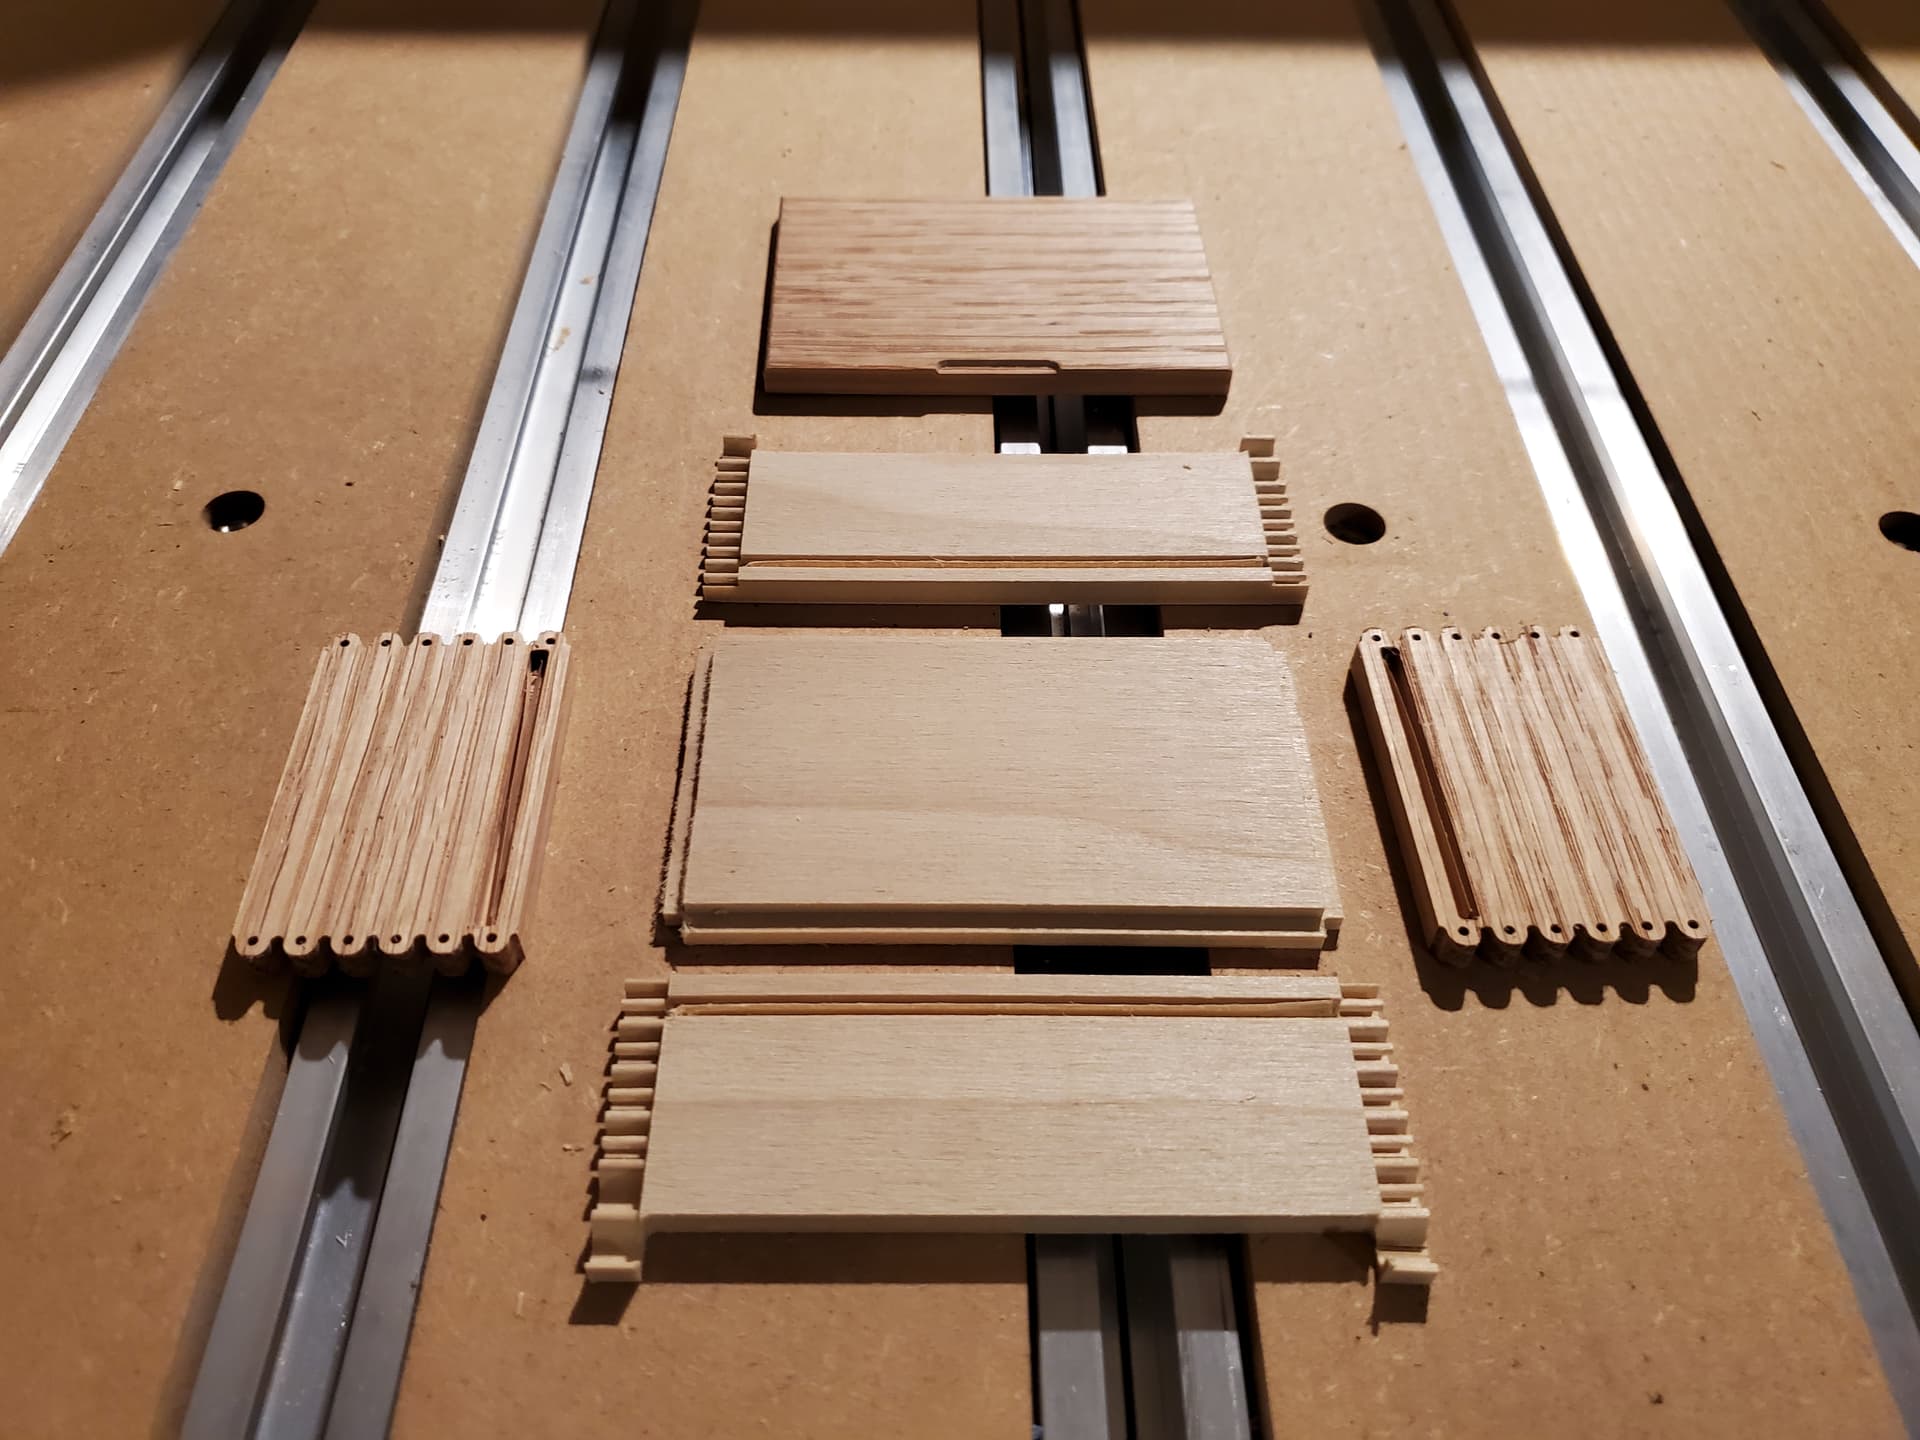
I don't want this to become a major project so I'm aiming to whack out the basic box in a weekend at most. Given the narrowness of the stock at 2" I don't think box finger [edit] joints or similar would look good. I'm also thinking I can use the Shaper Origin to add some details, perhaps brass pins or???

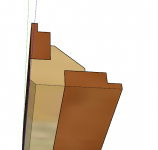
I'm also wondering if the best approach is the make all 4 of the side panels and then join them together into the box. Perhaps using a rabbeted corner post, with a 45 degree detail? I've also got plenty of 8/4 & even 12/4 stock to play with, in contrasting materials like ash, sycamore, maple.

Looking for any suggestions anyone may have. Thanks in advance.

RMW
 
Don't know if this helps or not Richard...just an observation.

Many years ago one of my best friends contacted Andersen Window in Stillwater and picked up several huge boxes of scrap cut-off from their window frame production facility. Don proceeded to make a roll-top desk for his daughter out of the scraps, it was absolutely stunning. The different shades of fir created a patchwork that was noticeable yet subtle at the same time. Not unlike what Ron [member=3192]rvieceli[/member] produces for his lamp bases.  [smile]
 
Richard

Lap joint, pinned lap joint, bridle joint, pinned bridle joint for the corner joins. Pinned mitered bridle joints  [eek]

I like the idea of a larger corner post to join the panels. Perhaps make it longer than needed and extend the bottom below the floor to create feet to elevate the box some.

Tongue and groove or shiplap your strips and use them for infill.

ROn
 
Playing around with the corner post idea:

[attachimg=1]

This is a little heavy looking, but there's room to make larger rabbets for the panels.

RMW
 

Attachments

  • Screenshot 2023-07-01 141216.png
    Screenshot 2023-07-01 141216.png
    53.9 KB · Views: 406
My CMT dowel jig would knock out the joinery in 20 - 30 minutes.  It would look like a simple butt joint, but there would be a dowel every 32mm. 

I think a domino would be quick also.
 
Yep I can Domino, dowl, etc. I am hoping to discover some interesting alternative that's not too complicated and adds visual interest. Absent that I'll likely use some version of a corner post and add some shadow lines at the joints.

Thanks.

RMW
 
With the Shaper, you could try and do something akin to through dominos but with tenons. Or even some kind of half-blind curvy box joint.

Shaper has various mortise and tenon samples in hub. In your graphic, I could see some cool looking through tenons making a design in the darker wood.

There's also the Knapp Joint that looks like it could be accomplished on Shaper.

A while back I was trying to make half-blind rounded box joints for drawer boxes in Studio. I haven't fired up the Origin to try it yet but it could be adapted to your scenario.

Shaper_Studio_2023-07-01_19-58-14.png
 
Back in 1970 - 1972 I had a very limited power tool inventory.  I had a circular saw, an electric drill, and a router.

Also back then, we had available redwood in 12” width at affordable prices. 

I made open back cubes from the redwood. These were stacked to make a fairly robust book shelf.  I also used them as supports for a hollow core door that was my desk. 

To assemble, I first made butt joints with glue and screws to hold them together while the glue dried.

I then backed out one screw, and replaced it with a 3” long x 3/4” diameter dowel.  The redwood was 2” x 12”. I repeated that until all the screws were replaced by dowels.  I think I had three dowels per joint.  The dowels were trimmed and sanded flush.  I don’t remember if I bothered to add a finish.  I don’t think I did.

The cubes were quite sturdy, and I liked the contrast between the redwood and the light color of the dowels. 

I continue to use the through dowel method when the dowels are not visible.  It is fast and easy and alignment is guaranteed.  I use clamps usually instead of the screws while the glue dries.  I’ve built both base cabinets and upper cabinets using a mix of confirmats and through dowels.  End panels cover the fasteners.

In your case, contrasting dowels will make the joint stand out. 
 
Back
Top