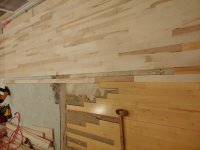
I'll start this off by mentioning that I'm definitely not a pro. I've installed a few hardwood floors in previous houses but this is the first time I've had to lace in.
The house is 20 years old and I'm working with 3/4" x 2 1/4" maple - grade 2. A local supplier provided a great match.
I found some tips on how to layout and start the lace in. Plenty of measuring, multiple string lines to double and triple check starter row. And screwed down a straight plywood stop for the first row.
The challenge is fighting against compression. The old boards unloaded are identical in width - 2 1/4".
However, when compressed over say a 29" span they have lost 1/4" in width. Instead of 29 1/4" the span is 29" and a hair.
The problem is that my new boards aren't compressing as much as the old. So now I'm almost 3' into my lace in and need to compensate for that 1/4" difference.
My dad, who is a long time remodel contractor, suggested wedges and prying to cram things in. The problem is I still can't match how much the original floor was squished. Even 1/32" times 20 adds up. I'm using a Bostich air assist stapler.
One idea I had was to rip 3/16" off the back of an entire row and throw the boards on the router table to match the groove.
I might have to repeat this in another few feet when I can no longer just cram boards into the old.
I'm 3' into a 8.5' wide job.
There are some smart(and experienced) fellers on this board. I was hoping someone might have suggestions or caveats to be aware of.
p.s. on a Festool note - the TS75 with rail has been great at cutting out the old boards. And keeping the dust to a minimum is much appreciated since I'm working inside the house.

