Multiple Projects from an abundance of free wood!

ilovesunshine

Member
Joined
Jul 22, 2018
Messages
82
Hello All,

Hope you are all well!

So I have posted about some Garden Sheds which I am now back in Cornwall finishing the last roof! I'll update that thread when I have finally taken the last one back up country and assembled them both in their final place.

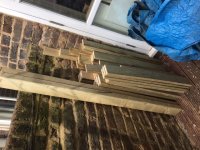
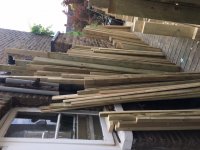
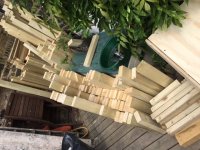
Anyway I came by a load of wood a few months ago, which comprised 2.5 Volvo estate FULL loads (I hit the weight limit before I hit the volume limit!) - mostly tannelised 2 x 4, a little bit of 2 x 3, a little bit of 2 x 2, and some other stuff that is sort of like cladding, pretty rough sawn, but just boards so no overlap - 2 corners are slightly bevelled, the other side isn't. All quite random lengths.

So I thought it would be fun to start this thread as I start to use it up and make things and make a log of what I make with it!

I'm hoping as I make more things I can improve my skills a bit :-) And if any of you have any suggestions, please let me know!!

If all else fails and I get fed up of storing it I can always make some raised beds for our allotment but that's a bit of a waste!!

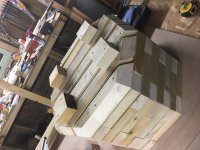
Here's where it's currently stored until I start using it!!

[attachimg=1]

[attachimg=2]

[attachimg=3]

[attachimg=4]

[attachimg=5]

[attachimg=7]

So, I have a few things to start with that I already made, they are pretty basic but at least functional!!

So far I have made:

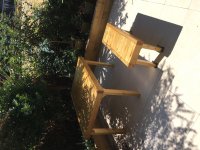
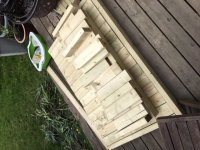
- A VERY heavy and chunky table made completely from 2 x 4!! plus 2 matching benches. The wood was free as they needed the space and was already cut to a multitude of different sizes so part of the challenge is finding projects to use as much as I can of each length it already is cut to minimise wastage!! Hence the small benches and the way I designed it, haha! :-)

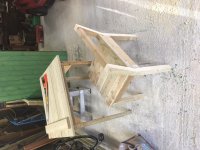
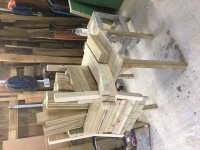
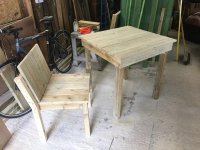
- A slightly less chunky table and some excellent stackable chairs from Ana White's website :-)

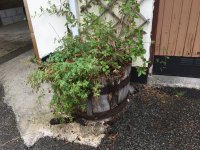
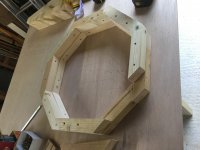
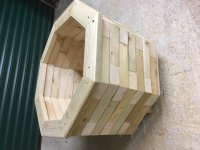
- And currently I am attempting an octagonal garden planter to say thanks to my parents for letting me use Dad's workshop down here to make the sheds!! Which I hope to finish tomorrow :-)

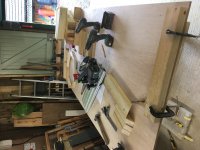
This is all cut with the only Festool I currently own, the HKC55 and I have 3 rails - the angled 420 one and 2 of the 1400 ones plus the joining bits.

Hope this is of interest to someone - :-)I'll post a few photos below :-)
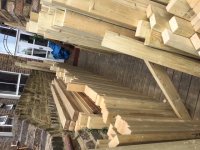
 

Attachments

  • IMG_0791.JPG
    IMG_0791.JPG
    146.6 KB · Views: 698
  • IMG_0792.JPG
    IMG_0792.JPG
    165 KB · Views: 701
  • IMG_0793.JPG
    IMG_0793.JPG
    156.5 KB · Views: 700
  • IMG_0794.JPG
    IMG_0794.JPG
    139.1 KB · Views: 710
  • IMG_0796.JPG
    IMG_0796.JPG
    124.2 KB · Views: 679
  • IMG_0790.JPG
    IMG_0790.JPG
    153.5 KB · Views: 227
Hey so here is the first project - UBER chunky and heavy table and 2 benches :

Laying it all out and trying to find wood that was nearly exactly already the size I needed it to be from all my random sized bits, haha! In London our deck is my workshop which proved fairly difficult, haha!

[attachimg=2]

What did I learn from this:

- even short bits of 2 x 4 can warp - and were warped - not all of them but some - I laid the top boards out next to each other and screwed them to the 2 x 2 and then to the edge bits - was so surprised when I finished it and turned it back up the right way round that they were all wonky!! I thought laying them all out on a bit of plywood would be flat enough to make it good but not so...

- problem was solved by my lovely strong partner clamping each board really hard to the plywood and I then screwed each bit together - which in hindsight I should have done to begin with but didn't think about it!

- Should have allowed a little bit extra on the long side edge bits - as there were small gaps when screwing the middle bits together so ended up having to cut 2 more slightly longer bits - if I had a proper work table here and had clamped everything super tightly prior to screwing this issue wouldn't have happened - plus haha if I had used super fresh completely unwarped wood then might not have happened either but this is fun to practice on :-)

- Didn't learn this but really must test out some other ways of doing corner joints - the corner triangle pieces are OK but even they don't work super well. I don't like having supports lower down or anything that you can hit your knees on when using the table. Any ideas / options gratefully received. :-)

Here's how it looks in it's final place with 2 coats of the Osmo UV oil that [member=11196]Peter Parfitt[/member] recommended. I still have one more bench to finish but had left all my tools where I built the sheds as I knew I was coming back down again soon so will take that there soon. Plus am adding 2 chairs as well as I really like them.

[attachimg=1]
 

Attachments

  • IMG_1221.JPG
    IMG_1221.JPG
    1.1 MB · Views: 737
  • IMG_0789.JPG
    IMG_0789.JPG
    148.4 KB · Views: 685
Something is going weird with the attachments here...

Anyway none of this is so advanced I need to show you step by step details haha!

Here is the table and partly finished chair that I've been working on from Ana White's design - as yet unfinished.

Tonight I cut wood for 3 more chairs - am going to take them back in those pieces and put together in London as I won't have space in my car for them any other way.

[attachimg=1]
 

Attachments

  • IMG_1261.JPG
    IMG_1261.JPG
    1.1 MB · Views: 742
This is what my parents sent me that they liked and wanted the planter to sort of look like:

[attachimg=1]

They like the sawn ends alternating per level. I like that design as it's about as advanced as my woodworking skills are right now, haha!

So I have made one level tonight so they can check the size of it tomorrow.

I had been hoping to make it out of - you guessed it - 2 x 4 - I know, crazy huh -

So I found actually the first problem I have ever found with the HKC saw tonight. Well its not really a problem it's just user error / inexperience! On the lowest setting I found that when I cut an angled 45 degree cut the blade isn't quite long enough to go all the way through the 2 x 4

...and given I am going for an octogon so am gonna need at LEAST 24 maybe 32 or 40 pieces of wood depending how tall they decide they want it
...and each side has 2 45 degree cuts on
...plus I don't really have a proper woodworking bench to hold the bits in

I have decided to cut the bits of 2 x 4 in half along their length and make it with 2 x 2 instead 
or 2  x not quite 2 as I won't be left with quite that much but I'll have 2 nice consistent edges on each outside bit...

So I have made one level which is pretty decent - they want it 55cm across the widest part - took a bit of trial and error but have got the size about right

Was quite delighted when I realised that I can screw each bit to each next bit from inside without actually needing to have angled corner bits like on the square planted equivalent - hadn't even considered that - and I guess I can screw each level to itself as I build it up as well, hurrah!!

So that'll keep me out of trouble tomorrow  - will post photos and of the finished thing as it needs to be finished tomorrow :-)


Attachments

  • hexagonal planter.jpg
    hexagonal planter.jpg
    80.2 KB · Views: 655
[attachimg=1]So this is what I’m replacing for my parents 😀


Attachments

  • 2BFE6F76-5101-4C08-B329-947151C1FED8.jpeg
    2BFE6F76-5101-4C08-B329-947151C1FED8.jpeg
    4.4 MB · Views: 879
  • 3E3F7A2B-B4D7-4980-A832-9EAF0A2C8B21.jpeg
    3E3F7A2B-B4D7-4980-A832-9EAF0A2C8B21.jpeg
    4.4 MB · Views: 185
This is the other 3 chairs I cut yesterday
[attachimg=1]
 

Attachments

  • B07AE2BF-B76D-4EE6-BF8F-C353DB7A225B.jpeg
    B07AE2BF-B76D-4EE6-BF8F-C353DB7A225B.jpeg
    2.2 MB · Views: 886
[attachimg=1]

More octagonal bits in progress!!
 

Attachments

  • 11D87EC4-CFD8-49D9-8EE8-C98A8119706B.jpeg
    11D87EC4-CFD8-49D9-8EE8-C98A8119706B.jpeg
    2.2 MB · Views: 848
First real test: putting octogon level 2 on top of octogon level 1!! Hahaha!

Wasn’t quite as simple as I’d hoped but it’s not surprising since I’m not cutting each piece super accurately! I’m doing my best but each bit is a bit of 4 x 2 ripped in half then cut 45 flat each end as best I can!

So priority now is to get the outside looking as good as possible and adjust the 8th piece on each level as best I can and try to set up my cuts better. I need to work out how those benches you all have with holes on the super lovely flat top work!! I don’t think it’s too bad considering I can’t even clamp these little pieces when cutting them! 😀😀

Practice makes perfect or at least, better, I hope! 😀😀 have a great Sunday everyone - will post the finished planter! 🙂🙂

[attachimg=1]
 

Attachments

  • A96F6430-CB6A-4F28-ACF5-24C4A005414C.jpeg
    A96F6430-CB6A-4F28-ACF5-24C4A005414C.jpeg
    2 MB · Views: 845
[attachimg=1]
Photo of underneath the finished planter. Can only post one photo per post using my phone for some reason.
 

Attachments

  • BFD6D997-EFAD-4814-917F-301078E69559.jpeg
    BFD6D997-EFAD-4814-917F-301078E69559.jpeg
    2.1 MB · Views: 785
[attachimg=1]

Finished 🙂 except treating the wood. That’s up to my parents how they want it to look 🙂
 

Attachments

  • 33138A82-3A77-4729-AAD6-0A31F5D9ED4F.jpeg
    33138A82-3A77-4729-AAD6-0A31F5D9ED4F.jpeg
    2.6 MB · Views: 803
ScotF said:
Nice projects! Would love to see some pics of the tool in action too!

Thanks Scot! There’s lots of tool action but nothing too complicated! I got bored of all the 45 degrees so did the trim on top and think it looks nicer 🙂 used the 420 angled rail to cut the 22.5 degrees 🙂

I really want to make a bench next but not sure of the final design. I saw one on here that was beautiful but way beyond my skills thus far! Plus I’d like to make it out of the wood I have as that’s part of the challenge 🙂

Thinking a combo between the Ana white chairs and something a bit chunkier 🙂
 
NL-mikkla said:
The planter came our really nice, well done!

Thanks mikkla 🙂 my parents are pleased with it which is the main thing 😀 and I am too - learned a few new things which is great 😀
 
Untreated table and one chair - will be 1 more chair for this set as it’s going on a long thin balcony and 2 other chairs to go with the bigger chunkier table and benches set 🙂

[attachimg=1]


Attachments

  • ADC76E61-FB9B-4F0A-9D50-2014FF1277A1.jpeg
    ADC76E61-FB9B-4F0A-9D50-2014FF1277A1.jpeg
    2.4 MB · Views: 636
Great work! [emoji1303]

You just keep on cranking the furniture out, it seems. ;)
I like the style, but have found in my own woodworking, that a little more sanding goes a long way in making the pieces seem more refined, if you are interested in this.
Maybe sand a chamfer on the legs, get rid of the sawmarks...

...or just keep at it in your own style.
As long as you keep at it! [emoji846]
 
grobkuschelig said:
Great work! [emoji1303]

You just keep on cranking the furniture out, it seems. ;)
I like the style, but have found in my own woodworking, that a little more sanding goes a long way in making the pieces seem more refined, if you are interested in this.
Maybe sand a chamfer on the legs, get rid of the sawmarks...

...or just keep at it in your own style.
As long as you keep at it! [emoji846]

Hey thanks for the comments! Yes I totally agree I should sand more and make it look smoother and nicer - I’ve only got my little triangular Fein multitool one with me here -
Do you use the festool sander? Would you recommend it?
To be honest I just wanted to get the design right and didn’t have too much more time than that this time! The Ana white chair is supposed to be stackable but I made the seat bit slightly overlapping the frame so don’t think that can now happen!
I would LOVE to learn how to finish wood nicely 🙂 the slats I used on top of the table and chair were pretty rough to begin with so I just used my 60 grit fein triangles and left it there! This is for outside but great point I should pay more attention to that 🙂 thank you 🙂
What do you do or what would you recommend for finishing outdoor furniture nicely? I really like the osmo uv oil that Peter parfitt recommended - what grit of sandpaper and finish do you recommend? Thank you 🙂🙂
 
Back
Top