Grasshopper
Member
- Joined
- Oct 6, 2014
- Messages
- 595
Bill,
thanks for the suggestion. I just watched Marc Sommerfeld's methods on his YouTube channel. Pretty cool way to go. I have been intimidated by building my own custom panels, but that gave me hope. (In my mind, I needed to attach a pre-fab panel to a plywood side and back, but with Marc's method, just tongue and groove into the FF. I wonder if I could still order prefab panels and tongue and groove those into a face frame that I build).
Questions:
-If you are doing a panel on the side and back, do you just tongue and groove it on the outside corner so it is flush? (If not, how would you deal with the outside corner where the side and back panels meet?)
-How do you attach drawer slides without screwing to the inside of the panel (I assume you just screw into the rails and stiles, but thought I'd ask)?
-I just purchased the Domino, so with that in mind, would you still do pocket joinery on the inside of the face frame or would you join using dominos (same question for attaching dividers and shelves)?
-Are the side and back panels tongue and grooved (without 3/4" plywood anywhere) strong enough to support a 500 lb +/- granite slab?
Thanks again for the suggestion as well as the intro to Marc Sommerfeld's videos.
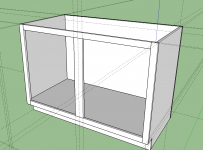
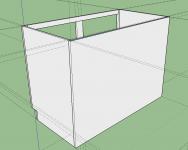
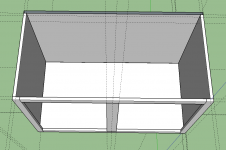
Billedis said:I use tongue and groove joints on my face frame cabinets and use a raised panel for the ends. It is strong, and only limiting factor is the drawer guides, making sure you do not screw into the panel so it can float. Check out some videos on youtube by Marc Sommerfeld for some ideas. Bill
")