Joelm said:
I recently upgraded the house to 220A service in preparation for some HVAC upgrades. While the electrician was already here I got him to upgrade my shops wiring.
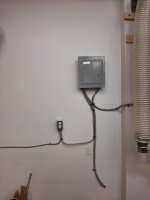
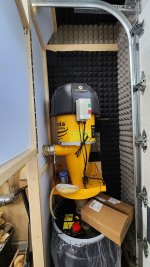
He first installed a sub panel which I need because I'm also getting a mini split in the shop next week.
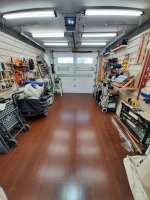
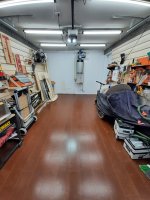
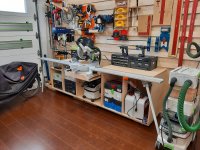
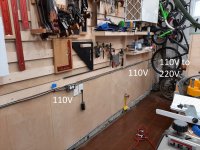
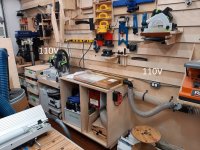
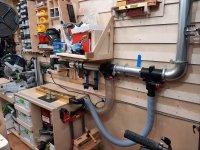
I had him run a line down each wall. One side had 2 outlets at 110V.
The other wall has 3 outlets. 2 at 110V and the third I wanted 220V for next year when I will buy a cabinet tablesaw.
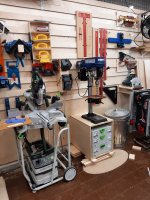
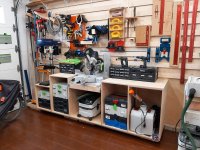
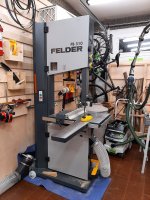
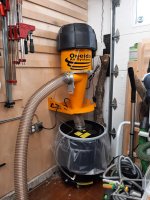
The problem I ran into yesterday was the side of the wall with the 3 outlets are all 110V and all off of the same 15 amp breaker. I was ripping some pine 2x4's with my sawstop JSS Pro and my CT26 when all of a sudden I tripped the breaker.
I originally asked him to put each outlet on it's own breaker. He looked at me like I was a bit crazy. So he suggested all the plugs on the right would be on 1 breaker and all the plugs on the left on the second breaker. For the 220V outlet I asked for he wired it up as a 110V and said when I get my new saw to call and he'll swap out the plug. The 220V/110V outlet is also joined at the subpanel to the 2 other 110V plugs on the left wall all sharing the same 15 amp breaker.
I reached out to him last night and he said he could put decouple and install in a new breaker for the 220V/110V outlet. That sounds ok but I'm wondering if I should tell him to go back to my original idea of a breaker for each outlet. Or upgrade all of the 15 amp breakers to a 20 amp or 30 amp breaker.
I know this is a year and two months later response. But some comments on the electrical wiring.
It sounds like neither you nor the so called electrician knew what they were doing. Sadly. Regarding your idea of putting every outlet on its own circuit. Sounds nice except in actuality its a big waste. The correct way of wiring a shop is to put every other outlet on its own circuit. So outlet 1, 3, 5 are all the same circuit. And outlets 2, 4, 6 are all the same circuit. That way when you plug in a saw and a dust collector, you will use two outlets next to each other. But both will be on their own circuit. Do not have all outlets on one wall on the same circuit. Because you will likely plug both tools, saw and vacuum, into the same wall. And overload the circuit because both are on same circuit. More thought should have been put into this.
As for upgrading the circuits to 20 amp. Depends. What wire gauge was used? They are currently 15 amp breakers. Usually thinner 14 gauge wire is used with 15 amp breakers. So cannot be upgraded to 20 amp breakers. If the electrician planned and did the job correctly from the beginning and used 12 gauge wire, then it is easy to just change out the circuit breakers to 20 amp and you are set. But I cannot figure out why you would use little 15 amp breakers in the first place. 15 or 20 amp breakers are almost identical in price. Its the wire that is more costly. And the wire is what determines the breaker size used. You should have had 12 gauge wire installed originally. A shop needs heavier 12 gauge wire to use 20 amp breakers. But in your case, if the bad electrician used thin 14 gauge wire and a 15 amp breaker, then you are screwed. It will be a lot of work to pull all new wiring to 12 gauge to allow an upgrade to 20 amp breakers. Its illegal to put a 20 amp breaker on 14 gauge wire. Someone did not think when this job was done.
Regarding your 220 volt outlet on the wall. That is joined to the other two 110 volt outlets. And all sharing the same wiring back to the panel? And are sharing the same breaker. Oh my. No one was thinking when this was done. If the original plan was to originally make that 220 volt in the future, then it should have had its own separate wiring run from the panel to that outlet. Probably 10 gauge wire to handle 30 amp 220 volt breaker. It could have still been mated to a 15 or 20 amp breaker in the panel temporarily. Then later changed to 220 volt using the same wires but putting in a new double pole breaker. Easy.
But right now, I don't know what you have. You will need separate dedicated wiring run to the 220 volt outlet from the panel. And its own breaker in the panel. I'm not sure any thinking was done on this.
Now that it is a year later and you have used the shop and know what you want. I would think about it again. And call in a different electrician to do the work. Or do it yourself. Electrical work is pretty easy. Explain to the new electrician what you want and listen to his suggestions. Then research and think about his suggestions. Then call him back if he gave you good suggestions and have the job done.
Seems to me there was a whole lot of wasted effort here. The job will need to be done twice to get it right. The conduit and boxes on the wall can still be used. But new wiring will likely need to be run. And new breakers will need to be installed.
")
")