ear3
Member
- Joined
- Jul 24, 2014
- Messages
- 4,342
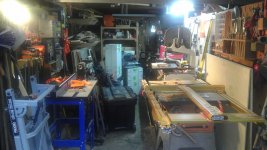
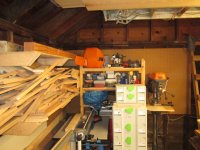
I've posted so many questions related to my shop reorganization that I decided it would be useful for me to just centralize it in a single thread and chronicle the ongoing changes. Just to set the parameters, my workshop occupies one-half of a 2 car garage in what used to be my grandfather's, then my dad's, and now my house (which I share with my aunt -- 2 family upstairs/downstairs unit -- she gets the other half of the garage). My dad originally setup a rudimentary workspace in the garage, and I've been gradually modifying it since I took over the house. Since I started to convert my workshop over to Festool, I've found my conceptions of the workspace changing radically, and decided this past Winter to do a major overhaul. This was the moment I realized something had to be done (taken last November, and chronicled here: http://festoolownersgroup.com/workshops-and-mobile-vehicle-based-shops/ideas-for-shop-reorganization/msg356395/#msg356395):
[attachthumb=1]
I had just returned from an installation, and realized with disgust that I could barely navigate the space. It was like playing a game of Tetris every time I wanted to access a tool or perform some operation.
My needs: Since I have the driveway, I will continue to do most of my cutting out there (miter saw, router table and table saw are all mobile), but I want the space to be as organized as possible, and have the option to do cutting inside when the need arises. I mostly work on my own projects, but a few times a year I do art installations -- most of the work is done on-site, but there's usually a fair bit of prep work to do at home base, and so I need to have the capacity to temporarily store and process large amounts of lumber.
So here's what I've done so far.
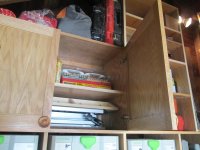
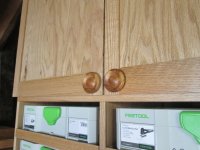
I don't have a huge amount of hand tools, and so I realized they could be organized and stored more efficiently in a cabinet above the workbench with a hybrid pegboard construction (documented here: http://festoolownersgroup.com/workshops-and-mobile-vehicle-based-shops/shop-cabinet/msg399394/#msg399394):
[attachthumb=2]
I realize I'm working a bit backwards by not re-doing the workbench first, but I'm still figuring out what I want for that, so the current bench is just a placeholder for what will eventually take its place.
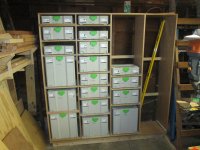
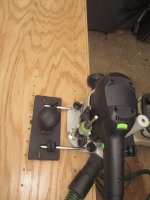
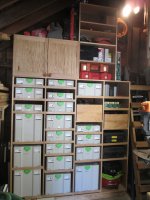
In the meantime, I've gone to work clearing out the back to free up storage and make space for a chaos cabinet. I redid and expanded the cordless tool storage station, and moved it to the right of the workbench:
[attachthumb=3]
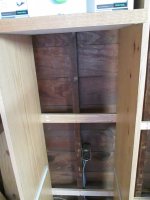
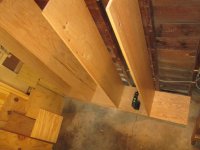
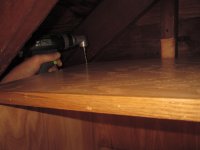
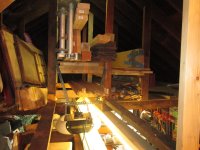
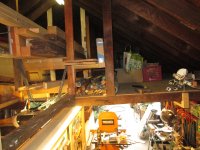
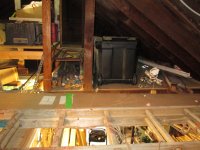
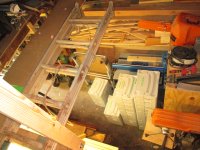
The loft on my side of the garage had accumulated 15 years of junk, and so I did a ruthless round of sorting and trashing over the weekend (thanks NYC Dept. of Sanitation!). It's amazing how much junk one holds onto. This allowed me to actually take out the back part of the loft:
[attachthumb=5]
[attachthumb=6]
[attachthumb=7]
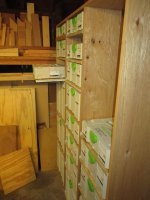
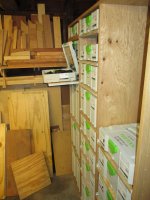
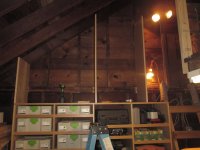
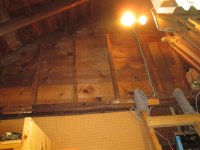
With the back loft out, it now became possible to use the front loft space more efficiently. This is what it looked like after I had cleared all the junk:
[attachthumb=8]
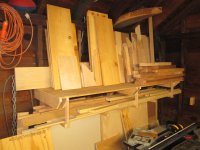
Now I have separate compartments space for long wide boards and guide rails, 2x4s and the long extension ladder, long narrow boards, and moulding/miscellaneous long pieces:
[attachthumb=9]
[attachthumb=10]
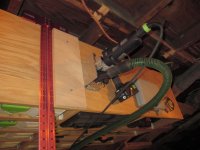
Since I moved the cordless tool storage station, I could now move the drill press over to the left side of the bench, and thus take it off the back wall:
[attachthumb=4]
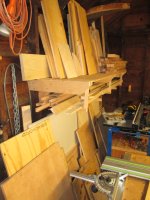
I then simplified the wood storage on the left, designating it as a space for scraps under 4ft, but keeping the space underneath for sheet good storage:
[attachthumb=11]
[attachthumb=12]
I can't help but feel like the old configuration is still exerting some influence over this redesign of the scrap storage, and that there might be more efficient ways of doing this, but I couldn;t think of any that would still allow me to put 4x8 sheets underneath.
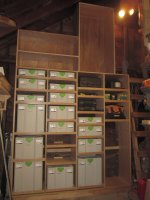
So this is what the back wall of the shop now looks like, ready to receive a Chaos Wall:
[attachthumb=13]
I've got my LR32 and am now working out the design of the Chaos Cabinet/Sys-ports, which I will embark on as soon as I pick up the drawer slides. More to come...
[attachthumb=1]
I had just returned from an installation, and realized with disgust that I could barely navigate the space. It was like playing a game of Tetris every time I wanted to access a tool or perform some operation.
My needs: Since I have the driveway, I will continue to do most of my cutting out there (miter saw, router table and table saw are all mobile), but I want the space to be as organized as possible, and have the option to do cutting inside when the need arises. I mostly work on my own projects, but a few times a year I do art installations -- most of the work is done on-site, but there's usually a fair bit of prep work to do at home base, and so I need to have the capacity to temporarily store and process large amounts of lumber.
So here's what I've done so far.
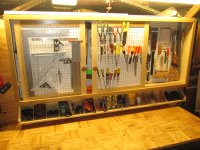
I don't have a huge amount of hand tools, and so I realized they could be organized and stored more efficiently in a cabinet above the workbench with a hybrid pegboard construction (documented here: http://festoolownersgroup.com/workshops-and-mobile-vehicle-based-shops/shop-cabinet/msg399394/#msg399394):
[attachthumb=2]
I realize I'm working a bit backwards by not re-doing the workbench first, but I'm still figuring out what I want for that, so the current bench is just a placeholder for what will eventually take its place.
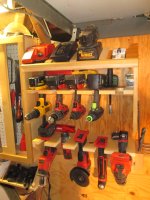
In the meantime, I've gone to work clearing out the back to free up storage and make space for a chaos cabinet. I redid and expanded the cordless tool storage station, and moved it to the right of the workbench:
[attachthumb=3]
The loft on my side of the garage had accumulated 15 years of junk, and so I did a ruthless round of sorting and trashing over the weekend (thanks NYC Dept. of Sanitation!). It's amazing how much junk one holds onto. This allowed me to actually take out the back part of the loft:
[attachthumb=5]
[attachthumb=6]
[attachthumb=7]
With the back loft out, it now became possible to use the front loft space more efficiently. This is what it looked like after I had cleared all the junk:
[attachthumb=8]
Now I have separate compartments space for long wide boards and guide rails, 2x4s and the long extension ladder, long narrow boards, and moulding/miscellaneous long pieces:
[attachthumb=9]
[attachthumb=10]
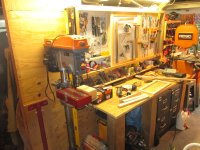
Since I moved the cordless tool storage station, I could now move the drill press over to the left side of the bench, and thus take it off the back wall:
[attachthumb=4]
I then simplified the wood storage on the left, designating it as a space for scraps under 4ft, but keeping the space underneath for sheet good storage:
[attachthumb=11]
[attachthumb=12]
I can't help but feel like the old configuration is still exerting some influence over this redesign of the scrap storage, and that there might be more efficient ways of doing this, but I couldn;t think of any that would still allow me to put 4x8 sheets underneath.
So this is what the back wall of the shop now looks like, ready to receive a Chaos Wall:
[attachthumb=13]
I've got my LR32 and am now working out the design of the Chaos Cabinet/Sys-ports, which I will embark on as soon as I pick up the drawer slides. More to come...
Attachments
-
 Pre-org.jpg547.4 KB · Views: 2,804
 -
 Back wall, wide view.JPG560 KB · Views: 1,824
 -
 Scrap storage 2.JPG500.9 KB · Views: 1,097
 -
 Scrap storage.JPG541.6 KB · Views: 1,235
 -
 Front loft storage 2.JPG505.8 KB · Views: 1,235
 -
 Front loft storage.JPG546.6 KB · Views: 1,399
 -
 Front loft, cleared.JPG519 KB · Views: 1,542
 -
 Loft removed, view from above.JPG579.1 KB · Views: 1,686
 -
 Loft removed 2.JPG465.4 KB · Views: 1,483
 -
 Loft removed.JPG515.5 KB · Views: 1,994
 -
 Drill Press.JPG615.1 KB · Views: 1,879
 -
 Cordless tool storage.JPG574.5 KB · Views: 5,800
 -
 IMG_4744.JPG612.7 KB · Views: 2,740