Grasshopper
Member
- Joined
- Oct 6, 2014
- Messages
- 595
I thought it may be a cool thread to have FOGgers share how they break down sheet goods for various projects.
This is my first attempt, so I thought I'd document my attempt and see how others approach the task.
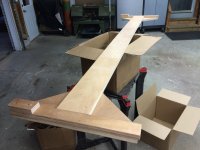
My project is fairly small, so I've laid out the Cut sheet on two 4x8 sheets of ply (oversized by 1/2 inch so I can cut off factory edge).
(I assume larger projects would gain efficiencies as you could probably make full rip cuts and make better use of the flag stop on the MFT)
I will break the plywood down (cuts over 28" +/- will be made "freestyle" with two 1400mm rails joined together, straightened with a 4' level, and clamped to plywood. Below I'd use using a piece of hard insulation as a sacrificial surface). Where possible, cuts under 28" will be made on the MFT.
I plan to make the following final dimensions:
(1) 48"x34.5" (Back Panel - Main Cab)
(4) 24"x34.5" (Side Panels - Main and Smaller Cab)
(1) 47 1/4" x24 3/8" (Bottom of main cab, dadoed 3/8" into sides and back)
(2) 47 1/4" x 4" (front and back stretchers for main cab)
(1) 24x34.5" (Back Panel - Smaller Cab)
(2) 23 1/4" x 24 3/8" (Top & Bottom of Smaller Cab, dadoed 3/8" into sides and back)
As I attempt to lay this out, I suppose I am surprised to find how many cuts I will be making "freehand" with my two 1400mm guide rails over the sacrificial piece of insulation.
On the first sheet (the one on the left), my cuts are:
1 & 2 - rip cut on both sides taking 5mm off factory edge using guide rail (5mm off each side)
Cut 3 & 4 cut & rip 48x34.5 sheet to final size using guide rail
Cut 5 - Rip cut using guide rail
Cut 6 - Cross cut left side of bottom MFT
Cut 7 - Cross cut right side of bottom and bottom of one side MFT
Cut 8 - Cross cut top of side MFT
Cut 9 - Cross cut left side of top for small cab MFT
cut 10 - Cross cut right side of top and bottom of back MFT
cut 11 - cross cut top of back small cab
The 2nd sheet is similar to sheet 1 (labeled as well, so I won't type it all up.
[attachimg=1]
Feedback is welcome.
Also, as the title suggests, share how you break down sheet goods.
This is my first attempt, so I thought I'd document my attempt and see how others approach the task.
My project is fairly small, so I've laid out the Cut sheet on two 4x8 sheets of ply (oversized by 1/2 inch so I can cut off factory edge).
(I assume larger projects would gain efficiencies as you could probably make full rip cuts and make better use of the flag stop on the MFT)
I will break the plywood down (cuts over 28" +/- will be made "freestyle" with two 1400mm rails joined together, straightened with a 4' level, and clamped to plywood. Below I'd use using a piece of hard insulation as a sacrificial surface). Where possible, cuts under 28" will be made on the MFT.
I plan to make the following final dimensions:
(1) 48"x34.5" (Back Panel - Main Cab)
(4) 24"x34.5" (Side Panels - Main and Smaller Cab)
(1) 47 1/4" x24 3/8" (Bottom of main cab, dadoed 3/8" into sides and back)
(2) 47 1/4" x 4" (front and back stretchers for main cab)
(1) 24x34.5" (Back Panel - Smaller Cab)
(2) 23 1/4" x 24 3/8" (Top & Bottom of Smaller Cab, dadoed 3/8" into sides and back)
As I attempt to lay this out, I suppose I am surprised to find how many cuts I will be making "freehand" with my two 1400mm guide rails over the sacrificial piece of insulation.
On the first sheet (the one on the left), my cuts are:
1 & 2 - rip cut on both sides taking 5mm off factory edge using guide rail (5mm off each side)
Cut 3 & 4 cut & rip 48x34.5 sheet to final size using guide rail
Cut 5 - Rip cut using guide rail
Cut 6 - Cross cut left side of bottom MFT
Cut 7 - Cross cut right side of bottom and bottom of one side MFT
Cut 8 - Cross cut top of side MFT
Cut 9 - Cross cut left side of top for small cab MFT
cut 10 - Cross cut right side of top and bottom of back MFT
cut 11 - cross cut top of back small cab
The 2nd sheet is similar to sheet 1 (labeled as well, so I won't type it all up.
[attachimg=1]
Feedback is welcome.
Also, as the title suggests, share how you break down sheet goods.

") . For me, using that 1400 guide rail on foam insulation has felt a lot less freehand than other methods I've used in the past. Compared to doing it on the MFT though it certainly makes sense. I guess it's all a matter of perspective.
. For me, using that 1400 guide rail on foam insulation has felt a lot less freehand than other methods I've used in the past. Compared to doing it on the MFT though it certainly makes sense. I guess it's all a matter of perspective.