Richard/RMW said:
rvieceli said:
Richard, I don't know how your code folks are, but here they don't count stuff that hangs off the building but doesn't increase the foundation footprint. Things like a bay window or a bump out.
Can't find a pic right now but I have seen folks that have created a bump out behind the SCMS to make room for the rails and stuff, so they can fit on a smaller space bench top.
Good idea, it's something I once considered as a way of creating a cubby for a compressor or to store a DeWalt contractors saw.
Where our codes give me a problem is in setbacks, the shop sits 3' from our fence on 2 sides and I cannot encroach into that setback. Also for practical reasons I want to have room to get around the shop for maintenance, cleanup, etc.
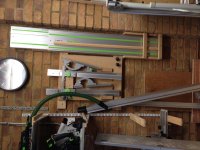
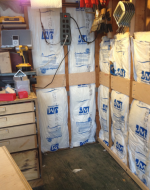
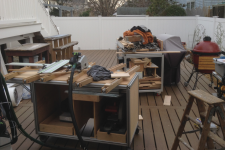
I was looking at another thread on the FOG earlier today showing a Bosch SCMS that does not have the tubes off the rear, it got me thinking. I have to head over the Lowes/HD and measure the saw when it is in the tucked-in position. Now that the space is cleaned out to create some openness I am reluctant to fill it up again... although that is probably inevitable.
RMW
Richard, how about a flush door or a sliding door. The flush door could open out when needed and it could be weather stripped. it could even be set up so it could open from inside and still open out. Un noticeable to anybody until it is opened.
a double door with the bottom flipping down and the top flipping up could work so it never opens out. Flashing for that could be very unobtrusive (as in not visable).
Of course that Bosch would solve all of the problems i have listed here :
")
Whoops! I just now thought of another tale from the past.
As my brother and i had been dropped off at our Uncle's farm for two weeks while our parents sorted out their differences, the stay ended up lasting for 6 years.
For our first or second Christmas on the farm, we had looked under the tree (which we had helped cut and drag down from the back pasture lot) hoping to find something there from our dad. Our mom was there and we had already located piles of goodies from her. When all packages had been opened and wrappers spread all over the floor (I know, nobody else makes that kind of mess), our mom took us out to the barn and showed us a big pile of lumber. I had noticed the pile as i had been doing chores around and in the barn for over a week, but gave it no thought. Santa had sunk into the barn over nite Christmas eve and tied a big ribbon around the pile with a card from Dad. The card promised that he would come to the farm (The uncle was really his uncle, so our great uncle) for two weeks in July. He would help us to build a tree house.
I, especially, was excited. I had always been interested it "playing" with tools and wood. My brother was excited as well, but his artistic endeavors were more in the line of paint brushes and paint.
As we commenced with construction, we got to talking about fighting off indians and cattle rustlers and maybe even pirates. In those days, it was alright, and maybe even encouraged, for kids to play with toy guns and make believe shooting at the bad guys. Of course, after watching the shooter up western that played for the entertainment of all on Starday afternoon, we all wanted to be the bad guys. Those guys had more freedom and a lot less responsibility. As we worked and talked, our Dad quietly framed in some windows that opened out, some opened in and some were sliders. Even the door had a slot with slider in it for shotgun or blunderbuss to stick out for protection. We even ended up with a little door, not unlike a pet door today, where we could sneak in or out, depending on the direction of battle.
We never did come under attack, but it was great when the two of us and a few friends would go up "on the hill" with sandwiches and soda, or sometimes stayed all nite, we talked about fighting Indians and rustlers. Sometimes, when it was time to bring the cows down tot the barn at milking time, it was my job to bring them. I loved working with the animals. I of course, became the rustler along with maybe one or two others, while the rest devised ways to head us off at the . Of course, "the rustlers" were never headed off and the cattle ended up penned in the thieves barn.
So, RMW, you see, I have had lots of experience with openings in the side of buildings. :
[unsure]
Tinker
![ScreenClip [3].png](/data/attachments/12/12810-c1f25fe4ba8ea6ef1ff9da79a97f9e36.jpg?hash=XHHfyGZuL2)
