iamnothim
Member
- Joined
- Feb 5, 2014
- Messages
- 1,435
Stoked!
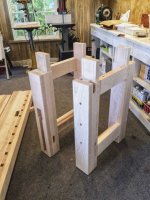
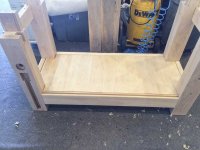
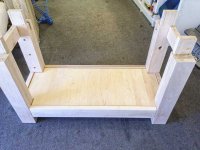
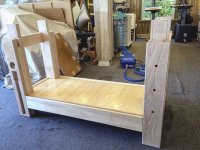
The leg end assemblies are glued and pegged.
The draw bore is incredibly strong. A clamp provided no additional glue up benefit.
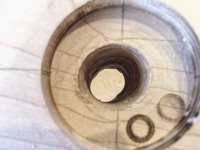
As always ya learn from the first one. Marc said in the video to offset the hole in the tenon about 1/16" (1.50mm)
So I did. I wish I took a picture but my hands were full. In the each end assembly there are 8 pegs (see below)
I could only get three to full depth in the first end. The remaining ones were skew. Very solid, but skew.
On the second assembly I drilled about 1/32 off center. That did the trick. Straight and through to the other side.
Everything came out nice and square and the joint is amazing.
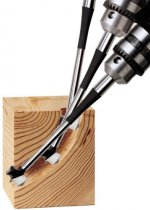
Pegs: I'm going to see if I can return the Lie Nielsen dowel cutter. I could not make a decent dowel. If I cut the stock very close
there are flat spots. It's also difficult to keep the stock straight. My dowels looked like gummy worms. As such I ran out and purchased some 3/8" cherry dowels. $3 for a 3' stick. Dowels on Demand has them from a long list of species. So much for the $55 dowel die.
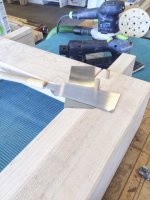
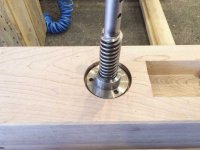
Cutting the dowels flush. I used a card scraper under the saw for the first stroke or two. This eliminates the possibility of the saw touching the workpiece. I flush the dowels up with a block plane. Then sand.
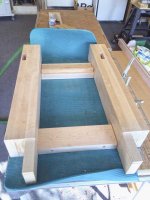
Sanding: For years I have used a Yoga Mat to protect the workpiece while sanding or other finish work. They are inexpensive and work great. I originally purchased it for Yoga but the residents protested and the city put a ban in place..... But I digress a yoga mat is great for sanding. You can lay your sander down right away without having it walk off the table.
What is next???
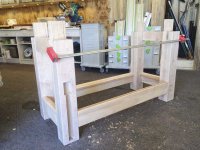
I need to work on one of the two long rails but that shouldn't take long. Then I pop the top on. [eek]
[attachimg=1]
[attachimg=2]
[attachimg=3]
The leg end assemblies are glued and pegged.
The draw bore is incredibly strong. A clamp provided no additional glue up benefit.
As always ya learn from the first one. Marc said in the video to offset the hole in the tenon about 1/16" (1.50mm)
So I did. I wish I took a picture but my hands were full. In the each end assembly there are 8 pegs (see below)
I could only get three to full depth in the first end. The remaining ones were skew. Very solid, but skew.
On the second assembly I drilled about 1/32 off center. That did the trick. Straight and through to the other side.
Everything came out nice and square and the joint is amazing.
Pegs: I'm going to see if I can return the Lie Nielsen dowel cutter. I could not make a decent dowel. If I cut the stock very close
there are flat spots. It's also difficult to keep the stock straight. My dowels looked like gummy worms. As such I ran out and purchased some 3/8" cherry dowels. $3 for a 3' stick. Dowels on Demand has them from a long list of species. So much for the $55 dowel die.
Cutting the dowels flush. I used a card scraper under the saw for the first stroke or two. This eliminates the possibility of the saw touching the workpiece. I flush the dowels up with a block plane. Then sand.
Sanding: For years I have used a Yoga Mat to protect the workpiece while sanding or other finish work. They are inexpensive and work great. I originally purchased it for Yoga but the residents protested and the city put a ban in place..... But I digress a yoga mat is great for sanding. You can lay your sander down right away without having it walk off the table.
What is next???
I need to work on one of the two long rails but that shouldn't take long. Then I pop the top on. [eek]
[attachimg=1]
[attachimg=2]
[attachimg=3]