Systainer Cabinet Making from Inconsistent Plywood?

onocoffee

Member
Joined
Sep 23, 2024
Messages
1,555
Location
Baltimore, Maryland, USA
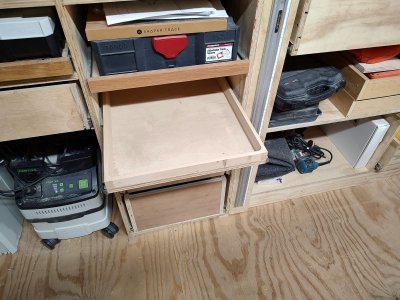
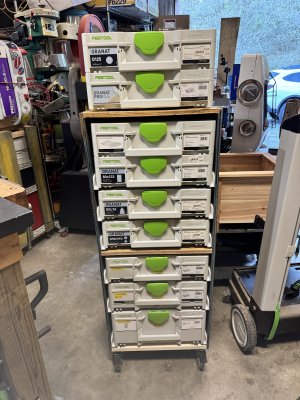
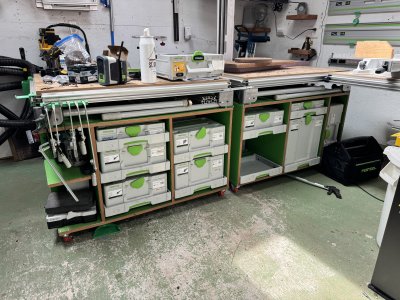
I'm planning on building some Systainer cabinets that are 920mm high, 620mm deep with an interior width of 427mm. In my inventory of reclaimed plywood, I have some 18/19mm ply that is of nice quality that I repurposed from a project we build 25 years ago. Very few to no voids. The other stuff is mostly from harvested pallets, so they range from 12mm, 15mm, 18mm.

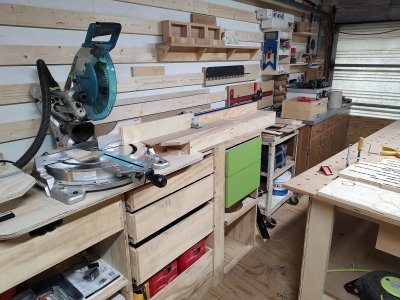
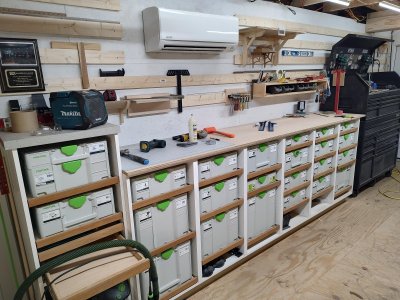
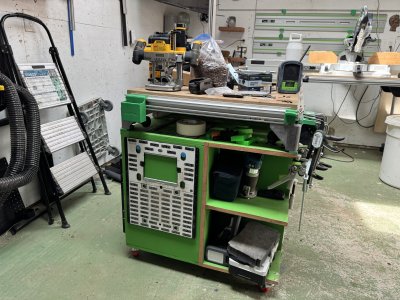
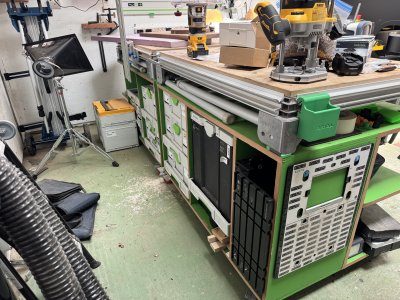
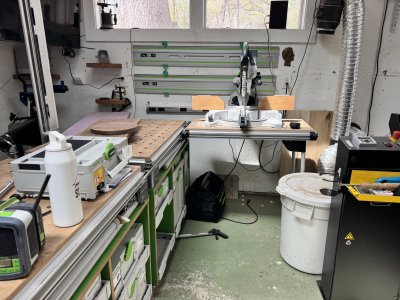
Ultimately, the idea is to line the cabinets together (let's say a total of six) and then drop a 600mm wide cabinet in the middle that will one day be the home to a KS120. The cabinets will each have locking casters to allow them to roll around as necessary. But instead of using stretchers and screwing a countertop to it, I'd like to use the ply to work as a top.

I'm thinking of using the Domino for alignment and screws to hold it all together. I'm wondering what parts I should use for assembly - meaning, should I save the thickest ply for the verticals or the top/bottoms?

Thanks!
 
I did something similar when I made my systainer cabinets from leftover underlayment (18 mm). I had about 10 sheets remaining after I extended my workshop and wanted to use them for this. Even though the quality really wasn't great (many voids and other deficiencies and "hairy/feathery" surfaces),

One set is placed under the stairs and doesn't need to be moved. The other set (7 cabinets of about 1 meter high with a solid 38 mm beech worktop on top of therm) are on casters and need to be moved once in a while, because the racks with my wood store are behind it. There is no problem with the cabinets when I move them. There is no racking at all. They are screwed to each other with patent screws (not sure that is what you guys call them, see picture). The backs are just 6 mm poplar ply in grooves (not glued). One thing I did was screw 2 sturdy strips of iron flat bar under the cabinets to prevent sagging and to make sure there was something keeping them together when I pull on the whole contraption. The casters (6 of them) are screwed to the metal bars. I edge banded the visible sides of the panels and pull-out drawers with iron-on fir edge banding to make it look better.

I built all cabinets as separate units, meaning there are always two sheets against each other. Even with 2x12=24 mm that should give you enough strength. The cabinets are dominoed and glued. No screws were used. Depending on how you are thinking of making the drawers you might prefer to use the 18 mm sheets for those. The 12 mm sheets will be able to carry the weight of a normal systainer (unless it is filled with metal parts or something like that). But you will need enough thickness to screw them to the runners without the screws breaking out when you put load on the drawer. That is, unless you use expensive undermount runners, or are willing to lose much useable height/width to strengthen the construction of the drawers. I wanted to keep the cost low and optimize for space, so I chose to do it like this. I would suggest to use Euro screws to screw the runners to the cabinets and long wood screws to screw the runners to the drawers. I also applied system32 to make rows of holes so I was flexible when it came to placing the systainer drawers in the cabinets. The topside of each drawer has recesses for the systainer feet and the underside has a recess that functions as a finger pull.

Maybe that gives you some ideas.

patentbout.jpg
20260316@173048-01.jpg

20260316@173343-01.jpg

20260316@173228-01.jpg

20260316@173256-01.jpg
 
HDV makes good points, and good cabinets for his purpose.

Over here those fasteners are called “sex screws”, or at least used to be, but with careful design you can make the whole thing as a unit and won’t need these screws.

I’d reserve the thicker plywood to the tops and bottoms but I don’t know the material quantities so… You always want to be working on a flat strong surface and the casters will need to be attached to something strong. 1/2” plywood can support a lot of weight as long as it’s prevented from bowing. The drawers slides will take care of that. I’d do the same thing hdv did for drawers.
 
Mine are 1M (39") high, 18"(457mm) internal width, and 22"(560mm) deep. The pullouts are similar to @hgv except mine are face out, rather than side loaded. They also have a hardwood front edge, rather than the finger scoop/slot. It helps to cover the drawer guides, the foot pockets were a later addition that I wish I had done the first time.
My first set were/are plywood too. They were thrown together quickly, to get up and running after a move.
Duplicated/expanded in white melamine, as I had time. The pullouts are all still plywood and considerably deeper than necessary, which leaves storage space behind the Systainers.
The plywood run has been modified/adapted into a miter saw station.
It went from a very "lived in" station, in a commercial cabinet shop, to a pretty sterile home shop, still in the works.
 

Attachments

  • IMG_20250912_120741951_HDR.jpg
    IMG_20250912_120741951_HDR.jpg
    452 KB · Views: 33
  • IMG_20250820_153242888.jpg
    IMG_20250820_153242888.jpg
    446.6 KB · Views: 32
  • IMG_20250823_093935714_HDR.jpg
    IMG_20250823_093935714_HDR.jpg
    418.5 KB · Views: 30
Does the 620mm depth allow for slides long enough, to open the systainer while still on the shelf?
In the case of the cabinets I'm just starting to build, I ended up going with 650mm depth to fit 24" slides from Woodcraft (HighPoint 3J01). Originally, I thought of this because - on a separate tool cart for the 9" bandsaw, I did a similar depth to access systainers on both ends. In the case of these cabinets, I'm not sure if they will end up open-ended or against a wall - meaning that rear access would be limited. I'm expecting the slides to be long enough to double-depth the systainers and (hopefully) to have enough slide depth to open the interior systainer and access the contents. At the moment, I have not yet installed all the slides, so I'm not 100% sure this will work.

However, you decide to approach your cabinets, I've found that even 12" sliders will work. However, in those cases, the systainer itself has to slide slightly forward to be clear enough to open the lid completely. If you go with 14" slides, there will be enough slide for the systainer lids to open. In both cases, I used the 3J01 slides, though I suspect any company's slides will work in a similar manner.

To note: in this pic the 24" slides are not fully extended.

IMG_2806.JPG
 
To follow up, I did a little more work installing the slides. The slide panels are 600mm deep and you can see how well the interior Systainer can be accessed. In this case, ther forward Systainers are SYS3 M187 and the interior are T-Loc Systainer 2
 

Attachments

  • IMG_2895.jpeg
    IMG_2895.jpeg
    3.1 MB · Views: 16
  • IMG_2896.jpeg
    IMG_2896.jpeg
    3.2 MB · Views: 16
  • IMG_2897.jpeg
    IMG_2897.jpeg
    3.1 MB · Views: 21
Well, my latest Cabinet From Inconsistent Plywood is a bit of a disaster. Easily The Worst project I've done in a while. 12mm plywood recovered from a pallet that's delaminating in spots and more than eager to chip up when cutting. But unlike the one that I assembled for adhesives and finishing supplies, this one was made from a single sheet. I thought it might be good to have all the abrasives systainers in one rack and I wanted to give those SYS Rail Pros a try. If you're unfamiliar, these are systainer rails based loosely on the Sys Rails from Tanos but feature a sliding capability. The V2 allows you to slide and pull the Systainer clear and readily access the contents. It seems like a great idea so I printed a bunch of them.

As I was making a previous cabinet with the 418mm width specified by Tanos for the Sys Rail (Sys Az drawers are 427mm), I tried to see of these SRPros would work. They did not. Turns out their spec is 412mm. Why the designer didn't match them to the Sys Rail, I don't know. Also the cleat that holds the rail in place does not use standard LR-32 hole spacing and any 5mm screw is way too big. I ended up using #8 - 3/4" screws.

The idea of the SRPro is really good. In execution, it's a complete mess. Tolerances are not what we have come to expect from things like the Sys Rail. In the hand, out of the printer, the rails seem pretty robust. Installed, I'm kinda hating it. The slides don't slide that easy and are dependent on how tight the screws are set. Of course, my janky plywood is not as sturdy as I would like and since it's ultra-cheap ply used for pallets, it's all kinds of wonky. After I took the first pics and used the slides a bit, the opening just flexed wider, the plys are so coarse that the screws started to strip out. The width at the opening flexes due to the sliding action because, unlike the shelf sliders I've used before, there's nothing to pull the walls together.

Overall: dumb. The 412mm spacing is so far away from the SYS AZ 427mm that it becomes difficult to unify them all in the same stack. At 412mm, it's still a little wider than the Systainer, so I think I will eventually repurpose this sysport for other tools Iand install the slider drawers.
 

Attachments

  • IMG_2898.jpeg
    IMG_2898.jpeg
    3.7 MB · Views: 12
  • IMG_2900.jpeg
    IMG_2900.jpeg
    4.6 MB · Views: 13
  • IMG_2901.jpeg
    IMG_2901.jpeg
    4.7 MB · Views: 11
  • IMG_2902.jpeg
    IMG_2902.jpeg
    3.7 MB · Views: 12
  • IMG_2903.jpeg
    IMG_2903.jpeg
    2.2 MB · Views: 11
  • IMG_2904.jpeg
    IMG_2904.jpeg
    3.6 MB · Views: 11
  • IMG_2906.jpeg
    IMG_2906.jpeg
    4.3 MB · Views: 9
3/4” ply should have been used for this but the existing cabinet is totally salvageable.

You’re learning a lot on this project.

1/2” plywood can support a lot of weight IF it’s kept from bending. You don’t have anything to prevent bending here and the slides might actually promote bending.
All you need to do is add a wood stretcher in the middle to keep the sides from bowing out or swap two sets of slides for conventional drawer slides like you used on the previous cabinet. One regular drawer slide might not have enough bowing resistance.

1/2” plywood is fine for screws that pass through but it’s thin for screws that go into it. Not enough meat. For screws that are stripping out substitute larger and or longer screws that go all the way through the thin ply, then cut off the surplus steel. Add a small cut-off grinder to your arsenal like this.

For sticky slides use a lube like SLIPIT. You are already on the right track reserving lightweight abrasive Systainers for the plastic slide.
 
Back
Top