DynaGlide
Member
- Joined
- May 16, 2017
- Messages
- 1,588
Richard/RMW said:TSO_Products said:[member=65062]DynaGlide[/member] - your project pictures along with pointers from the likes of Sparktrician are a big helpo for many facing this kind of work.
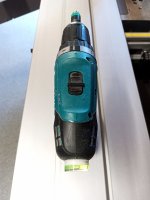
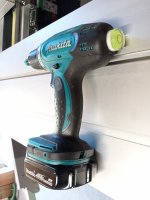
Your LR-32 Hex bar extension pictures the same solution we developed last year when we ran into the same limitations with the short standard bars and the awkward tightening/releasing of the FESTOOL attachment. We hesitated to put it into production because we were not sure if the market is big enough to justify the effort.
Maybe some other LR-32 users, who would rather do woodworking than building shopmade fixtures, will speak up ? ?
Hans
[member=61691]TSO_Products[/member] Hans I'm interested but primarily due to a pending project July-ish. If you had something available now I'd buy, absent that I will probably whomp up a DIY set.
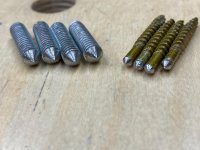
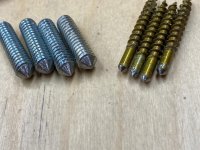
[member=65062]DynaGlide[/member] Matt - where did you obtain the hex bar stock, MMC?
Thanks,
RMW
[member=8712]Richard/RMW[/member] It's from McMaster Carr. 89845K77 I bought the 2ft length.
The other tricky part is finding a tape that will fit it. .this is the one I used https://www.amazon.com/gp/product/B00I8RKN68/ref=ppx_yo_dt_b_search_asin_title?ie=UTF8&psc=1
If all you are doing are a fixed depth you could cobble together your own jig for the guide rail out of scrap MDF. Line up the router on the LR32 plate where you want it and triple check it's parallel etc. Take some measurements and make your own one off pair for that setup.
Like this:
=271s
If I only made cabinets and only used the same hardware I could see having a pair made up for 37mm and 261mm ready to go.