Home Office Remodel

[member=65062]DynaGlide[/member]

Matt your design looks good. But I'm a big fan of units over a countertop that DO NOT continue down to the counter surface. Suggest you think about making the shelves more like an upper kitchen cabinet with shelves and perhaps mount them on French cleats. It will give you more flexibility in the future, should you decide to change things.

Ron
 
rvieceli said:
[member=65062]DynaGlide[/member]

Matt your design looks good. But I'm a big fan of units over a countertop that DO NOT continue down to the counter surface. Suggest you think about making the shelves more like an upper kitchen cabinet with shelves and perhaps mount them on French cleats. It will give you more flexibility in the future, should you decide to change things.

Ron

Concur with Ron wholeheartedly!  Leave the work surface clear of any vertical supports for the shelving by using a french cleat system to support the cabinets.  Set the bottom shelf at 60" AFF to provide headroom for leaning in while working, for servicing printers, and for large monitors. 
 
I think the proposed bookshelves might be too much for the room/desk. You might consider at least mounting them on the wall to give plenty of open space on the desk below. I'd feel claustrophobic working with the bookshelves sitting the desk. I like the overall design and the formica tops. They look good.
 
Matt - I'm going against the other feedback!  I'd recommend you paint them instead of going with the melamine.  The lowers look great with the painted finish, frame and panel sides, etc.    You have the tools, and the experience.  Don't make a dynamite workspace turn 'Ikea' with melamine.

I think you should continue that 'look' from the desk cabinets on the uppers, even with the need to paint them.  Plus I think it improves the resale on the home in the future. 

Agree with the others on keeping them off the counter top.  And I'd at least 'plan and build' for LED light strips that could be inset under the bottom of the wall cabinet.  Lee Valley has some really simple guides for selection of the right components.  You might think about a set of doors on one cabinet - maybe the set on the right side - to hide some clutter, but also give you access to the wall for wiring of the LED's in the future.

 
It seems unanimous that I shouldn't run the bookshelves all the way down. Unfortunately, as is usually the case, that's not "how the people on pinterest" do it. If I have them go all the way down I was going to do them 12" deep, no bottoms so the counter is still exposed, and give the right desk area a 36" wide open area. She's pretty adamant on this. You have to please the client if you want to stay in business, right?

[member=167]neilc[/member] Don't you go talking me into more painting! Even though I know you're right that it would look best. Compared to the doors doing the bookshelves would be really simple. Darn it.

I'll do some more looking into lighting. If I wanted lighted shelves that would mean ditching adjustable, no?

For the backs should I do 1/2" applied to full size of the carcasses, attached with dominos and screws? When I did the bottom cabinets I did stretchers/nailers, set the 1/4" backs in enough to fit the 3/4" stretcher behind.
 
For the backs / hanging...

Consider 2" rails across the top under the top shelf.  Do the same at the bottom, assuming you are floating them on the wall and not going to the desk.  Inset a 1/4" panel to those rails as well as on the sides.  Those give you rails to screw into the wall rather than dealing with French cleats.  Much cleaner approach and you give up minimal depth.

I just searched for 'built in bookshelves above desk' on Pinterest.  Many of the ones I saw are above the surface.  They look SO much better, particularly on a smaller space, which is what you have there.

[member=44099]Cheese[/member] - those are really cool shelving lights!  Love the idea of the adjustability and zero exposed wires.

 
neilc said:
[member=44099]Cheese[/member] - those are really cool shelving lights!  Love the idea of the adjustability and zero exposed wires.

Neil that's one of the manufacturers...I thought I'd saved the other one in the computer but I can't find it now.  [sad]
 
Hey [member=65062]DynaGlide[/member] they could be the one...I remember that it was a simple installation requiring just a couple of parts. However I also thought that screws were not part of the solution but a couple of retractible spring pins like on the original DF 500.

RSL (Roberts Step Lite) also produces a "Wireless Adjustable Shelf Light".
https://robertssteplite.com/led/
 
[member=44099]Cheese[/member] Thanks for the info. None of those manufacturers are forthcoming with how to buy without going through a design consultant. Probably a sign they're outside my budget.

After a few rounds of back and forth I think I've narrowed down a design that pleases everyone. She gets the full size bookshelf, centered on the wall. Then we get open areas above both our computers. The middle bookshelf is ~30" wide with 28.5" shelves. The two side wall hung units are about 22" wide each. Ideally they'd all be wall units but you work with what you've got. It's still being tweaked. I may make that middle unit a little narrower.

i-PHHvRvB-L.png
 
It looks really nice.  And probably as much work as installing a new kitchen.

There is a (new to me) type of hardware for joining seams on counter tops.  It not only draws the counters tightly together it allows form micro-adjustments to level the two pieces.

I have not seen any videos on how to  use this, but I  did see a photo showing its use.  I will try it on my next countertop.  The detail photos shown in the link give an idea how it works. 
https://www.ebay.com/itm/1743922065...MIy4KEhNCA7wIVBDiGCh2HIgo_EAQYBCABEgJqPPD_BwE
 
I finally nailed down the reason for the 'bookshelf' in the middle going full length to the countertop was to semi hide wiring for the printer. So I said, what if I give you a center cabinet with a pull out shelf to hold the printer and I put an outlet up there and a power strip to hold any devices you want to charge. I think that worked. I can put some access holes from the center cabinet to the shelf units on either side to accommodate Sonos bookshelf speakers too.

i-xQ2hfFh-XL.png


Thoughts?
 
I am enjoying watching the evolution of this project as you work through it with your spouse.  The design has come along nicely.  Your approach w/ the doors and slide out tray for the printer should work very well.  I think it will look better this way, too.

Are you planning to trim the adjoining side panels with 1.5" material, or make something wider?  Or just butt together?

Something about white melamine looks slightly off to me sometimes.. it's almost too white.  I used it for my kitchen cabinets (on the interiors) but it's not something I'd like to look at for long periods of time.  Depending on what's nearby, you might be able to get something with a slightly less stark color.

I built all my non-drawer cabinets with adjustable shelves for my kitchen.  So, 10 cabinets with 3 or 2 adjustable shelves each.  I think we have maybe adjusted one of them in the past four years.  It's a nice option to have, but playing with dimmable leds in the cabinet would be more fun if you had to choose. [big grin].  My wife really enjoys adjusting the under-shelf lighting to set a mood.  8) The adjustable LED systems look very cool, but I'm guessing that comes at a big premium.
 
Thanks for continuing to open this for discussion, Matt!

I like this better.  I’m not personally a big fan of a wall size bookcase, but you and your wife both being in there must need a lot of storage.  If it is a small room, it does make the room seem even smaller.  I just googled ‘office desk with floating shelves’ and found quite a few very interesting designs that definitely open up a room. 

On the printer, why not put the printer on the lower cabinets?  Only asking because a lot of printers get to be pretty deep, meaning deeper than a 12” wall cabinet.  That would make wiring simpler and might accommodate the option of a ‘pull-out’ drawer for easy scanning, etc. 

What did you decide on melamine vs frame and panel?

-
 
mrFinpgh said:
Something about white melamine looks slightly off to me sometimes.. it's almost too white.  I used it for my kitchen cabinets (on the interiors) but it's not something I'd like to look at for long periods of time.  Depending on what's nearby, you might be able to get something with a slightly less stark color.

I use Egger U708 light grey for all cabinet carcasses nowadays. Not at stark as the white and doesn't look dirty as easily.
 
I'm with neilc on the printer for a couple of reasons. The size he mentions is one. You'll be locked into something small.

Putting the printer unit in the base cabinet gives you more room and frees up desk real estate. The other thing is think about using it. With the higher level unit you will most likely have to stand up to retrieve print outs, the lower unit will allow you to remain seated and just grab the stuff. It is also easier to load items to scan if you have an all in one unit.

Ron 
 
mrFinpgh said:
I am enjoying watching the evolution of this project as you work through it with your spouse.  The design has come along nicely.  Your approach w/ the doors and slide out tray for the printer should work very well.  I think it will look better this way, too.

Are you planning to trim the adjoining side panels with 1.5" material, or make something wider?  Or just butt together?

Something about white melamine looks slightly off to me sometimes.. it's almost too white.  I used it for my kitchen cabinets (on the interiors) but it's not something I'd like to look at for long periods of time.  Depending on what's nearby, you might be able to get something with a slightly less stark color.

I built all my non-drawer cabinets with adjustable shelves for my kitchen.  So, 10 cabinets with 3 or 2 adjustable shelves each.  I think we have maybe adjusted one of them in the past four years.  It's a nice option to have, but playing with dimmable leds in the cabinet would be more fun if you had to choose. [big grin].  My wife really enjoys adjusting the under-shelf lighting to set a mood.  8) The adjustable LED systems look very cool, but I'm guessing that comes at a big premium.

[member=59039]mrFinpgh[/member] Hi, yes I plan on trimming where they butt together. I was thinking just that: a 1.5" wide strip with a the edges facing eased over.

The lighting I still want to do, I just need to do more research. In order to keep the adjustable shelving I would have to use vertical strips mounted to the sides of each carcass. They get recessed into a groove and installed into an aluminum track with a diffuser cover. I just haven't given it enough thought yet.

neilc said:
Thanks for continuing to open this for discussion, Matt!

On the printer, why not put the printer on the lower cabinets?  Only asking because a lot of printers get to be pretty deep, meaning deeper than a 12” wall cabinet.  That would make wiring simpler and might accommodate the option of a ‘pull-out’ drawer for easy scanning, etc. 

What did you decide on melamine vs frame and panel?

Hi Neil,

I might do that. I have the open corner cabinet with electrical in place that would work well for this. I originally intended on having a desktop PC there but opted for a nice laptop this past Holiday season instead. It plugs right into my work dock and sits on top of the desk. We don't print that often, maybe once a week for my daughter's school, so the inconvenient location wouldn't really matter. I'd still put it on a pull out shelf on slides so I'm not crawling around down there to use it when scanning.

In either case, I'll do the electrical and pull out shelf on the center upper for the reasons I listed above: device charging, speaker wiring.

I think construction wise the wall cabinets will be just like the bottoms except with a top. Rout the 1/4" back panel in 3/4" to allow for nailers/stretchers. I think I'll skip the melamine and opt for unfinished quality ply and paint it to match the doors and drawer faces below. Then the two doors of course will be identical to the ones below.

[member=3192]rvieceli[/member] I think you might be right. The printer we have is pretty compact and has a scanner. It was a Christmas purchase and while it would fit in a 16" upper cabinet, putting it in the bottom might be the way to go.
 
DynaGlide said:
The lighting I still want to do, I just need to do more research. In order to keep the adjustable shelving I would have to use vertical strips mounted to the sides of each carcass. They get recessed into a groove and installed into an aluminum track with a diffuser cover. I just haven't given it enough thought yet.

I like the vertical lighting solution, that's exactly what I'm going to do for the new kitchen cabinets I'm building.

Here are a couple of links that may trigger some additional ideas for electrification and wire management.
https://www.mockett.com/power-communication-systems/
https://www.mockett.com/grommets-wire-management/

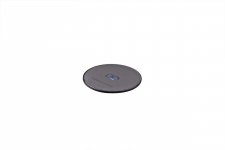
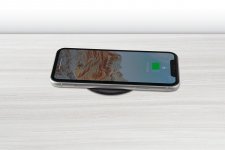
I really like the new built-in wireless charger to eliminate wires & cables.
https://www.mockett.com/power-communication-systems/wireless-charging/wcs9-23s.html

[attachimg=1]

[attachimg=2]

Here's some info on aluminum channels and their covers. The SLIM channel is only 3/8" deep, perfect for pocketing.
https://www.diodeled.com/custom/dow...ath-aluminum-channel-specification-sheet.pdf/

Here's another reliable supplier of LED's and accessories. I use the Luxeon LED's for installation in stainless outdoor step lights set in concrete along with MeanWell drivers. I also use MeanWell drivers for all interior LED lighting.

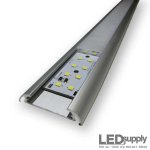
This vendor offers a real low profile aluminum extrusion that's only 8.8 mm tall.
https://www.ledsupply.com/led-heats...MIw6L57vaW7wIVr1PVCh3J0gQFEAYYByABEgLsB_D_BwE

[attachimg=3]
 

Attachments

  • Mockett.jpg
    Mockett.jpg
    14.9 KB · Views: 1,030
  • Mockett 1.jpg
    Mockett 1.jpg
    76.6 KB · Views: 1,040
  • Low Profile Channel.jpg
    Low Profile Channel.jpg
    17.7 KB · Views: 1,020
DynaGlide said:
[member=59039]mrFinpgh[/member] Hi, yes I plan on trimming where they butt together. I was thinking just that: a 1.5" wide strip with a the edges facing eased over.

The lighting I still want to do, I just need to do more research. In order to keep the adjustable shelving I would have to use vertical strips mounted to the sides of each carcass. They get recessed into a groove and installed into an aluminum track with a diffuser cover. I just haven't given it enough thought yet.

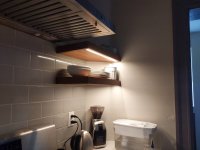
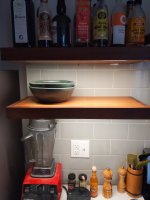
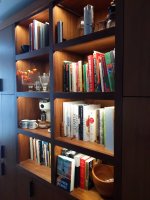
You might give a little consideration to what it will feel like when you're looking into the cabinets and there are vertical lights in there.  In my kitchen I've got LED lights in tracks w/ diffusers in two places:  Recessed into the bottom of floating shelves and attached to the underside of shelves within a faceframed unit.  What I've found is that the floating shelves look good but if you are in another room (e.g. sitting on a chair and looking into the kitchen)  the LEDs become much more directly visible and it isn't the best experience. Functionally they are great, however.

In the face-framed unit (4' wide, 5' tall), the shelves have a 2" wide piece on the front and the strips run directly behind, which means the light source is always shielded a little bit more.  The quality of light tends be a bit more pleasing to the eye and looks better from more angles.

I'm trying to imagine what vertical lighting might look like here and I can see some potential to get an eyeful of LED from a number of angles, even if they are recessed flush w/ the sides of the cabinet and diffused, it could be a bit strong.  I'm not really sure if it would play out that way in reality, but it's worth checking beforehand.  I guess someone with chops could mock up the light sources in fusion, but the real thing might be easier in terms of time.  I'm trying to think of a way you could recess the lights in the frame itself, and aim them towards the back, but it would make your face frame at least another inch or so wider, which probably isn't the look you are after.

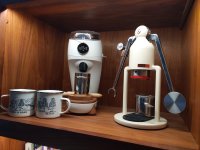
I've added a couple photos to illustrate what I'm saying.
 

Attachments

  • PXL_20210305_174859708~2.jpg
    PXL_20210305_174859708~2.jpg
    1.6 MB · Views: 520
  • PXL_20210305_174844844.jpg
    PXL_20210305_174844844.jpg
    1.9 MB · Views: 521
  • PXL_20210305_175020579.jpg
    PXL_20210305_175020579.jpg
    351.4 KB · Views: 533
  • PXL_20210305_175108061.jpg
    PXL_20210305_175108061.jpg
    187.7 KB · Views: 517
Back
Top