Mario Turcot
Member
- Joined
- Nov 26, 2017
- Messages
- 1,247
Alanbach said:What is available in your area for a reasonable price? My preference would be hard maple and my second choice would probably be soft maple.
ChuckM said:Mario,
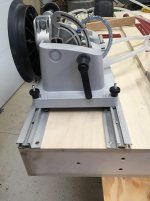
Thanks for sharing the Fisher's clip. His 180* swing design is unique and better than the usual one. I also found his video easy to follow (good pace of delivery), with no distracting or annoying music throughout.

ChuckM said:Question: Do you still have any room left for woodworking after all these shop builds? [tongue] [big grin]