rvieceli
Member
Like Mike said roll the table saw up on a piece of 18 mm ply and call it done.
Ron
Ron

")
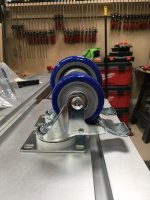
gnlman said:Great job, cart looks good.
Hmmm those are same lee valley wheels I use...or it looks like them...very nice wheels and double lock.
Greg
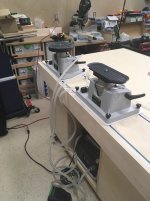
Cheese said:With the polypro cutting board under each SYS VAC unit, you can now evacuate each cavity area under the SYS VAC. Using those cavities will give you approximately 10X more time in case of an electrical failure.
Mario Turcot said:[member=44099]Cheese[/member] There you go!
Cheese said:Mario Turcot said:[member=44099]Cheese[/member] There you go!
That's slick Mario...and also SICK as they say in the motor-head community. [big grin] [big grin] Me likey!!!
Is that octopus of tubing a problem? It would be nice if you could somehow bundle that to be out of the way. [smile]
One of my mantras that I regularly repeat on a weekly, almost daily basis is that:
I HATE electrical cords
I HATE wires
I HATE hoses.
So for me going cordless is pure bliss. That's my end game. [smile]
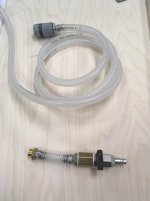
Mario Turcot said:I will probably put two quick disconnects through the top. I have to brainstorm on that [cool]
DynaGlide said:[member=66597]Mario Turcot[/member] I'm not quite sure how I missed your thread but I wish I had saw it sooner. We're after somewhat similar goals of incorporating the Vac Sys into a mobile cart. Mine is a lot less ambitious though. http://festoolownersgroup.com/member-projects/vac-sys-mobile-cart/
I'm still cooking up some ideas for the top but I, too, would like to add quick disconnect to the base hose(s). I have a drawer almost complete that should be pretty slick for holding the extra vacuum heads.
TrackTubesGuy said:Maybe a little late for this .. but I've recently began following Bentswoodworking on Instagram and he just finished an MFT cart with Vac Sys incorporated ... take a look. I think he may have a video on his YouTube channel also?
Bentswoodworking MFT cart ..