Grits said:
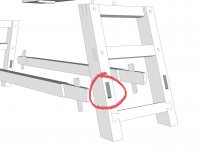
I am building a Moravian workbench and everything is pretty simple in the build except for the 15 degree leg mortises that are giving me a spot of trouble. I’ve watched the accompanying DVD and Will Myers masterfully chops it out by hand through the 4 inches but I’m definitely not at the level where I feel like I could do that by hand. I currently live in an apartment and I don’t have access to a drill press and figured I may be able to rig something up to route it out (a shim or ramp for the router perhaps). Can anyone suggest a jig of some sort to route out angles in a handheld router? Attached is a picture for clarity.
Hi Grits
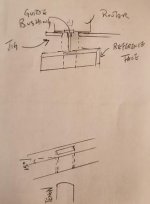
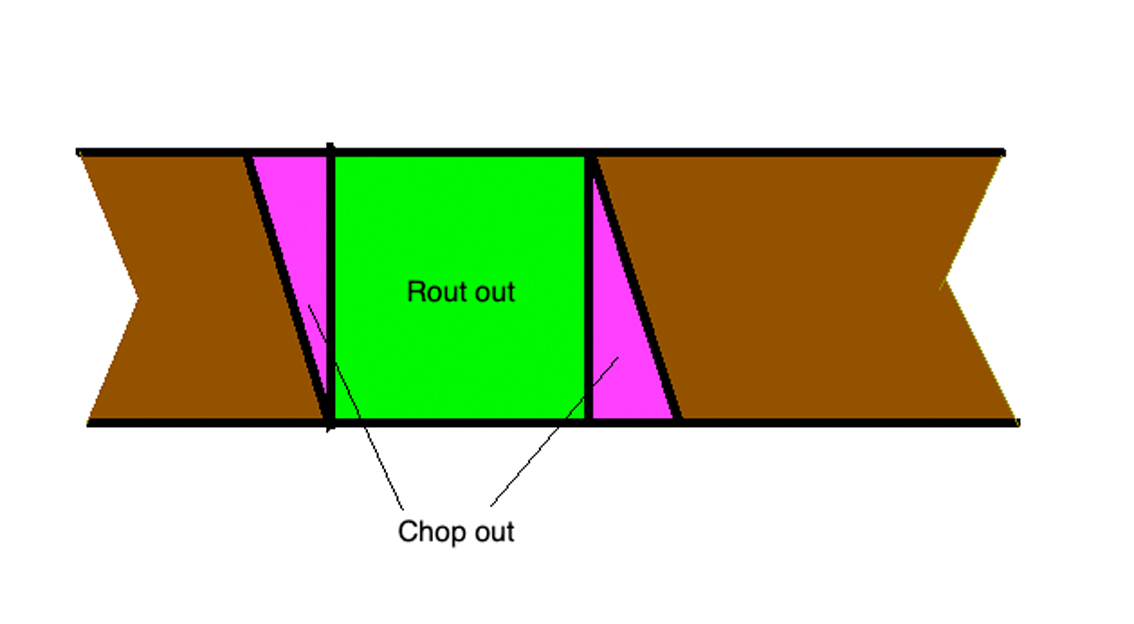
The key here is accurate marking out. Below is a drawing of the mortice ...
The green area will be routed out, half from each side. The pink area will be chopped out with a chisel - don't worry. This will be straight forward.
I have designed a fixture for guiding a chisel for morticing. It is based on the one made by Paul Sellers, but (obviously) better
")
There are two issues with Sellers' guide. Firstly, he holds his work in a vice, which is a no-no as the work piece will slip down. You can see this in his videos, and that he frequently has to make adjustments. Secondly, he has made a fixed position guide, and wants to sell his, which means you need a half-dozen of these (terribly simple) pieces for the desired offset.
The guide I designed has a variable position fence, and the work piece is placed on the bench top.
The fence also acts as a hold down, preventing the work piece to be lifted by the mortice chisel.
From the rear ...
The fixture is simply a long fence with a fine sandpaper as non-slip, against which the stretcher is clamped, and a short sliding fence, which will act as the depth control.
A marked mortice (yours will be marked in three sections, as above) ..
Place the stretcher on the bench and drop the fixture on top of it. Clamp the fixture in the bench …
Now adjust the sliding fence alongside the registration side of the mortice …
Clamp the stretcher against the long fence and begin chopping with the chisel against the sliding fence ..
The aim here is to achieve perpendicular sidewalls.
If all this is too difficult - hopefully it is not - then the other way to make the mortice is to laminate three boards together, with the mortice section as the centre board (in two sections) and fitted around the stretcher. Easier but more work and not as much fun
Regards from Perth
Derek