JLB builders LLC
Member
- Joined
- Jun 5, 2011
- Messages
- 339
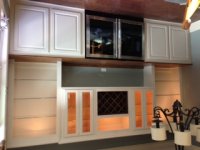
Great looking window seats. I like the frames on the front. Wait…..I do not see bead board???? Is it so? [eek]


Stephen B said:[size=12pt]
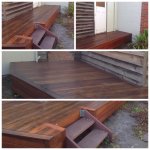
Merbu deck and Rendered Brick Wall.
jmbfestool said:The decking looks nice good clean job
BUT shame about the steps! With those big ugly angle brackets and being made of different material to the rest of the decking.
Could you not fix through the string instead of the angle brackets?
Jmb