tiralie
Member
- Joined
- Jan 26, 2010
- Messages
- 3,614
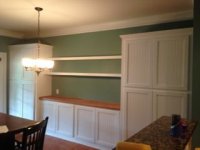
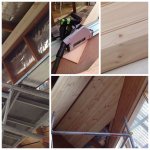
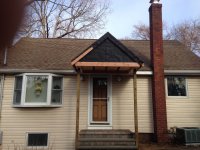
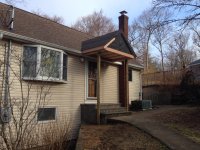
irishroey said:I am finally getting around to adding to this thread of a recent install
I like those curved doors.
Tim
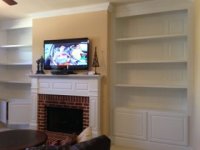
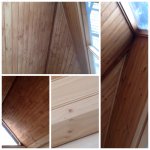
irishroey said:I am finally getting around to adding to this thread of a recent install
Kev said:Those angles have made me feel rather dizzy!
I was looking at that also, my guess is that it is 90 to make a Channel.GPowers said:Was the 1/2" reveal between the boards at 90 degrees or was it beveled at like 45 degrees?
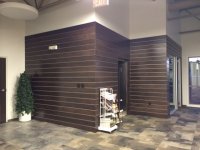
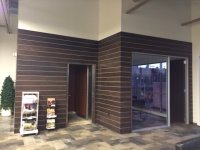
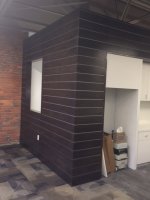
WoodWhisperer said:These pictures are from a job I finished up a few weeks ago. All the wood is 1x6 poplar stained almost black. 1/2 reveal between the boards.
bkharman said:I was looking at that also, my guess is that it is 90 to make a Channel.GPowers said:Was the 1/2" reveal between the boards at 90 degrees or was it beveled at like 45 degrees?
I was also wondering what way you fastened it to the wall... Very slick and nice looking. It reminds my of the Sea Ray we used to have.
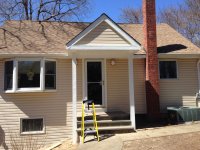
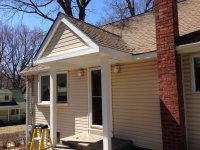
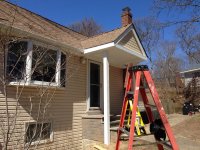
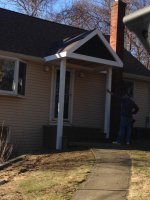
Looks great, really improves the look and functionality of that entrance.Sal LiVecchi said:Newest Adventure work in progress
Hoping to complete this week in between the rain drops