Home Office Remodel

Hello all,

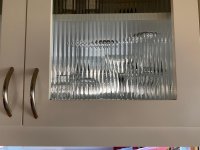
I'm looking to get started on this next week. Here's where the design sits:

i-QVMB8hw-X2.png


I'm a little torn on how to trim the cabinets. Originally I was going to put a 1.5" trim piece to cover where two adjacent shelf units meet. That might look strange if I didn't do something along the top and bottom edges. If I did a face frame, I'd get that 1.5" all around except where the cabinets meet the middle cabinet with doors. I'm tempted to just skip going for the chunky 1.5" look of the shelves and frame and keeping it frameless.

Any tips?

Thanks,
Matt
 
Matt, are you going to do strip or puck lighting under the hanging cabinets?  Might want to consider a false front to conceal the lights such that they don't cause glare into SWMBO's eyes.  Just a thought...  [wink]
 
Sparktrician said:
Matt, are you going to do strip or puck lighting under the hanging cabinets?  Might want to consider a false front to conceal the lights such that they don't cause glare into SWMBO's eyes.  Just a thought...  [wink]

[member=7493]Sparktrician[/member] I would like to. I'm a little confused on how to approach the design we're after. Maybe I'm missing something having not really dealt with face frames.

This is what we're after:

i-3xRrLBm-X2.png


I was thinking of building the cabinets frameless then attaching the front 'frame' in pieces after they're hung. Each rail and stile would be 3/4 material, 1.5" wide. That way where two boxes meet it would cover the exposed plywood without extending into the boxes insides. Along the tops and bottoms the rails would extend past the boxes 3/4", like this:

i-Ld4ZP76-X2.png


I'm assuming this 3/4" lip would allow me to hide some lighting strips.

That center wider cabinet is going to have two doors. My current thought is to do inset doors and when I bore the hinge holes, subtract off 18mm from the 37mm setback to account for the 'frame' that will be applied.

When it's all done I want the doors, the frame, and the shelves in the same plane. The shelves would be 3/4 ply with a 1.5" maple lip.

Does this all make sense or am I way off?

Matt
 
DynaGlide said:
Sparktrician said:
Matt, are you going to do strip or puck lighting under the hanging cabinets?  Might want to consider a false front to conceal the lights such that they don't cause glare into SWMBO's eyes.  Just a thought...  [wink]

[member=7493]Sparktrician[/member] I would like to. I'm a little confused on how to approach the design we're after. Maybe I'm missing something having not really dealt with face frames.

This is what we're after:

i-3xRrLBm-X2.png


I was thinking of building the cabinets frameless then attaching the front 'frame' in pieces after they're hung. Each rail and stile would be 3/4 material, 1.5" wide. That way where two boxes meet it would cover the exposed plywood without extending into the boxes insides. Along the tops and bottoms the rails would extend past the boxes 3/4", like this:

i-Ld4ZP76-X2.png


I'm assuming this 3/4" lip would allow me to hide some lighting strips.

That center wider cabinet is going to have two doors. My current thought is to do inset doors and when I bore the hinge holes, subtract off 18mm from the 37mm setback to account for the 'frame' that will be applied.

When it's all done I want the doors, the frame, and the shelves in the same plane. The shelves would be 3/4 ply with a 1.5" maple lip.

Does this all make sense or am I way off?

Matt

[member=65062]DynaGlide[/member], I think I'd put a 1-1/2" or 2" valence under the cabinets to direct the light down onto the work surface while keeping it out of SWMBO's eyes.  I'd hold the valence against that bottom front of the cabinets, even with the front plane of the cabinets, with the light strips right behind them to move the light as far forward from the wall to make it as useful and shadow-free as possible.  Make sense?
 
Matt, I think this is what Sparky was referring to.

On our kitchen cabinets I added a 2" valence to the BOTTOM of the cabinets to control light spread and keep it out of our eyes while working in the kitchen. The LED strip is approx 1" away from the front of the cabinets so that any chopping/cutting/mixing tasks are thoroughly illuminated. This is a photo showing the inside/back of the valence.

[attachimg=1]

This is the front of the cabinets showing the front of the 2" wide valence that's flush with the front of the cabinets.

[attachimg=2]


Attachments

  • 10175.JPG
    10175.JPG
    336.2 KB · Views: 916
  • 10176.JPG
    10176.JPG
    337.4 KB · Views: 905
Matt - I'd make the rails go all the way across at the top and bottom of the side shelves (where there are no doors.)  for the side shelves, I don't think they need to 1.5" edging on what I assume are adjustable shelves, unless they are carrying significant weight.

With careful measuring, You should be able to build either side cabinet face frame as one piece and the center door top/bottom rails can attached once those are in place.  If your bottom rail is 1.5", you should be OK to hide the LED strip as you have it designed.

Here's an article on typical dimensions for rails / stiles. https://homeguides.sfgate.com/cabinet-stile-rail-dimensions-94437.html
 
[member=65062]DynaGlide[/member] I don't see any reason you can't just go frameless on these upper units. Edge band the edges and be done with it. I think they would look fine. I'd also be tempted to leave the doors off and just go with shelves. It would look better IMHO.

As for the lighting, just put an L shaped valence slightly back for the front and side edges to shield the lights. I you want to hide the wring more try giving it a false top just below the cabinet bottom and put in a plywood panel. Make a rabbet or an extra rail to mount it too. Mount the LEDS to the panel and route the wiring underneath.

Ron
 
Thank you everyone for the feedback. Those pictures help a lot [member=44099]Cheese[/member] .

[member=167]neilc[/member]  The whole idea is that everything including the rails and stiles of the face frames and the shelf lips are the same width. The only thing that would be wider would be the door parts (those are 2.5" shaker rails and stiles to match the base cabinets).

I agree with the long rails and single piece face frames with careful measurements.

Some are suggesting I make the valance larger up to 2" but that'd throw the symmetry off which is why I'm asking if I can get away with 3/4" overhang to cover up some LEDs if I go that route.
 
DynaGlide said:
Some are suggesting I make the valance larger up to 2" but that'd throw the symmetry off which is why I'm asking if I can get away with 3/4" overhang to cover up some LEDs if I go that route.

You can make it whatever width you want to Matt...I needed 2" because at the time, LED strip lighting wasn't invented yet and I needed to shield the larger, deeper Halogen fixtures I installed.

Now with LED strip lighting, I'd make that same valence only 3/4" to 1" wide. With a narrow valence you'll also want to position the LED's very close to it.

I'd jury-rig a simple "cabinet bottom", place it at the height you think you want, mount a short piece of the strip lighting you plan on using and then fabricate a couple of valences in different widths and see what works. That'll get you 2 things, you may decide to raise or lower the bottom of the cabinet after some experimentation and you'll be able to decide how wide the valence needs to be to hide the LED's and prevent the stray light issue.

Make sure the chair is at the height you'll be using and if your wife is shorter than you, make sure she's part of the experiment.  [smile] You really don't want those LED's beaming any light in your direction because it's really distracting...gives you a headache.
That's the reason some people use the 45º LED brackets. Unfortunately that also throws the lighting away from the immediate area that you're trying to light up.

 
Cheese said:
Matt, I think this is what Sparky was referring to.

On our kitchen cabinets I added a 2" valence to the BOTTOM of the cabinets to control light spread and keep it out of our eyes while working in the kitchen. The LED strip is approx 1" away from the front of the cabinets so that any chopping/cutting/mixing tasks are thoroughly illuminated. This is a photo showing the inside/back of the valence.

This is the front of the cabinets showing the front of the 2" wide valence that's flush with the front of the cabinets.

[member=44099]Cheese[/member], BINGO!  [smile]
 
DynaGlide said:
Some are suggesting I make the valance larger up to 2" but that'd throw the symmetry off which is why I'm asking if I can get away with 3/4" overhang to cover up some LEDs if I go that route.

[member=65062]DynaGlide[/member], I'd suggest that you dummy it up using cardboard as a substitute for the valence to get a feel for the light spread, and use stick-on Velcro to test placement of the LED light strips until you dial it in for your needs.  In this scenario, you can vary both the valence height and light placement until you and she are both happy.
 
i-WSJmxsH-XL.png


i-B3T39k4-XL.jpg


I finalized the design and ordered materials. I am hoping to get going on this next week. My SketchUp Foo has greatly increased this past year and a half with this project. I will probably start learning Fusion360 next in anticipation of getting a CNC of some sort in 2022.

I took [member=167]neilc[/member] advice and am building two separate face frames to cover the left and right bank of cabinets. I accounted for having wider stiles where they meet the walls to allow me to scribe them in for a seamless look. To assist in my one man install I will cut the top nailers on each cabinet with a 45 bevel and place a mating french cleat piece on the wall which is about 2" less in width to allow for positioning. The wall cleats will only serve to help me get everything where I want before I attach to studs.

Thank you everyone for the contributions thus far.

Matt
 
I decided to take a mental health day and get into the shop. I quite liked the ripping station and cross cutting station setups. The one thing I'd change next time is to swap in my 90" TrackTubes to the crosscut station. There were a few pieces that were full length that needed squared on one end and that extra length of TrackTubes would've come in handy for material support. I don't own those roller support things that most guys use, they'd work just as well.

Cutting on those square dowels on the ripping station worked 'OK' but not great. I had to be very cautious about their placement. I'd opt for larger dowels next time. I accidentally cut into the lower sheet at the end of a cut one time but it is a part that won't be seen so I lucked out.

i-bgpCzsv-X3.jpg


i-kztScR2-X3.jpg


i-PzQgF5Z-X3.jpg


i-8nGMFwr-X3.jpg


i-x93FqKk-X3.jpg


i-bNWbz3h-X3.jpg


i-ch6bfSt-X3.jpg


i-z9PSFRp-X3.jpg


i-TV6nLW8-X3.jpg


i-QzDJD5B-X3.jpg


Oh and just as I was about to hit Post, look what showed up:

i-pjjH3fL-X3.jpg


I ordered it yesterday from a dealer in PA. Now that's fast. I'm a happy camper.

Matt
 
Here's some shots of how I use the vacuum pods in line with the vac sys pump head. I plumbed them to work together.

i-rnkdDq4-XL.jpg


i-kpxgcWp-XL.jpg


i-SHvmKBC-XL.jpg


i-tq7J3TJ-XL.jpg


Yesterday and part of today were LR-32 time. Things didn't go as planned. I caught it on the 2nd panel when I went to do the back row of holes and they weren't lining up with the front, about 1mm off. After an impromptu troubleshooting session with [member=7493]Sparktrician[/member] we figured out the OF1010 slipped on me off center. Only thing I can figure is I must've grabbed the LR-32 baseplate when tightening the router bit since all the holes are off by the same amount before I caught it.

When I went to do the rest I swapped in the 1400 since it screws securely to the baseplate.

i-c4kzJhB-XL.jpg


For the out of alignment holes since they're for shelf pins I went searching for an 'adjustable' adjustable shelf pin. In my mind I figured a cam shaped shelf pin would be perfect, and voila, someone else had the same idea:

156-191_1.jpg


https://woodworker.com/spiral-support-shelf-pins-mssu-156-191.asp

I ordered up 100 of them to adjust out any slop when I go to install the shelves.

Finally, when I went to do the grooves for the back panels wouldn't you know it, the 6mm or 1/4" panels I ordered they shipped 7mm thick MDF. My router bit is 6.35mm so I can do it in one go with a little breathing room but because of the 7mm panels the distributor sent me that meant I had to do all the parts in two passes. All these little frustrations add up to lots of wasted time.

I really like my Vac Sys cart. It's the perfect station for LR-32, edgebanding, putting in grooves, Domino, sanding. Really speeds things up and makes the monotony of batching out cabinet parts less tedious. I don't have a big workshop but I'm glad I made room for the cart.

Matt
 
jussi said:
Those vacuum pods looks pretty cool. Do you have a link to the seller?  How do you like them?

They're a very niche thing to have but for how I use them they're awesome. So much easier to twist two knobs to lock the rail down than deal with clamps from underneath. A member here from the UK has made a few pairs as his time allows and sells them on eBay. I hope he doesn't mind me sharing since I know he doesn't do it full time. [member=66875]simonh[/member] is is forum name.
 
jussi said:
Thanks.  I ended up finding his original post and expired ebay listing.  Looks very cool but $300 shipped is a bit too steep for me right now.  Hopefully he can find a US partner in the future.

Are like that aren’t hard for a woodworker to make.
 
Something I didn't run into with the base cabinets, how to hide the groove and bottom edge of the upper cabinets? I decided to put edgebanding over, seems to work okay. When these cabinets are up on the wall in my office, the bottoms will be seen.

i-TsGsXh9-X3.jpg


i-F4FWsD7-X3.jpg


I need to do some Domino work so I can test fit, measure for back panels, and check fit of the shelves.
 
Matt - nice progress.  Like the use of the vac holding clamps for the LR-32 rail.

So what are the grooves on the bottom of the adjustable shelves for?
 
neilc said:
Matt - nice progress.  Like the use of the vac holding clamps for the LR-32 rail.

So what are the grooves on the bottom of the adjustable shelves for?

Thanks Neil. Wish it was faster but I don't have much free time. Those are the cabinet tops and bottoms with the grooves.

Love that vac sys cart.
 
Back
Top