New bar build progress

BMAC

Member
Joined
Oct 15, 2014
Messages
160
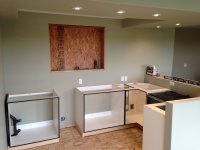
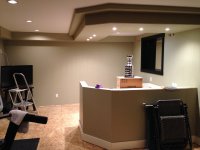
I've had some time finally to work in a project at my own home during the holidays. I'm building a bar in my walk out basement adjacent to what will be a pool table area. The basement area was pretty much unfinished when we moved-in in 2013 and it took me a too long to get it to this point, but here it is....

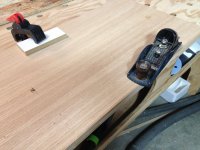
Used my new Pro 5 sander which worked great for sanding all of the woodwork.

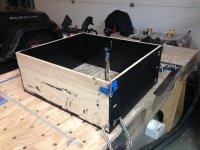
I've made the lower cabinet boxes from white melamine and edged taped them with Fastcap's self adhesive edge tape which I've been using on my jobs with good success.

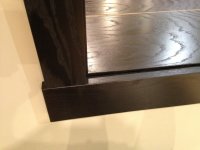
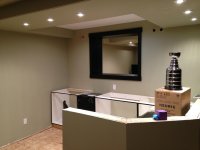
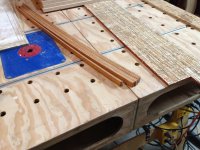
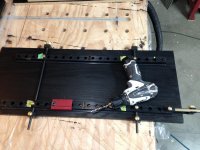
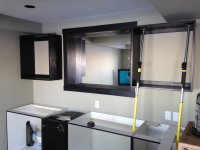
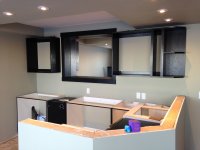
I recently completed the back bar bottle storage area set into a wall that I deliberately framed with two walls spaced parallel to one another about a foot apart. The wood returns in this opening are 3/4" oak veneer on particle board and solid red oak casings stained black with waterborne Saman brand black stain and minwax satin sprayed lacquer. I'll be adding tempered glass shelves about 3/8" thick for displaying the bottles. I also have rough wired the area for LED strip lighting above and below the bottle storage.

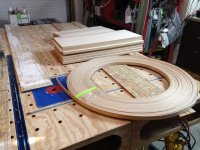
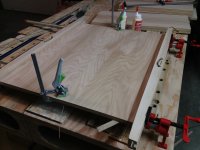
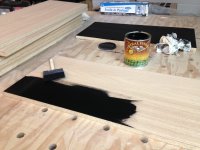
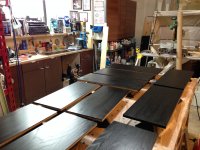
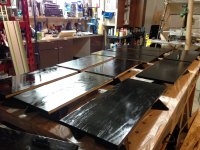
The last couple of days I've been working on building the upper cabinets also using the same 3/4" red oak sheet goods. I've switched the stain and finish now to General Finishes waterborne Black stain and Arm-R-Seal based on some great recommendations from FOG members on another post. Thank you all for pointing me to this finish system.

Below are some of the early pics of the initial bar construction and I'll post more on following posts in groups.
 

Attachments

  • image.jpeg
    image.jpeg
    1.8 MB · Views: 485
  • image.jpeg
    image.jpeg
    1.7 MB · Views: 504
  • image.jpeg
    image.jpeg
    1.4 MB · Views: 402
  • image.jpeg
    image.jpeg
    542.2 KB · Views: 382
  • image.jpeg
    image.jpeg
    1.7 MB · Views: 402
  • image.jpeg
    image.jpeg
    1.4 MB · Views: 385
Having problem uploading photos in larger groups so I'll do them in batches
 

Attachments

  • image.jpeg
    image.jpeg
    1.9 MB · Views: 327
  • image.jpeg
    image.jpeg
    746.6 KB · Views: 293
  • image.jpeg
    image.jpeg
    2.2 MB · Views: 338
...more
 

Attachments

  • image.jpeg
    image.jpeg
    1.5 MB · Views: 282
  • image.jpeg
    image.jpeg
    1.6 MB · Views: 269
  • image.jpeg
    image.jpeg
    2.2 MB · Views: 241
Yet more
 

Attachments

  • image.jpeg
    image.jpeg
    2.3 MB · Views: 268
  • image.jpeg
    image.jpeg
    1.5 MB · Views: 283
  • image.jpeg
    image.jpeg
    2.1 MB · Views: 244
  • image.jpeg
    image.jpeg
    805.6 KB · Views: 299
Last ones for now
 

Attachments

  • image.jpeg
    image.jpeg
    2.2 MB · Views: 355
  • image.jpeg
    image.jpeg
    2.3 MB · Views: 338
Nice looking work! I thought the Cup was bigger, I guess NHL players are the size of jockey's. Man I need a bigger tv in the bedroom.
Happy New Year!
Cheers
Curt
 
Thanks Curt and HMR

Lol, the small "Stanley Cup" is actually a hot air popcorn maker in disquise that I received as a door prize at a Company Christmas party that I attended recently. Thought it would be something I could use in the bar.

I'm hoping to get some of the assembly of the cabinets started today so I'll post more progress pics as I can.
 
Sure did Curt! Great game even if Toronto was playing.... Kinda of an East vs. West thingy
 
Photos below showing assembly of the uppers using Kreg Pocket screws.

Installed 2 of the upper cabinets earlier today. I'm working on assembly of the vertical wine storage cabinet and an end shelf unit. Both of these cabinets will be installed to the right hand side of the right upper cabinet in the photo below.

[attachimg=2][attachimg=1][attachimg=3]


Attachments

  • image.jpeg
    image.jpeg
    1.8 MB · Views: 822
  • image.jpeg
    image.jpeg
    1.6 MB · Views: 749
  • image.jpeg
    image.jpeg
    1.2 MB · Views: 751
The upper cabinet boxes have now been installed.

Remaining to do is to order the mirrors that I will be installed at the back of each of the two larger storage cabinets. I need to order custom glass shelves for these same 2 cabinets and I'll also order the thick tempered glass for the bottle display inset area.

I still have to make a lattice grid or similar for the tall skinny cabinet which will house bottles of wine.

I'm also going to eventually finish the top and bottom edges of the uppers with a solid 1x2 oak valance stained and finished to match. LED lighting will be added to the inside of the cabinets as well as task lighting behind the lower valance (I rough-wired for this item).

Still tossing around whether I'll make my own oak doors for the lower cabinets or just order them from my supplier. Their prices for unfinished wood doors are decent and while I can save some money doing them myself it would take me away from paid work which doesn't make sense.

[attachimg=1]
 

Attachments

  • image.jpeg
    image.jpeg
    1.6 MB · Views: 589
Bruce. Great looking project. Excellent craftsmanship. How did you apply the black stain? Did you apply a sealer first before staining?
JC
 
[member=24938]JCLP[/member] Thanks JC

Initially, I applied the stain with a foam brush which worked great. I stained the panels with two coats and the GF waterborne stain is excellent to work with (my first time with this product).

I was planning on spraying the Arm-R-Seal with my HVLP but given that there were only about 13-15 individual pieces I thought I'd try apply the finish with a foam brush instead. I'm very impressed with the self levelling capabilities of this product with only applying with the foam brush and I'm glad that I didn't go the HVLP route.

I had some extra pieces to stain/finish near the end of the project and had already tossed the last of the foam brushes I had on hand so as the application instructions indicated I used some 100% cotton rags (old t-shirt material) and I was blown away how well this method worked for the stain and finish, particularly the finish coat which goes on smoothly and with no streaking. Can't say enough about the GF products.

There are cheaper stains/finishes out there but the time savings and the final product make the slightly increased material costs worthwhile.The VOC's with GF appear to be less than the Minwax and Varathane poly I've been using. I'm definitely am sold. Thanks again to all that steered me in the right stain/finish direction (on another thread)
 
Back
Top