Setting My New Shop Up (Formerly Shop Build Progress)

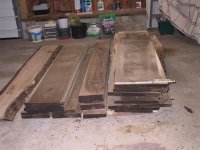
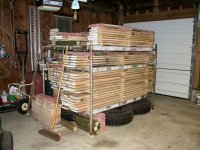
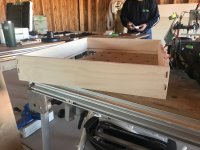
Got the other side of the miter saw stations cabinets set on the base. found a place that sells drawer slides pretty cheap same with ply. So I bought 3 5x5 sheets of 1/2 baltic birch 2 4x8 sheets of 1/4 ply and a box (20ea) white blum style drawer slides. The miter saw station will be all drawers of various sizes though .

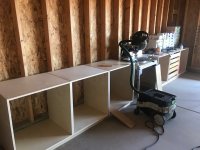
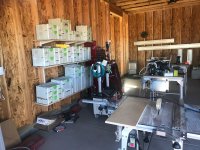
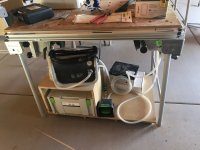
I made a cabinet for my Makita 12" planer andwill us it for storing my bench top tool and add a drawer or 2.

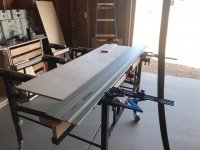
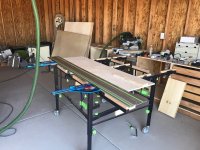
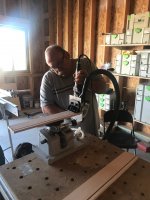
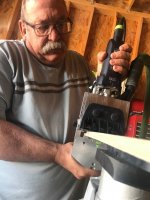
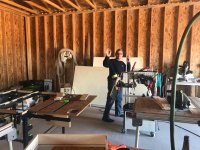
So here a couple of photos of where Im at now. It is starting to look like a shop. Messy shop but a shop
 

Attachments

  • IMG_4515.jpg
    IMG_4515.jpg
    182.8 KB · Views: 514
  • IMG_4518.jpg
    IMG_4518.jpg
    430.5 KB · Views: 529
"spur shelving" is a new term for me too but I have loads of that stuff in my shop used mostly for lumber storage. I put an upright every other stud and used 3 inch screws in every hole as I knew I would be loading them down.

I pulled it out of my last house where is was used in the basement for storage. When we moved into the current home 20 years ago there was no desire or need for it so it became part of the garage shop.

Anywho, I googled 'spur shelving' and see it is a brand name used in the UK.

spurshelving.co.uk
 
[member=60461]Bob D.[/member]

I picked up the name for it when I lived in the UK. A Brit buddy of mine was helping me set up my garage shop and told me to use "spur shelving" It just stuck with me as I didnt know it by any other name.
 
I think the generic name for it is ‘twin slot’ shelving, although Spur are one of the best known brands here in the UK.
 
Now I don't know what I called it before seeing this thread.  You all overwrote the brain.

I like that UK company, their website is straight from 1995.

I don't think most of us put much thought into it, it's just what ever Home Depot sells that week.
 
Well todays exciting update is
Changed things up a bit today.
I built a sort of organizer for my vacuum clamp station.
I got 2 vacuum heads mounted to the metal FT brackets that swing under the MFT for storage, a pump w foot release pedal, and Systainer with extra pads for various width pieces.

I use the vacuum clamps for sanding, dominioing, edge banding, routing and a bunch of other things.

The sustainer  in the front is the pad assortment w/ the pump and foot release.

In the back I got a box of glue pucks and a accessory that will allow me to use contra for edge band 5' or longer.
Ill put the edge bander and the 700 kit I use for trimmimg edge banding and the edge band, routing grooves for cabinet backs and drawer bottoms etc in the back.

When I get some more 3/4 scrap ply, Ill build a little box with drawers to store the age band tools  use. This way mostly everthing will be right there when I need it.

I know my hose mgmt is lacking but remember this is Rev 1 Ill prolly be up to rev 4 before Im though and happy with it but this will do for now
 

Attachments

  • IMG_4519.jpg
    IMG_4519.jpg
    310.4 KB · Views: 487
First Merry Chistmas every one May God bless each ad everyone of you.

So I started ripping the baltic birch into door stock. I own TSO Products GRS and their paralell guides (PGs). They have some rods to insert to make the PGs able to rip thin strips with it. So I watched the video and thought why not try it. I set the ply on my STM with a guide GRS etc well it was difficult I found I needed to put shims under the back of the guide to help support it but even then I didnt get as accurate a cut as I was hoping for. So my drawers which were originally going to be 4 3/4 are now 3 5/8, I ended up having to use my CMS/ table saw.

Looking at the TSO video again he had the material lying on a flat surface like ridgid foam and shimed the back and make the cut. The STM I used isnt a flat surface like that. So well I learned here is the set up I used with the STM.

Im sure the TSO PGs will work Im sure it was operator error
 

Attachments

  • IMG_4520.jpg
    IMG_4520.jpg
    174.1 KB · Views: 466
  • IMG_4521.jpg
    IMG_4521.jpg
    164.8 KB · Views: 422
  • IMG_4522.jpg
    IMG_4522.jpg
    239.1 KB · Views: 456
So after cutting the door stock I needed to rip the groove for the drawer bottom. I cut the pieces to rough length then used my vacuum clamp to hold the material while I routered the groove. I used the skinniest accessory pad they had for it and it held the stock pretty solid and the foot release pedal made it easy to change the pieces for the next one that needed routing.

Came out pretty good.

Nice clean cuts.
 

Attachments

  • IMG_4530.jpg
    IMG_4530.jpg
    214.2 KB · Views: 465
  • IMG_4527.jpg
    IMG_4527.jpg
    264.5 KB · Views: 437
  • IMG_4525.jpg
    IMG_4525.jpg
    208.9 KB · Views: 465
In todays exciting episode, I used the domino 500 to joint the drawers useing the vac clamps , set the peices on the vac pad and domino I used through dominos for this. Also had a distinguished visitor in the shop today. Allen K dropped by for a visit. Allen was a former FT rep and FT trainer who worked the FT road show. One of the most knowledgable people I know in the tools applications.

Here are photos of me dominoing the drawers.

Tomorrow , cut the drawer bottoms to size and glue, assemble.
 

Attachments

  • IMG_4538.jpg
    IMG_4538.jpg
    230.8 KB · Views: 474
  • IMG_4541.jpg
    IMG_4541.jpg
    223.8 KB · Views: 480
  • IMG_4542.jpg
    IMG_4542.jpg
    301 KB · Views: 434
  • IMG_4543.jpg
    IMG_4543.jpg
    437.2 KB · Views: 469
You're not getting many replies but that doesn't mean we're not monitoring your progress.

Looking good, keep those reports coming as you have time.

Fun to watch a new shop come together literally from the ground up.
 
Hey [member=10147]jobsworth[/member] - nice build.  I'm enjoying the pics.  It's fun to see the layout start to take shape.  I hope you're enjoying your holiday time in the shop.

I used spur shelving in my shop and my garage with 3/4" particle board shelving.  The 16" spans are pretty solid, the 32" spans are sagging a little more than I'd like, but not too bad.  I've never heard it called spur shelving before, but it makes sense.  It's practical, fast shelving and it's been holding all the weight I've needed it to for 13 years now.  The most trouble I've had with it it a tendency for the shelving to slide, and I have screwed the brackets to the shelving here and there.

I've only seen the vacuum clamps at work once in a demo.  I have no feel for how sturdy they are.  Seeing them in use with a router sort of helps calibrate that.  Are you satisfied with the working height?  Can you adjust the working height?
 
Yep. Here's another thumbs up. I am monitoring this thread closely, because I hope to build a new workshop the coming year or (more probably) the year after. I am always on the hunt for good ideas to copy.  [big grin]

I am watching Peter Parfitt's updates on his new shop as well. There's always something to learn from how fellow FOGers go about it in their shop.

Thanks for the updates!
 
Thanks guys for the input about this thread  [thumbs up]. It takes a while to set a shop up, Im not sure how detailed ya want it to be, so Im noting things I think ya'll might find interesting.

[member=61231]HarveyWildes[/member]

I bought the actual festool mounting plates. They are a bit pricey , It was befoore I know how easy the shop made ones were to make and didnt know where to get te plas at the time.

No they are not adjustable in working height. However the shop made ones are at a better height about the height of a MFT. The vacuum clamps are very sturdy and will make your domino, sanding, edge banding, routing life easier.
If you do get one get the kit with the accessory heads they have different width pads to fit almost any piece of material.

Today Im going out in the shop cut the staock for the drawer bottoms hopefully be able to start assembling the drawers and get them installed then back at it Ill have more drawers to build.
 
I’m watching closely too!
Impressed by your progress and productivity.
Hopefully establishing a final workshop within next year, just moved rooms and temporary space these days.
Peter Parfitt is also under monitoring for ideas [big grin]
 
[member=71478]FestitaMakool[/member]

Thanks for the encouragement. Ive een tinking Im dragging my feet and not getting as much done as I should be.

My goal to at least have a functional shop with in the next month or 2. Not completed but to be able to start building things for the property and finish up a side board/ bar I started building be stopped due to my ankle surgery.

Maybe get the last 2 circuits ran (220V and 110V) then get the shop insulated.

Truthfully its like everyday I walk in the shop I feel a bit over whelmed.

I have way to much to do and not enough getting done.

But I tell myself a fence not matter how long or tall is built one brick at a time.

 
jobsworth said:
[member=71478]FestitaMakool[/member]

Thanks for the encouragement. Ive een tinking Im dragging my feet and not getting as much done as I should be.

My goal to at least have a functional shop with in the next month or 2. Not completed but to be able to start building things for the property and finish up a side board/ bar I started building be stopped due to my ankle surgery.

Maybe get the last 2 circuits ran (220V and 110V) then get the shop insulated.

Truthfully its like everyday I walk in the shop I feel a bit over whelmed.

I have way to much to do and not enough getting done.


But I tell myself a fence not matter how long or tall is built one brick at a time.

I feel the same way but for the opposite reason. I’ve been in the same old shop so long that it is so stuffed with tools and supplies that it’s a nearly overwhelming chore to make space to get anything done. My fantasy is to have a new empty space to move just the stuff I really need. Which would also probably require moving to another state. So I’ll make do watching you set up your new shop.

Keep on trucking!
 
I am in the same boat Michael. Need to do some serious thinning/cleaning/reorganizing. Shop is too cluttered to have a smooth workflow. I am sure I can find things I don't use often enough to justify their presence in the shop or even existence in my collection.

I think I have too much material (wood) stored in the shop which is taking up valuable wall space. I have a 20 foot shipping container that I could make a lumber rack in and move about half of it there.

Sorry jobsworth, didn't mean to take this thread on a tangent.

Back to our regularly scheduled channel. :-)
 
‘Think your doing fine, you may be dragging your foot for a good reason. You may think that your pace might be slower, but this is probably mostly in your head. Settling in in a new place, with a new shop is a whole lot of work, and believe me, it can’t go fast enough [smile]. I’m eating patience myself  [big grin]

Moving relatively slow usually means better solutions in the end, as working in a new place makes new ideas mixed with old true and well proven ones to make an even better shop than the previous. I just moved in my new temporary room just before Christmas, but piles of tools was left on the benches, now to be put in drawers, hang on walls, shifting tables and stuff around in a cramped space makes for a challenge the next days. But, I’m really looking forward to enjoy waaay more outlets, lighting and finally a couple of benches. Best thing that has happened for a couple of years! So keep calm and carry on! [smile]
 
[member=60461]Bob D.[/member]

I dont keep a large supply of lumber around it takes up way to much space IMO.

I get bugged at scraps lying around after so long I just toss them.

I was going to start a thread axing why do people store lumber?

Unless they get a killer price for it.

I see photos and videos of guys with racks of lumber stored.

Right now Im just throwing stuff in drawer  ( the ones Im making and already set in a cabinet) Im just trying to clear counter space and keep stuff off my MFTs so I can use them.

[member=71478]FestitaMakool[/member]
Thanks for the encouragement  see thats the reason Ive havent insulated yet. I want the outlets and workflow laid out (we all know it will be moved and adjusted).  Thats one reason Im taking my time. Im thinking ahead to the next build, Still working on the miter saw station, but thinking ahead, Built a cabinet on wheels for my planer found a spot for it, Yea this does take time and a lot of thought and adjustments and flexibility.
 
"I was going to start a thread axing why do people store lumber?
Unless they get a killer price for it.
I see photos and videos of guys with racks of lumber stored."

I store what is left over from past projects. Also what I think I will use or do use on a regular basis in the shop.

I have some red oak, cherry, and walnut from trees that were felled near me and I had a local sawyer mill. Been working my way through it with various projects for family and friends. The wood was free just had to pay for the milling. Couldn't pass that up.

I also keep a few pieces of framing lumber around plus sheets of plywood and sheetrock for whatever comes up. I don't like running to the lumber yard every time I need material. I'd rather have some stock on hand so when I need something I get some extra to save me a 30 mile trip in the future. Initially I had no other place to store lumber than in the shop. Then I picked up the old scaffolding you see in the one photo for $60 and use it as a storage rack for the oak in the garage plus now have the shipping container that I utilize part of to store lumber and some tools in.

Too many tools that don't get used often enough is my problem. I have a RAS in very good condition that I rarely use but don't want to part with. It operates fine and the guard and other safety features have been updated so it's as safe to use as it can be. I keep a 3/4" dado stack in it and only use it to hog out half laps or dados on long workpieces that would be awkward on the TS. A router would work but the RAS is much faster though not as precise.
 

Attachments

  • IMG_1528 (Small).jpg
    IMG_1528 (Small).jpg
    51.2 KB · Views: 422
  • IMG_1469small.JPG
    IMG_1469small.JPG
    64.5 KB · Views: 486
Back
Top