- Joined
- Nov 3, 2007
- Messages
- 5,092
iamnothim said:TS-75 update.
Straight away.... the new saw has a lot more power, cuts cleaner and quicker.
Finally
Woo Hoo!
Tom
EDIT:
or as we say in Texas, YEE HAW!
iamnothim said:TS-75 update.
Straight away.... the new saw has a lot more power, cuts cleaner and quicker.
Finally
iamnothim said:I added a L-N low angle jack...


iamnothim said:I have good news. I did the geometry and calculated the stock for my legs AND, I was able to flip the joint. (make a larger one) The bottom is back to being a bottom and the top will have no unsightly domino pockets. [smile]
The width of the joint is slightly larger but using 140mm legs I’ll have a 12mm shoulder on each side of the tenon
Wayne,Tinker said:So far, this thread has been a fascinating read. It has also been very educational.
Tinker
iamnothim said:This is classic Luke. Not sure if it’s my meds or the dozen or so ECT treatments I had a few years back.
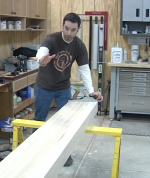
I had a lot of trepidation about smoothing the slab with a hand plane. I’m not that experienced with hand tools. Probably why I gave up golf 15 years ago. The frustration takes it toll. Unlike golf, I will soldier on through the the errors and try to develop the finesse necessary to produce good results. I am please that I am slowing down and taking my time figuring out what is happening.
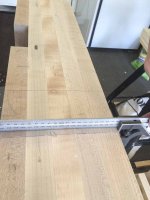
The slab.
What was supposed to happen after lamination is I was to smooth the bottom of the slab. Then turn it over and use that surface as the reference and run it through the surface planer.
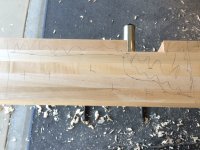
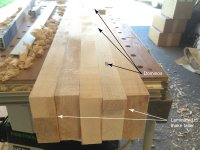
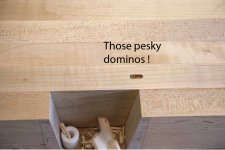
I was getting tight on lumber so I domino’d two pieces together to make a couple planks. I though the dominos were buried enough, after trimming the plank not to show. Wrong.
Yesterday I start planing. Low and behold, surprise, domino pockets. So I’m thinking “ No big deal. I’m working on the bottom of the slab.”
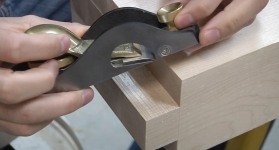
And then I noticed it… I had decided to use the David Barron leg joinery method and I cut the dovetail sections oriented such that I was working on the TOP of the slab.
A couple of things in no particular order.
The “It’s just a workbench” mantra. I can’t buy that.
Get Sipo dominos and turn failure into a feature. Can’t buy that either. Slap some planks and wedges on and turn it into the rear slab.
Then there’s the fact that I am getting very close, too close to the final dimension just hand planing the top surface. I blame me. Marc says leave 1/2”. I though “ Gee, that’s a lot of material. 8mm (1/3”) ought to be enough. When you build this bench. Listen to Mark. Even with dominos, the boards will slip during glue-up.
[attachthumb=8]
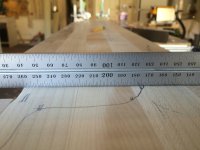
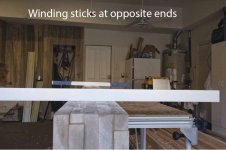
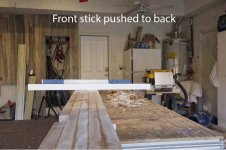
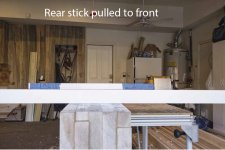
The only thing I can do is continue to flatten the top and hope I leave 102mm of meat. Below are winding stick photos. I need to wrap my head around them to determine the end I should plane.
[attachimg=2]


Hi JimJim Kirkpatrick said:Luke, When I read you were going to use dominos to aid in alignment I meant to caution you. I did the same thing myself! Only I was fortunate to where the exposed domino was in the offcut and not the top itself.
For do-over sake: I think an easier more foolproof way of doing it is to use brads, and snip the heads off as shown. Just make sure you place them more towards the center of the board so as not to expose them later during power or hand planing.
In any event, I'm glad you were able to work things out. Worst case, with your inlay skills, you could have covered it with a bowtie or something more creative. Most important tip is: Take your time. You're going to be looking at it for the rest of your life, don't rush it only to kick yourself for it later! [eek]